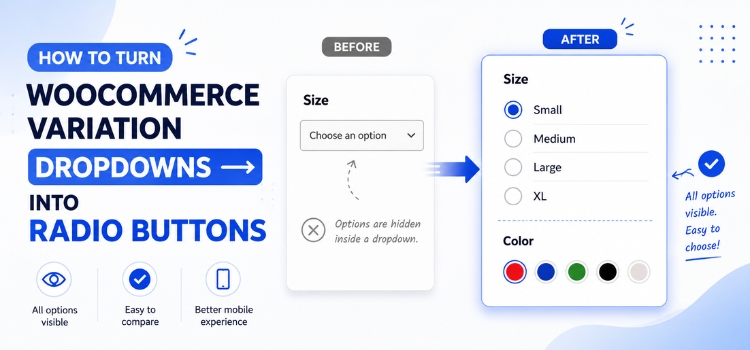
Open any WooCommerce variable product. The sizes, the colors, the materials — they all sit hidden inside a grey dropdown. Your shopper has to click once just to see what you sell.
That extra click costs you. Shoppers cannot compare options side by side. They cannot see that the red one is sold out until after they pick it. On a phone, the dropdown opens a native picker that covers the whole screen.
Radio buttons fix this. Every option sits on its own line, visible without a click, with a familiar circle to tick. This guide shows you two ways to get them — one with code, one with a plugin — plus the free button and color swatch options if radio turns out not to be what you want.
Why the default dropdown holds your product page back
WooCommerce uses a plain HTML <select> element for variations. That choice creates three real problems.
Options stay hidden. A shopper cannot count your sizes without clicking. If you sell one product in eight colors, that range is invisible on first look.
You cannot style it. Browsers do not let CSS reach inside a <select> element. There is no ::after, no blur, no reliable opacity on an individual option. So you cannot grey out a sold-out size, add a cross icon, or paint a color chip next to the name. You can change the dropdown’s border and width, and that is about the end of it.
Sold-out options look identical to available ones. The shopper picks “Medium”, waits, and then reads “out of stock”. That is a small frustration each time, repeated across every visitor.
Radio buttons and swatches fix all three, because they are ordinary HTML elements you can see, count, and style.
Two myths worth clearing up first
You will find tutorials suggesting CSS to restyle the variation dropdown, cross out sold-out options, or add color chips. As above, browsers do not allow it. There is no CSS-only route to any of this.
A second myth involves the woocommerce_variation_is_active filter. Plenty of articles present it as a way to hide out-of-stock variations. It is not. It takes two parameters and it greys options out — it leaves them on the page rather than removing them. Useful, but not what those tutorials claim.
To blur, cross out, or hide an option, you need real elements in place of the dropdown. Which brings us to the two ways of getting them.
Method 1: Build the radio buttons yourself with code
If you are comfortable with PHP, you can do this without a plugin. It takes two snippets.
The first one swaps the dropdown for radio buttons. The second one makes them actually work. Skipping the second is the mistake most tutorials make — you get radio buttons that look right and do nothing.
Tested on WooCommerce 8.5+. Try it on a staging site first, not a live store.
Step 1: Replace the dropdown markup
WooCommerce passes its finished dropdown HTML through a filter called woocommerce_dropdown_variation_attribute_options_html. That filter lets you hand back something else.
Notice that the code keeps the original <select> on the page. That is deliberate. WooCommerce’s own script reads the select to work out prices and stock, so removing it breaks everything. We hide it with CSS in the next step instead.
add_filter( 'woocommerce_dropdown_variation_attribute_options_html', 'gwp_variation_radio_buttons', 20, 2 );

function gwp_variation_radio_buttons( $html, $args ) {

    $attribute = $args['attribute'];
    $options   = $args['options'];
    $product   = $args['product'];
    $name      = 'attribute_' . sanitize_title( $attribute );

    if ( empty( $options ) || ! $product ) {
        return $html;
    }

    // Keep the original select. The variation form JS depends on it.
    $output  = '<div class="gwp-radio-hidden-select">' . $html . '</div>';
    $output .= '<ul class="gwp-variation-radios">';

    foreach ( $options as $option ) {

        $label = $option;

        if ( taxonomy_exists( $attribute ) ) {
            $term = get_term_by( 'slug', $option, $attribute );
            if ( $term && ! is_wp_error( $term ) ) {
                $label = $term->name;
            }
        }

        $output .= sprintf(
            '<li><label><input type="radio" name="gwp_%1$s" value="%2$s"> %3$s</label></li>',
            esc_attr( $name ),
            esc_attr( $option ),
            esc_html( $label )
        );
    }

    $output .= '</ul>';

    return $output;
}
Where this goes. Use the WPCode plugin. Add a new snippet, choose PHP, paste the code, set it to run everywhere, and save. Do not paste it into your theme’s functions.php — a theme update will erase it.
At this point your product page will show both the dropdown and the radio buttons, and clicking a radio button will do nothing. That is expected. Step 2 fixes both.
Step 2: Hide the dropdown and connect the radio buttons
This snippet does three small jobs. It hides the original dropdown. It copies your radio choice into that hidden dropdown so WooCommerce notices. And it ticks the right radio button if the selection changes somewhere else, such as the Clear link.
add_action( 'wp_footer', 'gwp_variation_radio_scripts' );

function gwp_variation_radio_scripts() {

	if ( ! is_product() ) {
		return;
	}
	?>
	<style>
		.gwp-radio-hidden-select { display: none; }
		.gwp-variation-radios { list-style: none; margin: 0; padding: 0; }
		.gwp-variation-radios li { margin: 0 0 6px; }
		.gwp-variation-radios label { cursor: pointer; }
	</style>
	<script>
	jQuery( function ( $ ) {

		// Radio clicked -> push the value into the hidden select.
		$( document ).on( 'change', '.gwp-variation-radios input[type="radio"]', function () {

			var $select = $( this ).closest( '.gwp-variation-radios' )
			                       .prev( '.gwp-radio-hidden-select' )
			                       .find( 'select' );

			if ( $select.length ) {
				$select.val( this.value ).trigger( 'change' );
			}
		} );

		// Select changed elsewhere -> keep the radios in step.
		$( document ).on( 'change', '.gwp-radio-hidden-select select', function () {

			var val = this.value;

			$( this ).closest( '.gwp-radio-hidden-select' )
			         .next( '.gwp-variation-radios' )
			         .find( 'input[type="radio"]' )
			         .each( function () {
				         this.checked = ( val !== '' && this.value === val );
			         } );
		} );

		// "Clear" link -> untick everything.
		$( document ).on( 'reset_data', '.variations_form', function () {
			$( this ).find( '.gwp-variation-radios input[type="radio"]' ).prop( 'checked', false );
		} );
	} );
	</script>
	<?php
}
Where this goes. Same place as the first snippet: a second WPCode snippet, type PHP, run everywhere.
Step 3: Check that it worked
Open a variable product on your shop and walk through this list:
- The dropdown is gone. Only radio buttons show.
- Picking an option ticks the circle.
- The price updates once you have picked every attribute.
- The Add to cart button becomes clickable.
- Clicking Clear unticks everything and resets the price.
If the radio buttons appear but the price never moves, Step 2 did not save or did not load. If nothing changed at all, Step 1 is not running — check the snippet is active in WPCode.
What these snippets still cannot do
They work. But it is worth being clear about where they stop, because the gaps are the reason most stores end up on a plugin.
Impossible combinations stay clickable. Pick Red, and if Red only comes in Large, a normal WooCommerce dropdown removes Small and Medium from the second attribute. Your radio buttons will not. WooCommerce does that by rewriting the select’s options, and the radio list never hears about it. Shoppers can pick a combination that does not exist and get a quiet failure.
No color or image options. Radio circles only. A color block or a fabric thumbnail means writing all of that yourself, plus an admin screen to upload the images to.
No per-product control. Every variable product on the site gets radio buttons. There is no way to say buttons here, radio there.
A ceiling at around 30 variations. Past that point WooCommerce stops printing variations into the page and loads them over AJAX instead. Custom snippets commonly break here, because the markup they expected is not there when the page loads.
So when is writing it yourself the right call?
There is a real answer, and it is not “never”.
If you run one or two variable products with a handful of options each, no impossible combinations, and you already maintain custom code on the site — this is fine. Two snippets, no plugin, no licence to renew, and you own the markup completely.
The moment you want a second option type, or shop page support, or you sell combinations that do not all exist, you are looking at building a small plugin of your own. That is the point where installing one someone else already maintains stops being lazy and starts being sensible.
Method 2: Radio buttons through the attribute type setting
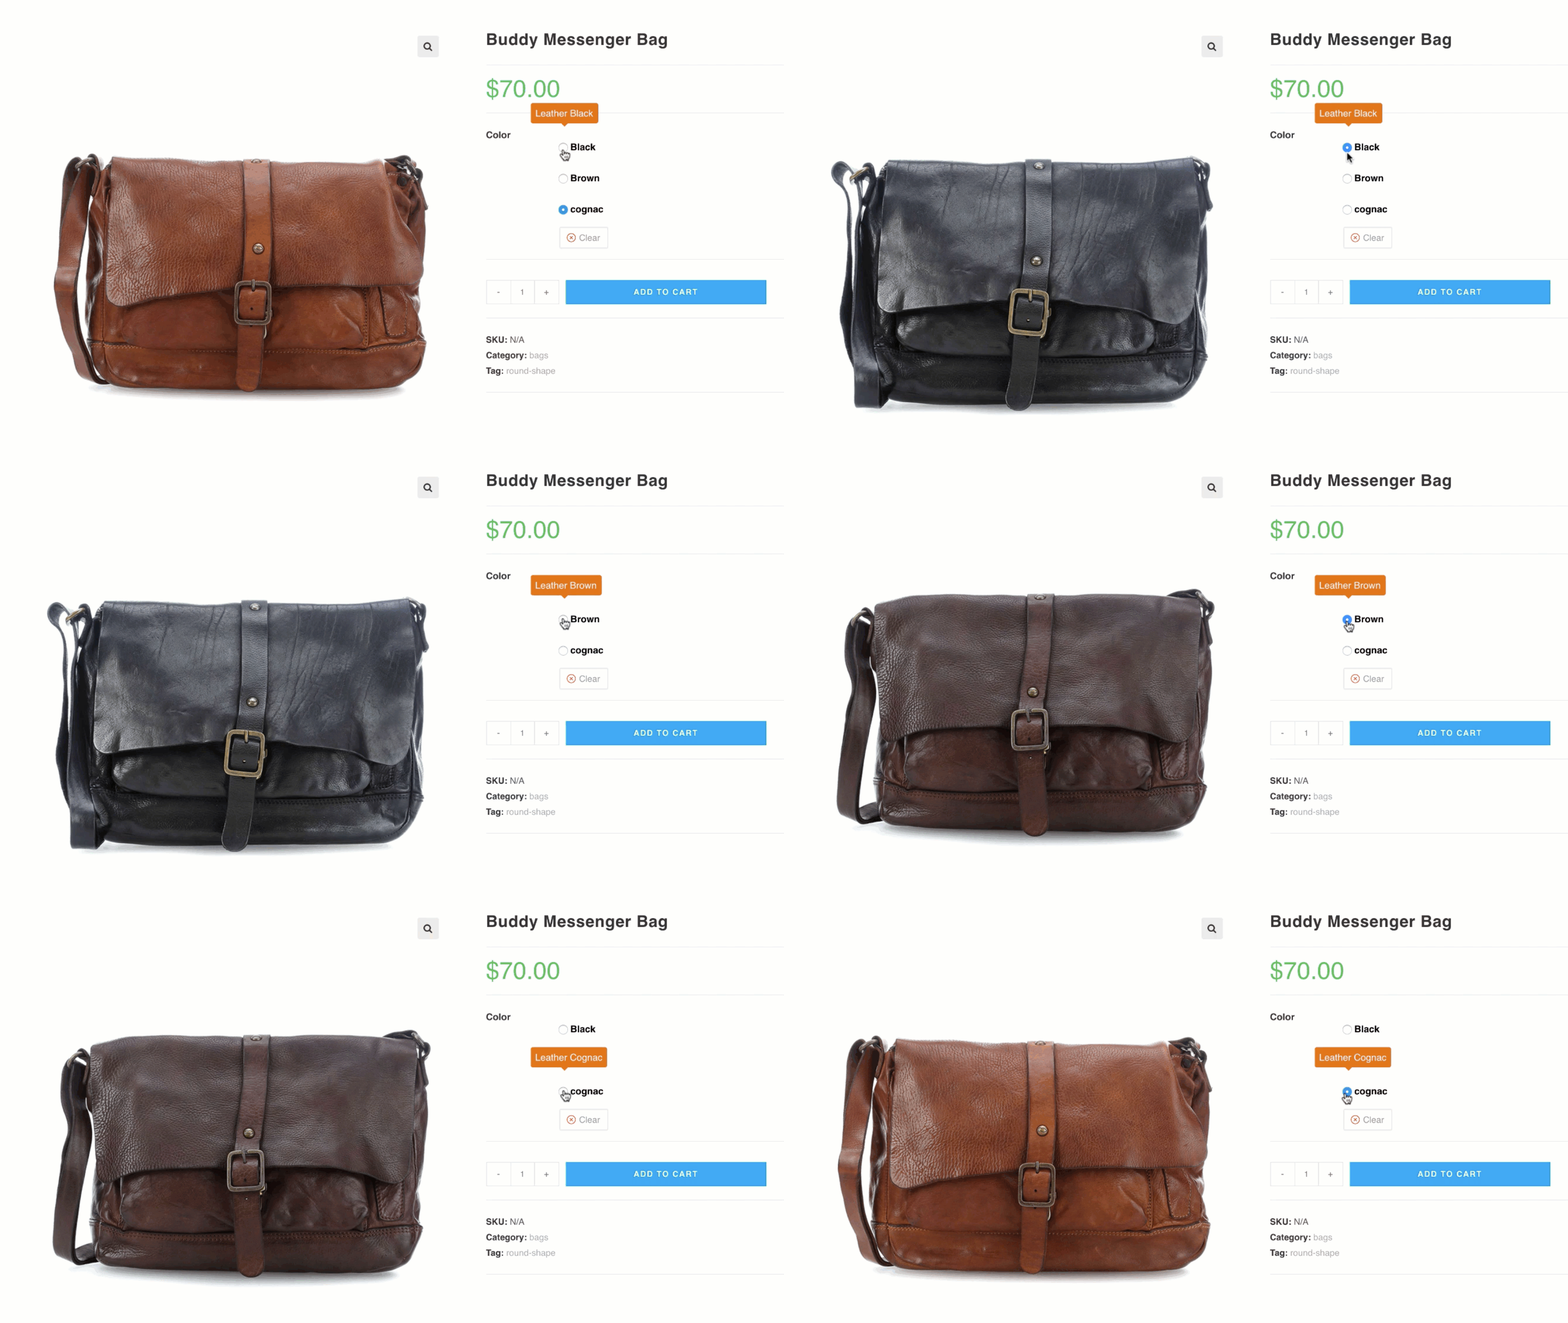
The plugin route skips the maintenance. Variation Swatches for WooCommerce adds a Type field to your product attributes, and Radio is one of the choices.
Being straight about one thing first: Radio is a premium feature. The free plugin gives you Color, Image, and Button/Label attribute types. If radio buttons specifically are what you came for, the free version will not deliver them. That is worth knowing before you install anything.
With the premium extension active alongside the free plugin, the setup takes three steps:
- Go to Products → Attributes and click Edit on your attribute.
- Open the Type dropdown. Alongside Color, Image and Button, you now see Radio. Select it and save.
- The attribute list will show Radio instead of Select. Your product page options are now radio buttons.
For attributes typed into a single product rather than created globally, go to that product’s Swatches Settings tab and pick Radio from the Select (Default) dropdown there instead.
You can see radio buttons running on a live demo product, and the full setup documentation covers all three attribute scenarios.
The premium extension starts at $49 a year for a single site. That also covers the other features free users hit a wall on — swatches on shop and archive pages, per-product customisation, image and text tooltips, and out-of-stock handling beyond the free version’s limits. Full pricing sits on the plugin page.
Method 3: Buttons and swatches, free, with no configuration
Radio is not the only way out of the dropdown, and it is not always the best one. If your option names are short — S, M, L, or 128GB — buttons pack them into one tidy row instead of a long vertical list. And this route is free.

Install Variation Swatches for WooCommerce from the WordPress plugin directory and activate it. Your variation dropdowns become button swatches straight away. No settings page, no attribute setup. The plugin runs on 300,000+ active stores and holds a 4.8 out of 5 rating across 919 reviews.
If you want color swatches or image swatches instead, that takes two more steps and is still free:
- Go to Products → Attributes. Click Edit on the attribute you want to change.
- Set Type to Color, Image, or Button/Label, then save.
- Back on the attribute list, click Configure terms. Edit each term and pick its color from the color picker, or upload its image.
The free version also gives you round or square swatch shapes site-wide, control over swatch width, height and font size on the product page, the selected variation’s name shown beside the label, and a setting to turn button swatches back into a dropdown if you decide you preferred it that way.
One limitation worth knowing up front: the free version converts attributes you created globally under Products → Attributes. If you typed your options directly into a product’s Attributes tab, separated by the pipe character, those are custom product-level attributes — converting those needs the premium extension.
Radio buttons, buttons, or swatches — which one?
These three get mixed up a lot. Here is what each actually suits.
| Type | What the shopper sees | Best for | Free or premium |
|---|---|---|---|
| Radio button | A vertical list with a small circle to tick | Long option names, plans, add-ons | Premium |
| Button/label | A row of clickable boxes with text inside | Size, capacity, length | Free |
| Color swatch | A round or square block of color | Color, finish | Free |
| Image swatch | A small thumbnail per option | Fabric, pattern, print | Free |
Radio buttons suit longer text, because each option gets its own line. Buttons are the most compact. Color and image swatches work when the option is visual and the name alone does not help — “Cognac” means little, but the color block means everything.
Which method fits your store?
| Your situation | Best method |
|---|---|
| You specifically need radio buttons | Method 2 — premium |
| Your options were typed into the product, not created globally | Method 2 — premium |
| You maintain custom code and have one or two simple products | Method 1 — snippet |
| Short option names, and you want this done today for free | Method 3 — free plugin |
| You want color or image swatches | Method 3 — free plugin |
Free versus premium, at a glance
| Feature | Free | Premium |
|---|---|---|
| Radio swatches | — | ✔ |
| Auto-convert dropdowns to button swatches | ✔ | ✔ |
| Color swatches | ✔ | ✔ |
| Image swatches | ✔ | ✔ |
| Button/label swatches | ✔ | ✔ |
| Global attributes | ✔ | ✔ |
| Custom product-level attributes | — | ✔ |
| Round or square shape, site-wide | ✔ | ✔ |
| Product page swatch size control | ✔ | ✔ |
| Swatches on shop/archive pages | — | ✔ |
| Per-product swatch customisation | — | ✔ |
Frequently asked questions
Does WooCommerce have radio buttons for variations by default?
No. WooCommerce ships one option only: a <select> dropdown per attribute. Radio buttons need either custom code or a plugin.
Are WooCommerce radio button variations free?
Not in Variation Swatches. The free plugin covers Color, Image and Button/Label attribute types. Radio sits in the premium extension, from $49 a year. Button swatches are the closest free equivalent.
Will this work with my theme?
Variation Swatches supports the major WooCommerce themes, including Flatsome, OceanWP, Divi, Astra, Woodmart, Enfold and more. Any theme that follows WooCommerce’s template standards should work, though occasionally a small CSS tweak is needed. If your theme already includes its own swatches, check the two do not clash.
What happens when a product has more than 30 variations?
WooCommerce switches to loading variations over AJAX. Custom snippets often break at this point. The plugin handles it, though a few free-version behaviours — such as blur and hide for out-of-stock options — are limited to about 30 variations unless you have premium.
Can I show these on my shop page too?
Yes, but that is a premium feature. The free version applies swatches to the single product page.
Can I switch back to a dropdown later?
Yes. The free plugin includes a setting to convert button swatches back into a dropdown.
Does it work with WPML?
Yes. From version 2.1.0 onward the plugin handles the attribute meta translation automatically. On older versions you had to tick the relevant custom term meta fields manually in WPML’s settings.
Conclusion
If radio buttons are specifically what you need, that is the premium extension — three clicks in Products → Attributes, from $49 a year.
If you just want the dropdown gone and your option names are short, install the free plugin and you are done in two minutes.
And if you would rather own the code, the filter in Method 1 is your starting point. Just go in knowing what you are signing up to maintain.

