
Variable product is a useful feature that the Variation Swatches for WooCommerce plugin offers. It helps store owners add various attributes to their WooCommerce products on their store.
Install Woostify
Woostify is one of the most powerful WooCommerce themes that is completely built for online stores, and offers various options to customize WooCommerce checkout page, shop page, product page, and more.
To enable color swatches in Woostify theme for your variable products, first, you have to install Woostify in your store.
To download Woostify, go to Woostify official website or go to WordPress.org
Install WooCommerce Variable Product Attributes
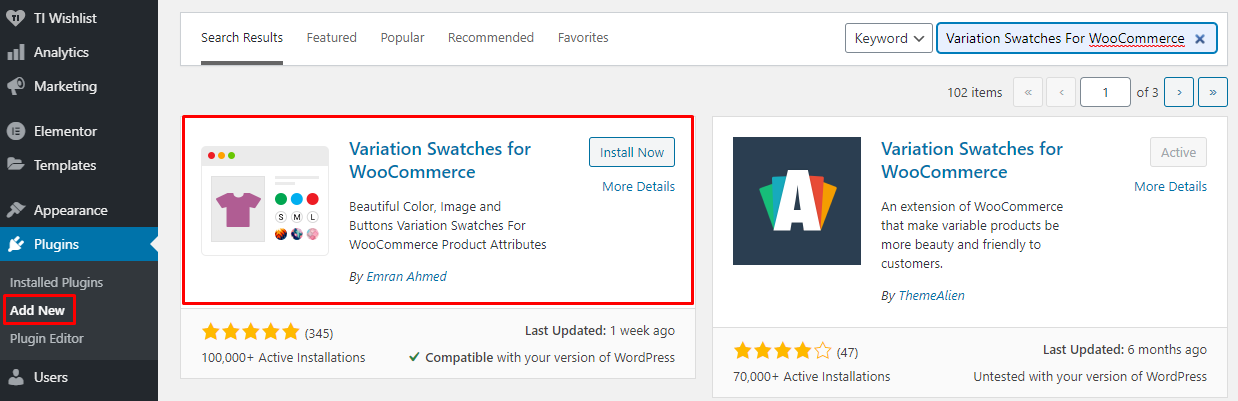
In your WordPress dashboard, navigate to Plugins > Add new type in the search bar “WooCommerce variable for WooCommerce” and click on the Install Now button to install the plugin.
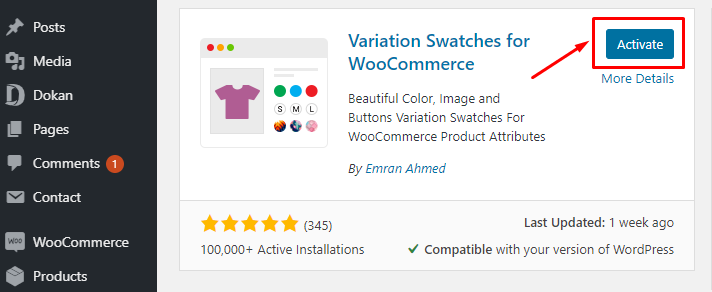
After that, press the Activate button to turn the plugin on your WooCommerce site.
Simple settings
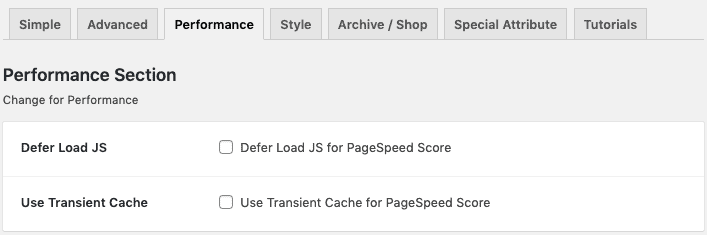
In your WordPress dashboard, go to Swatches Settings tab to make some settings and enable the features you want from the plugin. There are 6 sections you may customize namely Simple, Advanced, Performance, Style, Archive/shop, Special attribute. The free version of the plugin allows you to get all features in the Simple, Advanced, and Performance section as below.
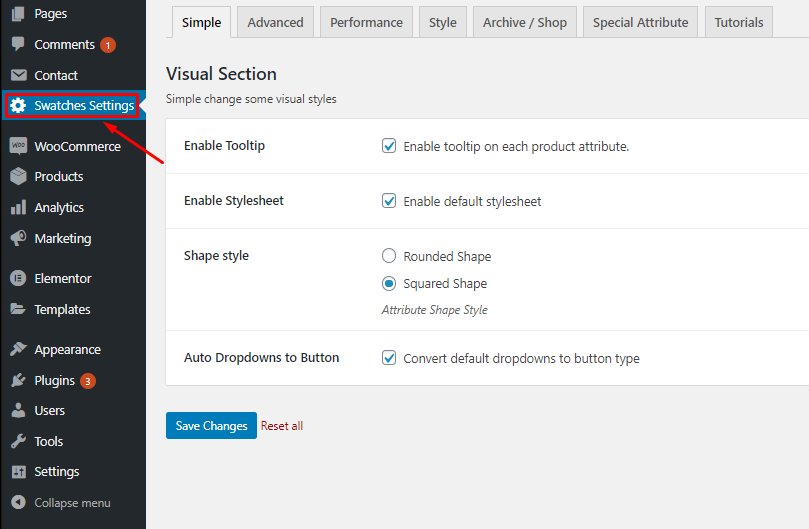
- Enable Tooltip: By clicking on this box, you can display a tooltip on each product attribute.
- Enable Stylesheet: this allows you to use the default stylesheet.
- Shape style: in this section, you can select the attribute style between Rounded or Square shape.
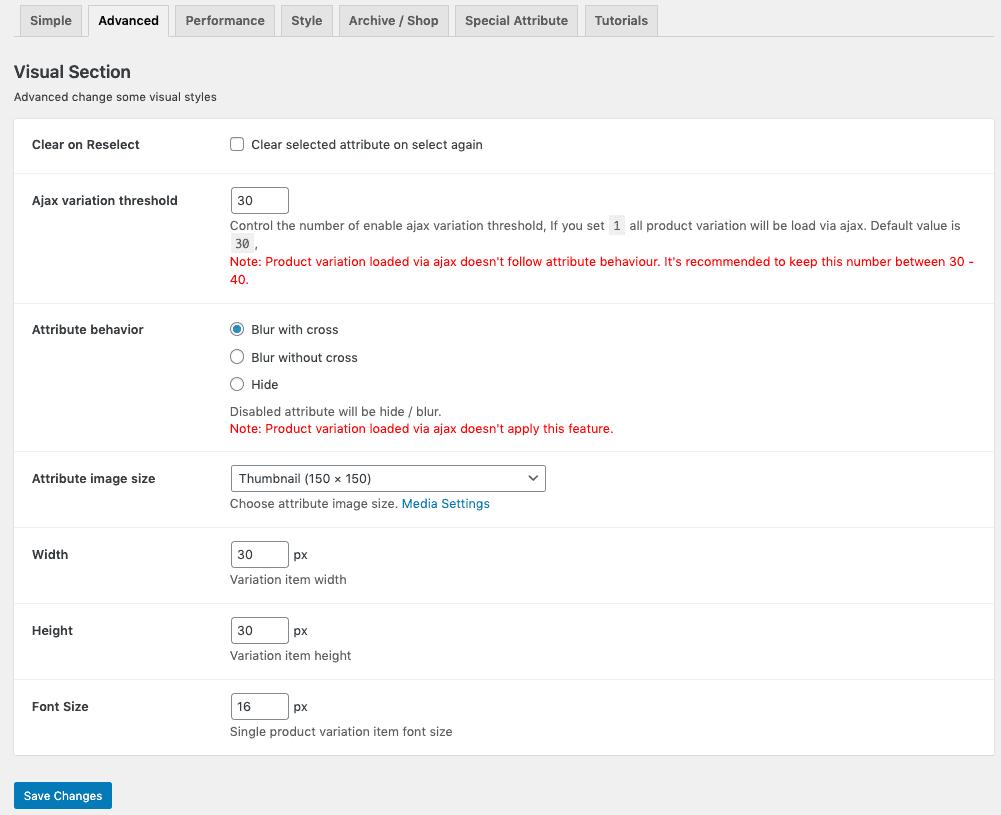
Plus, in the Visual section, you are able to clear on reselect, custom Ajax variation threshold, and choose to hide or blur attributes, set the thumbnail image’s size, width, height, and font size.
Besides, the free plugin allows you to delay Load JS and use transient cache to boost the speed of the shop pages.
Now, let’s go in detail about how to create and add variation attributes to your shop in Woostify.
How to create WooCommerce color variation swatches in Woostify?
Step 1: Create Attribute
The first step in this process is to create a color attribute and its variations globally by going to Products > Attributes > Give your attribute a name: Color. One important thing you have to do is choose the type of the attribute: Color
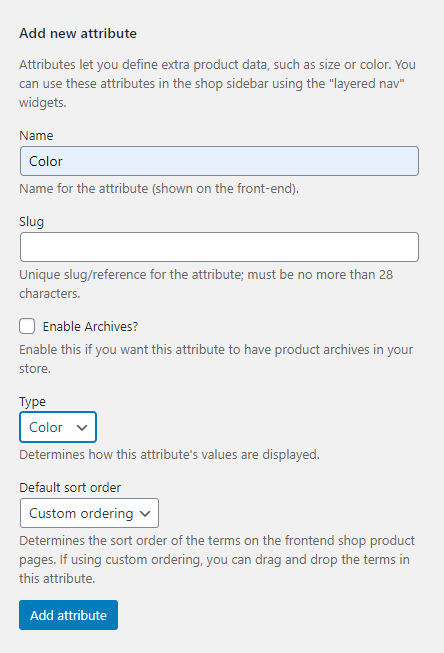
The Slug of the attribute is automatically generated so you can leave it empty. Finally, click the Add Attribute button to save the attribute you have created.
Step 2: Create Attribute Variations
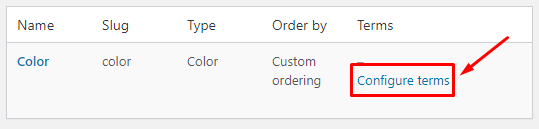
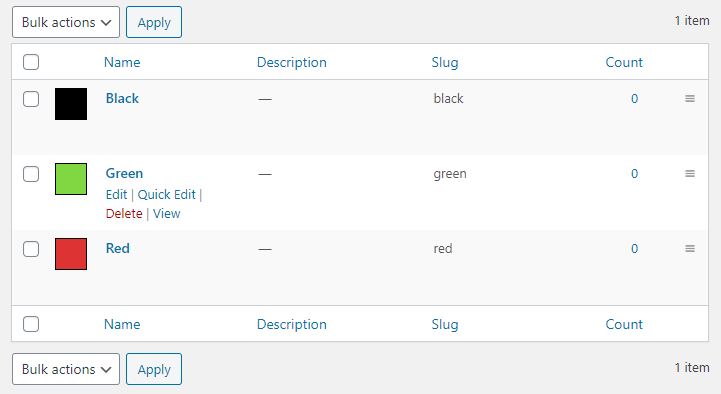
After creating, you will see the list of your desired attributes on the right side of the screen.
The next step is to create attribute variations. You can add more details, and customize the attribute by clicking on the Configure terms button as below:
In this case, we will include various colors in the Color attribute. To add a color variation, fill in the Name with the color, and choose the color at the bottom > click Add new color:
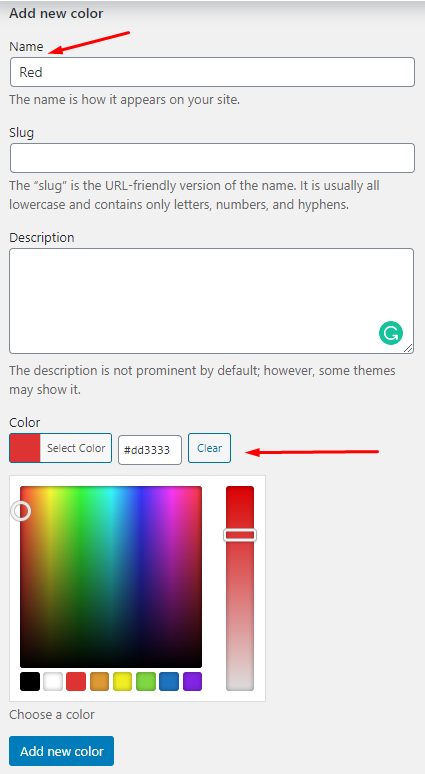
You can add more colors to this attribute, for example Green and Black, by following the step above. After adding colors you want, you can see all of them in the right side of your screen:
Step 3: Enable Attribute Variation in Variable Product
After having attributes and variations for it, you now can enable color for a variable product on your store.
First, choose a product you want to add variable attributes by going to All Products under the Products section.
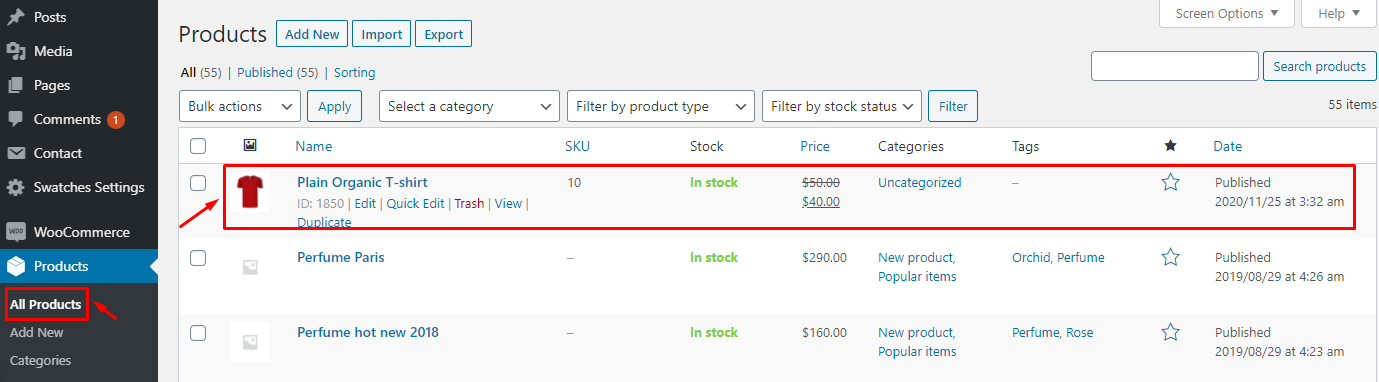
If there is no product you want, you can add a new product by navigating to Add New under the Products section.
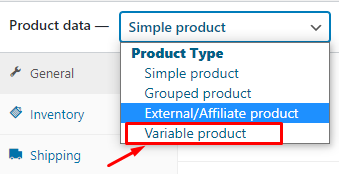
Second, Dropdown to the Product data section > select Variable Product
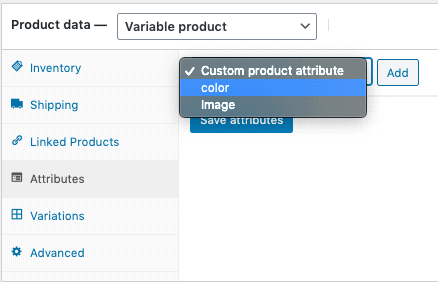
Then, click on the Attributes tab. Click on the Custom product attribute dropdown. This dropdown will list all of your globally created attributes. Here, you choose Color attribute > Add to your product.
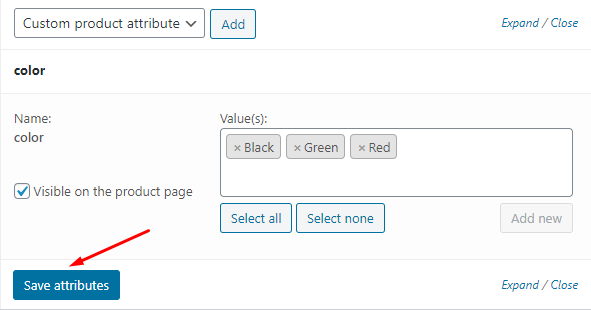
After that, you can select the color for your product by clicking on the Select terms box, then a list of colors you created before in the dropdown**:**

Once choosing the colors for your product, don’t forget to Save attributes:
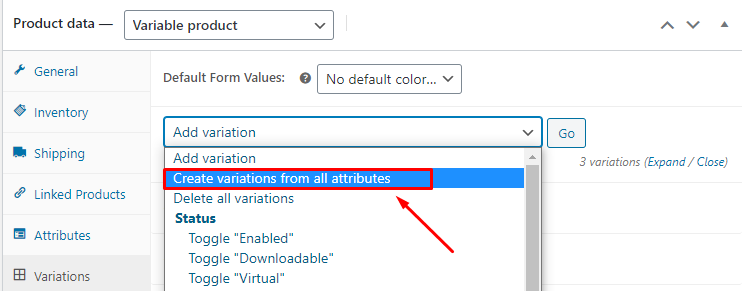
Now get into the Variations tab. Click on the Add Variation box, you will see a list of choices in the dropdown such as Add variation, create variations, delete variations, status, and more. Here you will notice two options. The first one is Add Variation and the second one is Create variations from all attributes.
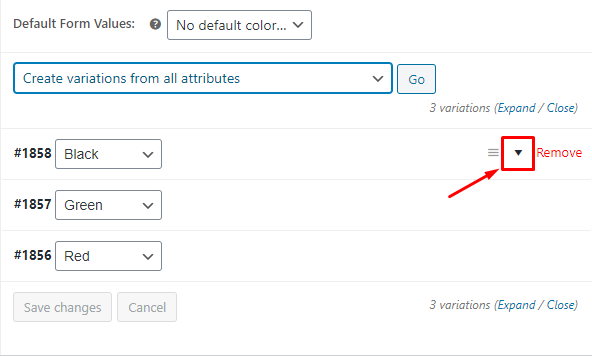
Then you will see the list of Color variations that you have created before. You now press on the dropdown icon of a variation to add it to your product.
Here, you can set up SKU, price, stock status, shipping, tax, and description of the product with different colors. It is necessary for you to add the price in each variation, otherwise, variations won’t be visible on the product frontend.
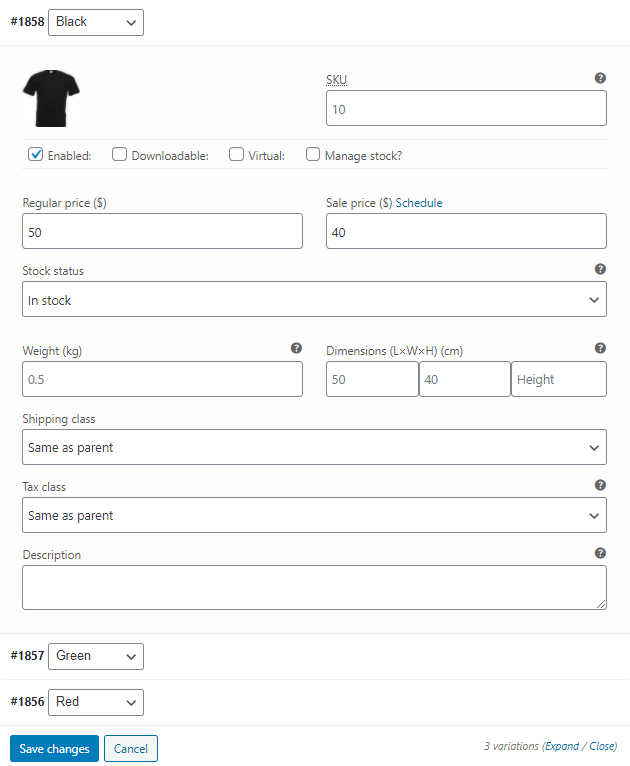
Do the same step with other color variations, and finally click the Save changes button to save what you have done.
Here is how it looks after you successfully added WooCommerce color variation swatches in Woostify theme.

Conclusion
By including color variation to your product, you can enhance customer experience on your site as well as increase customer satisfaction when shopping on your store, which may result in a better conversion rate, and drive more sales.