Showing Button / Label swatches is an other powerful option to present product variations smartly. In last tutorials, I showed how to enable Color Swatches and Images Swatches. In this turn, I am going to write to enable label swatches for WooCommerce Product Variations in Flatsome Theme.
Those who are here in this tutorial for the first time, I recommend you to download free or premium version of WooCommerce Variation Swatches plugin from the following link.
As I already described the plugin installation process. Those who missed in the previous tutorial, check here.
Step 01: Create Attribute
At first, we have to create label / button attribute and its variations globally. To create label attribute globally, navigate to Products >> Attributes. As we’ll create label attribute for our product. Fill the name field with your desired attribute name. In this tutorial, I’ve termed attribute name: Size.
You can leave Slug field empty. It automatically generates the slug for the attribute. From the Type dropdown select button attribute type. When the mandatory fields are filled, select Add Attribute button.

After creating attribute, you will notice a list is created in the right side. Check the following screenshot.

Step 02: Create Attribute Variations
The more variation you would add, they would get added to this list. When an attribute is created, we need to create attribute variations. To create product variations, click on the Configure terms from the attribute list.

As we have created a label attribute. We’ll add label title as variations inside the button attribute. In this tutorial, we’ll add Small, Medium, and Large Variations. To create variations inside label attribute. Fill the Name field with your desired variation name, leave the slug field empty and save the setting each time.

Step 03: Enable Attribute Variation in Variable Product
It’s time to enable button / label swatches inside a variable product. To enable label swatches in your desired product. Get into your desired product edit mode. Make sure you have variable product selected from Product Data.
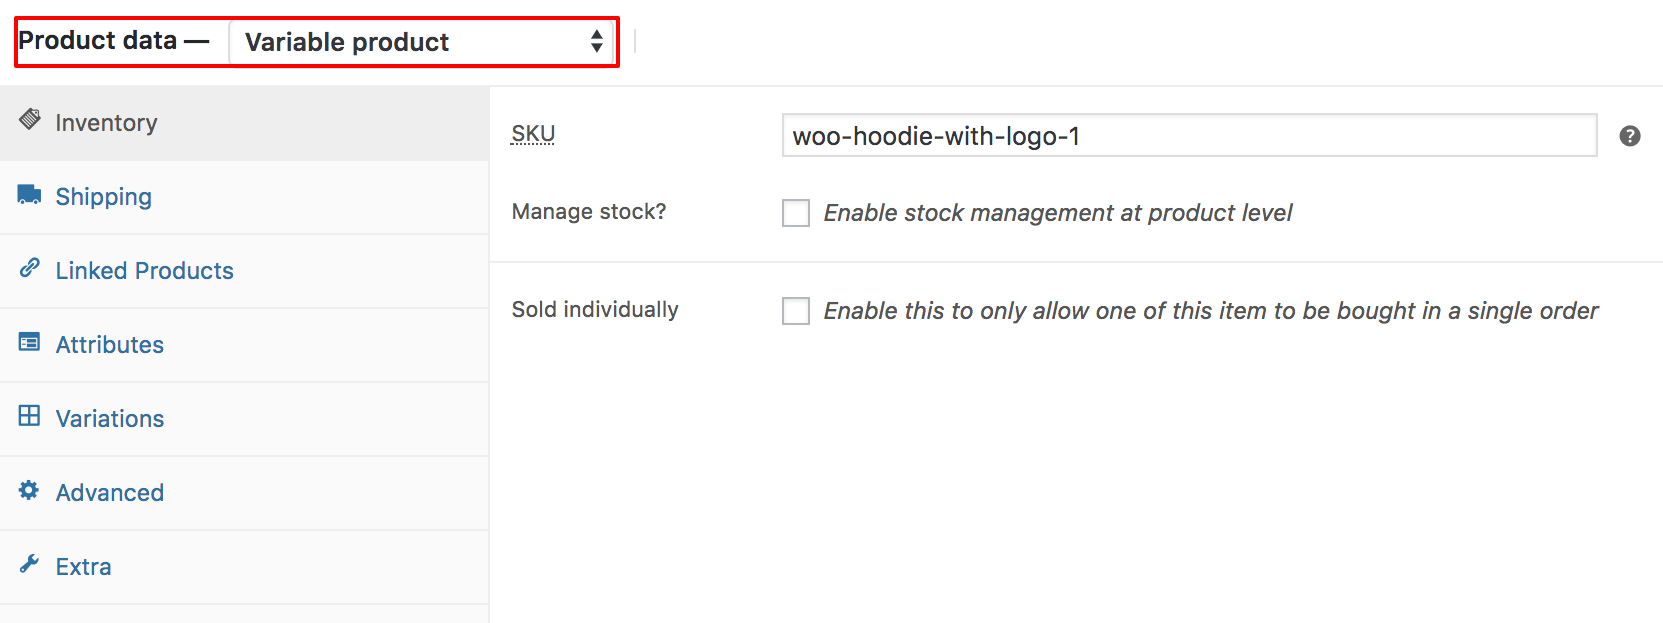
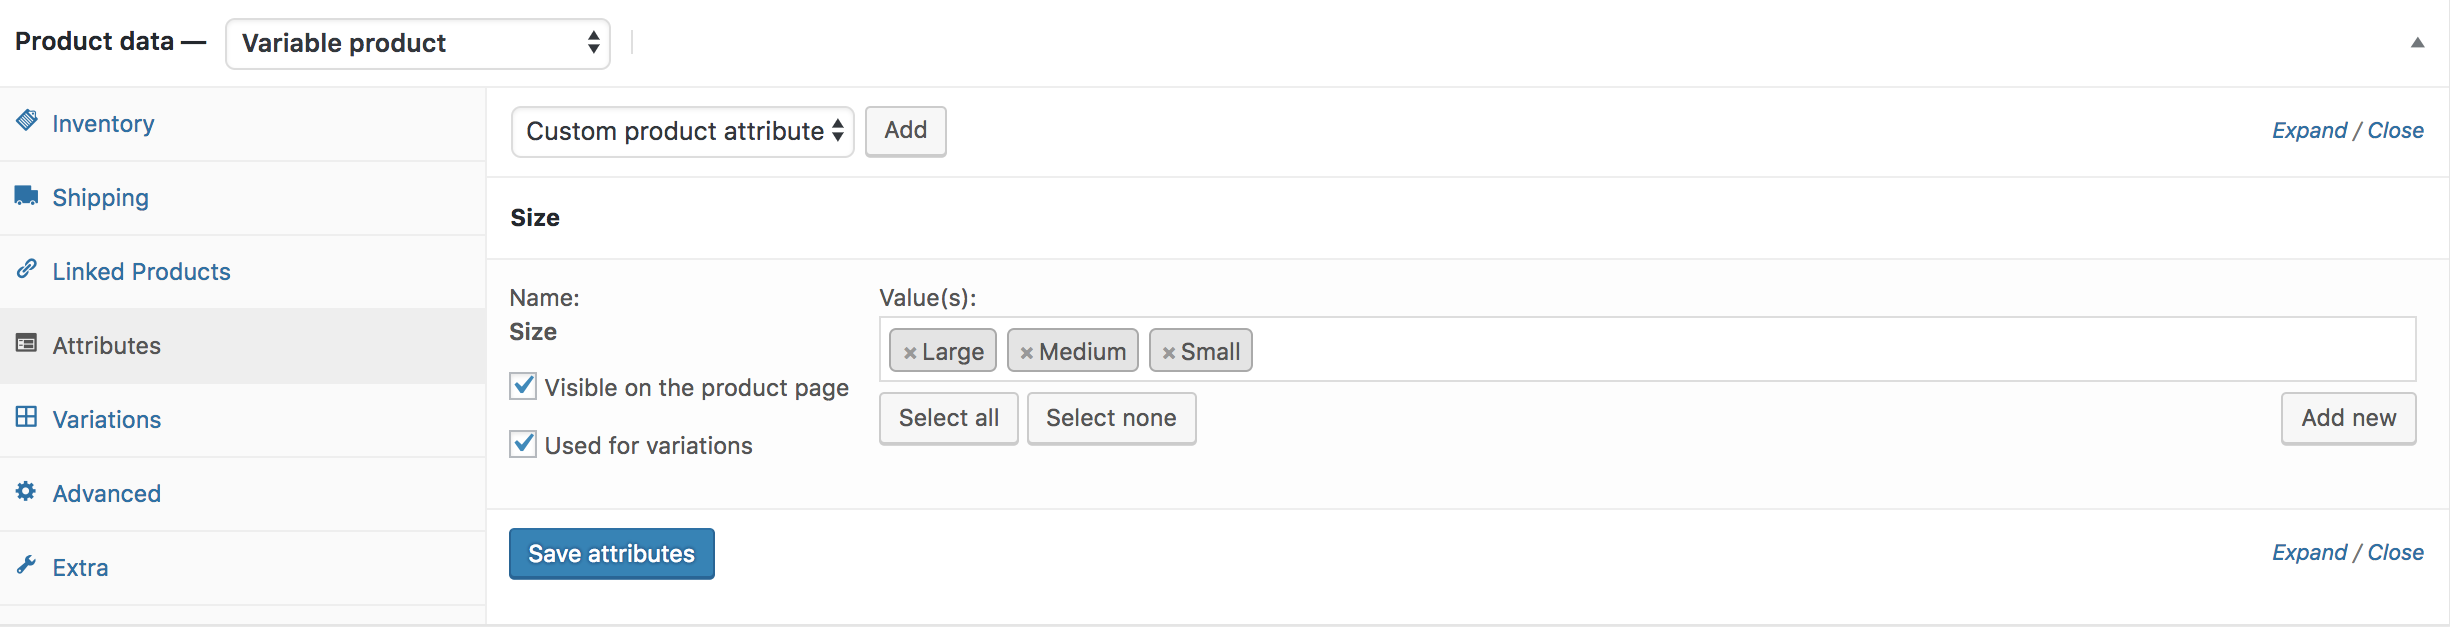
After selecting the Variable product from Product data dropdown, head to the Attributes Tab. Click on Custom product attribute dropdown. In this dropdown, you can see all your globally created attributes. As we’ve only created a Size attribute, it’s now showing Size attribute.
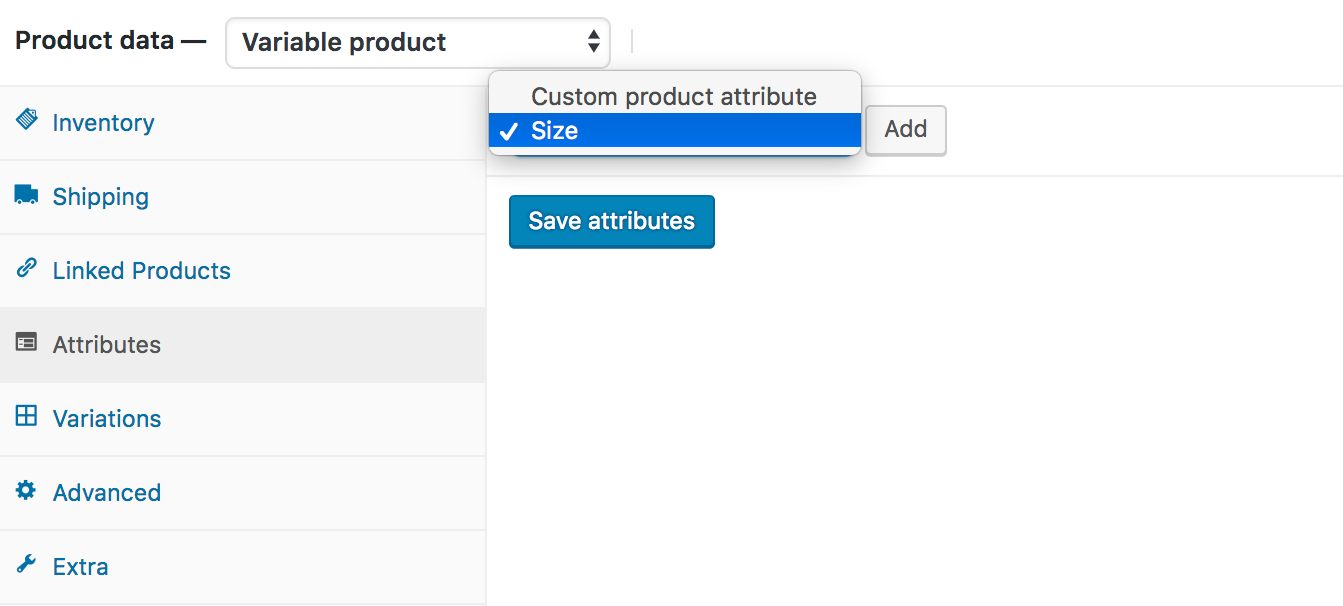
Now select the Size attribute and click on Add. You can see the following screens appears afterward.
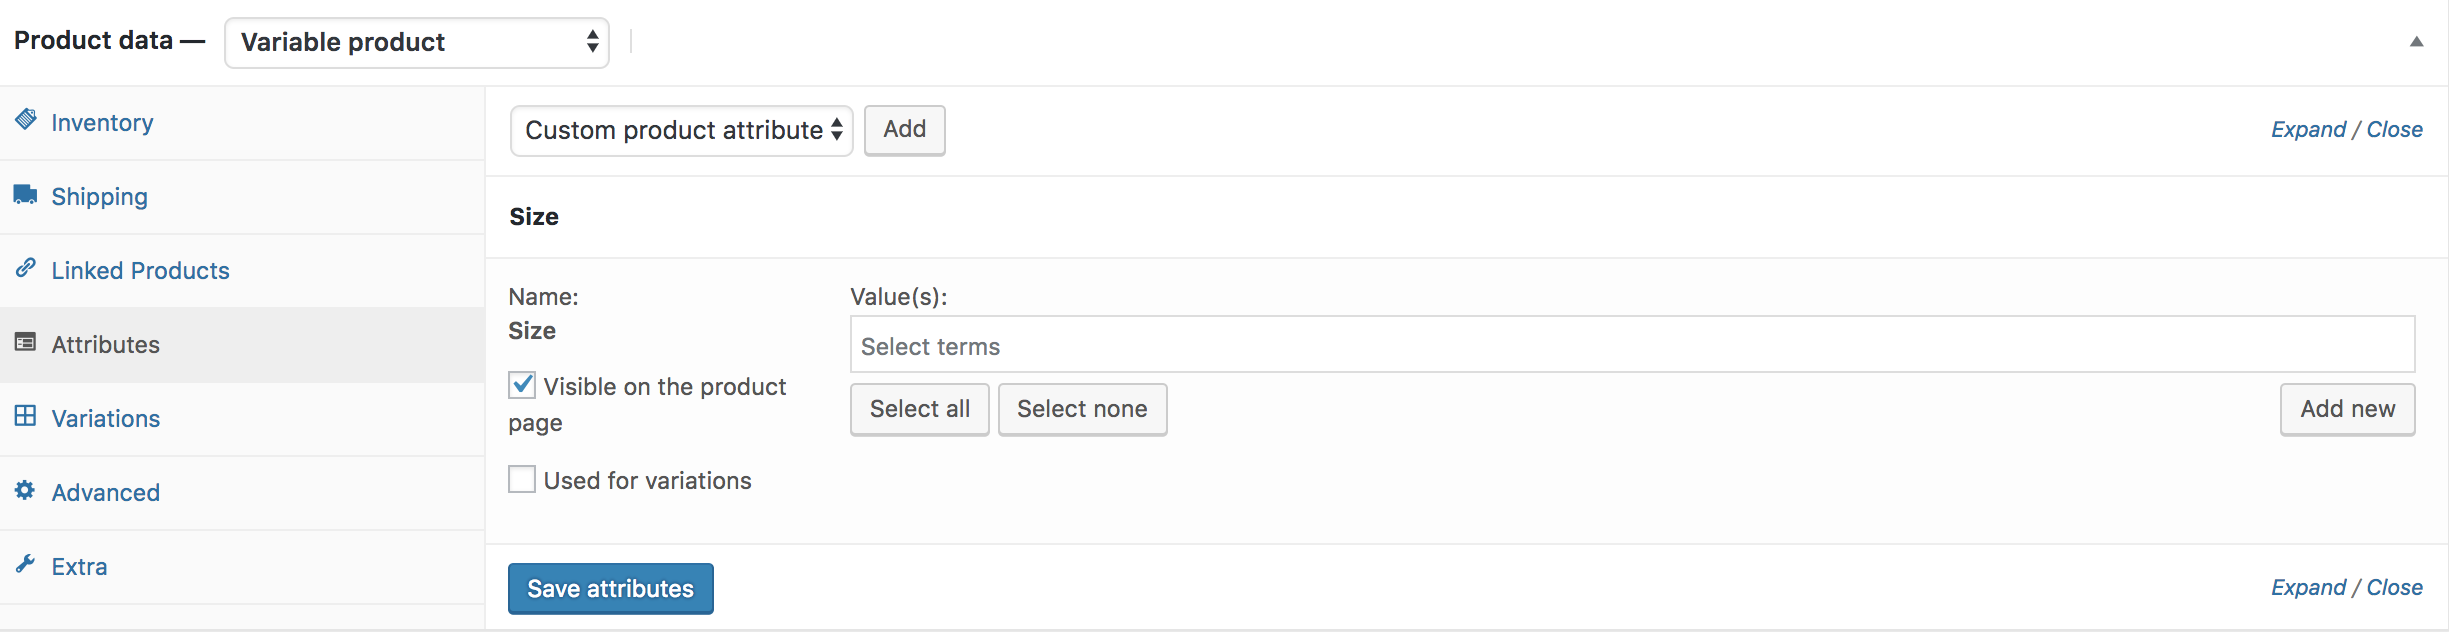
If you want to select all available variations of the size attribute, click on Select all button. If you want to deselect all selected variations at once. Click on Select none button. Add all variations selecting Select All button, checked Used for variations settings and click on Save Attributes button. Check the following screenshot for guideline.
Now get into Variations tab. Click on Add Variation dropdown. Here you will notice two options. First one is Add Variation and the second one is Create variations from all attributes.
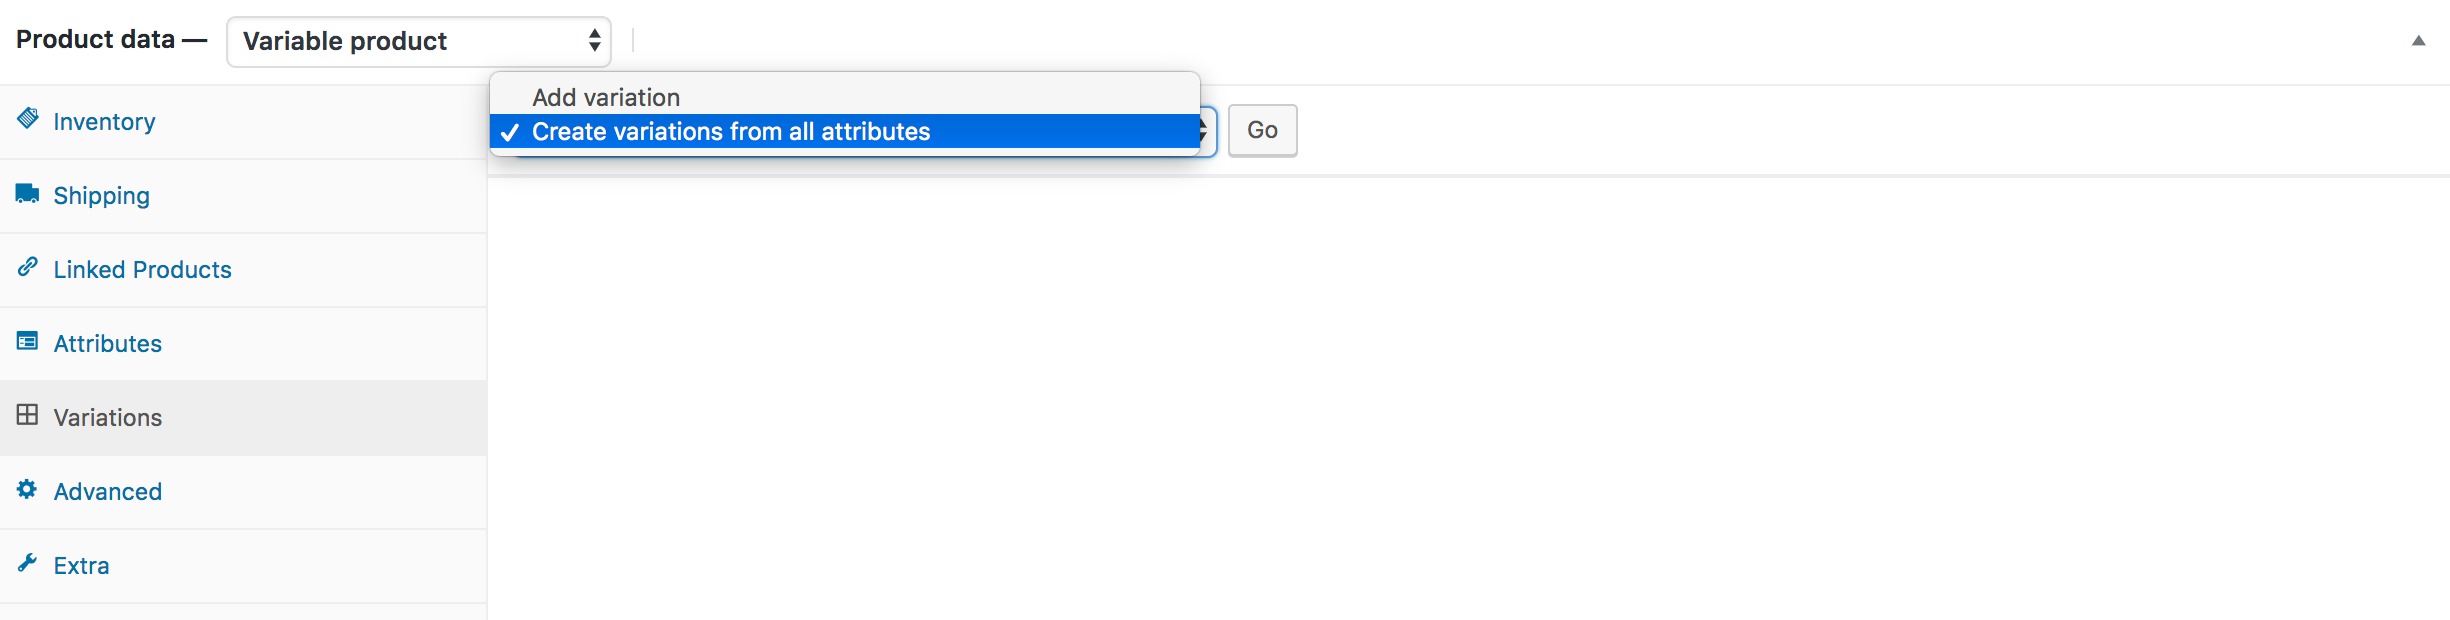
In this tutorial, I am going to select Create variation from all attributes and click Go button. It’ll add all available variations like the following.
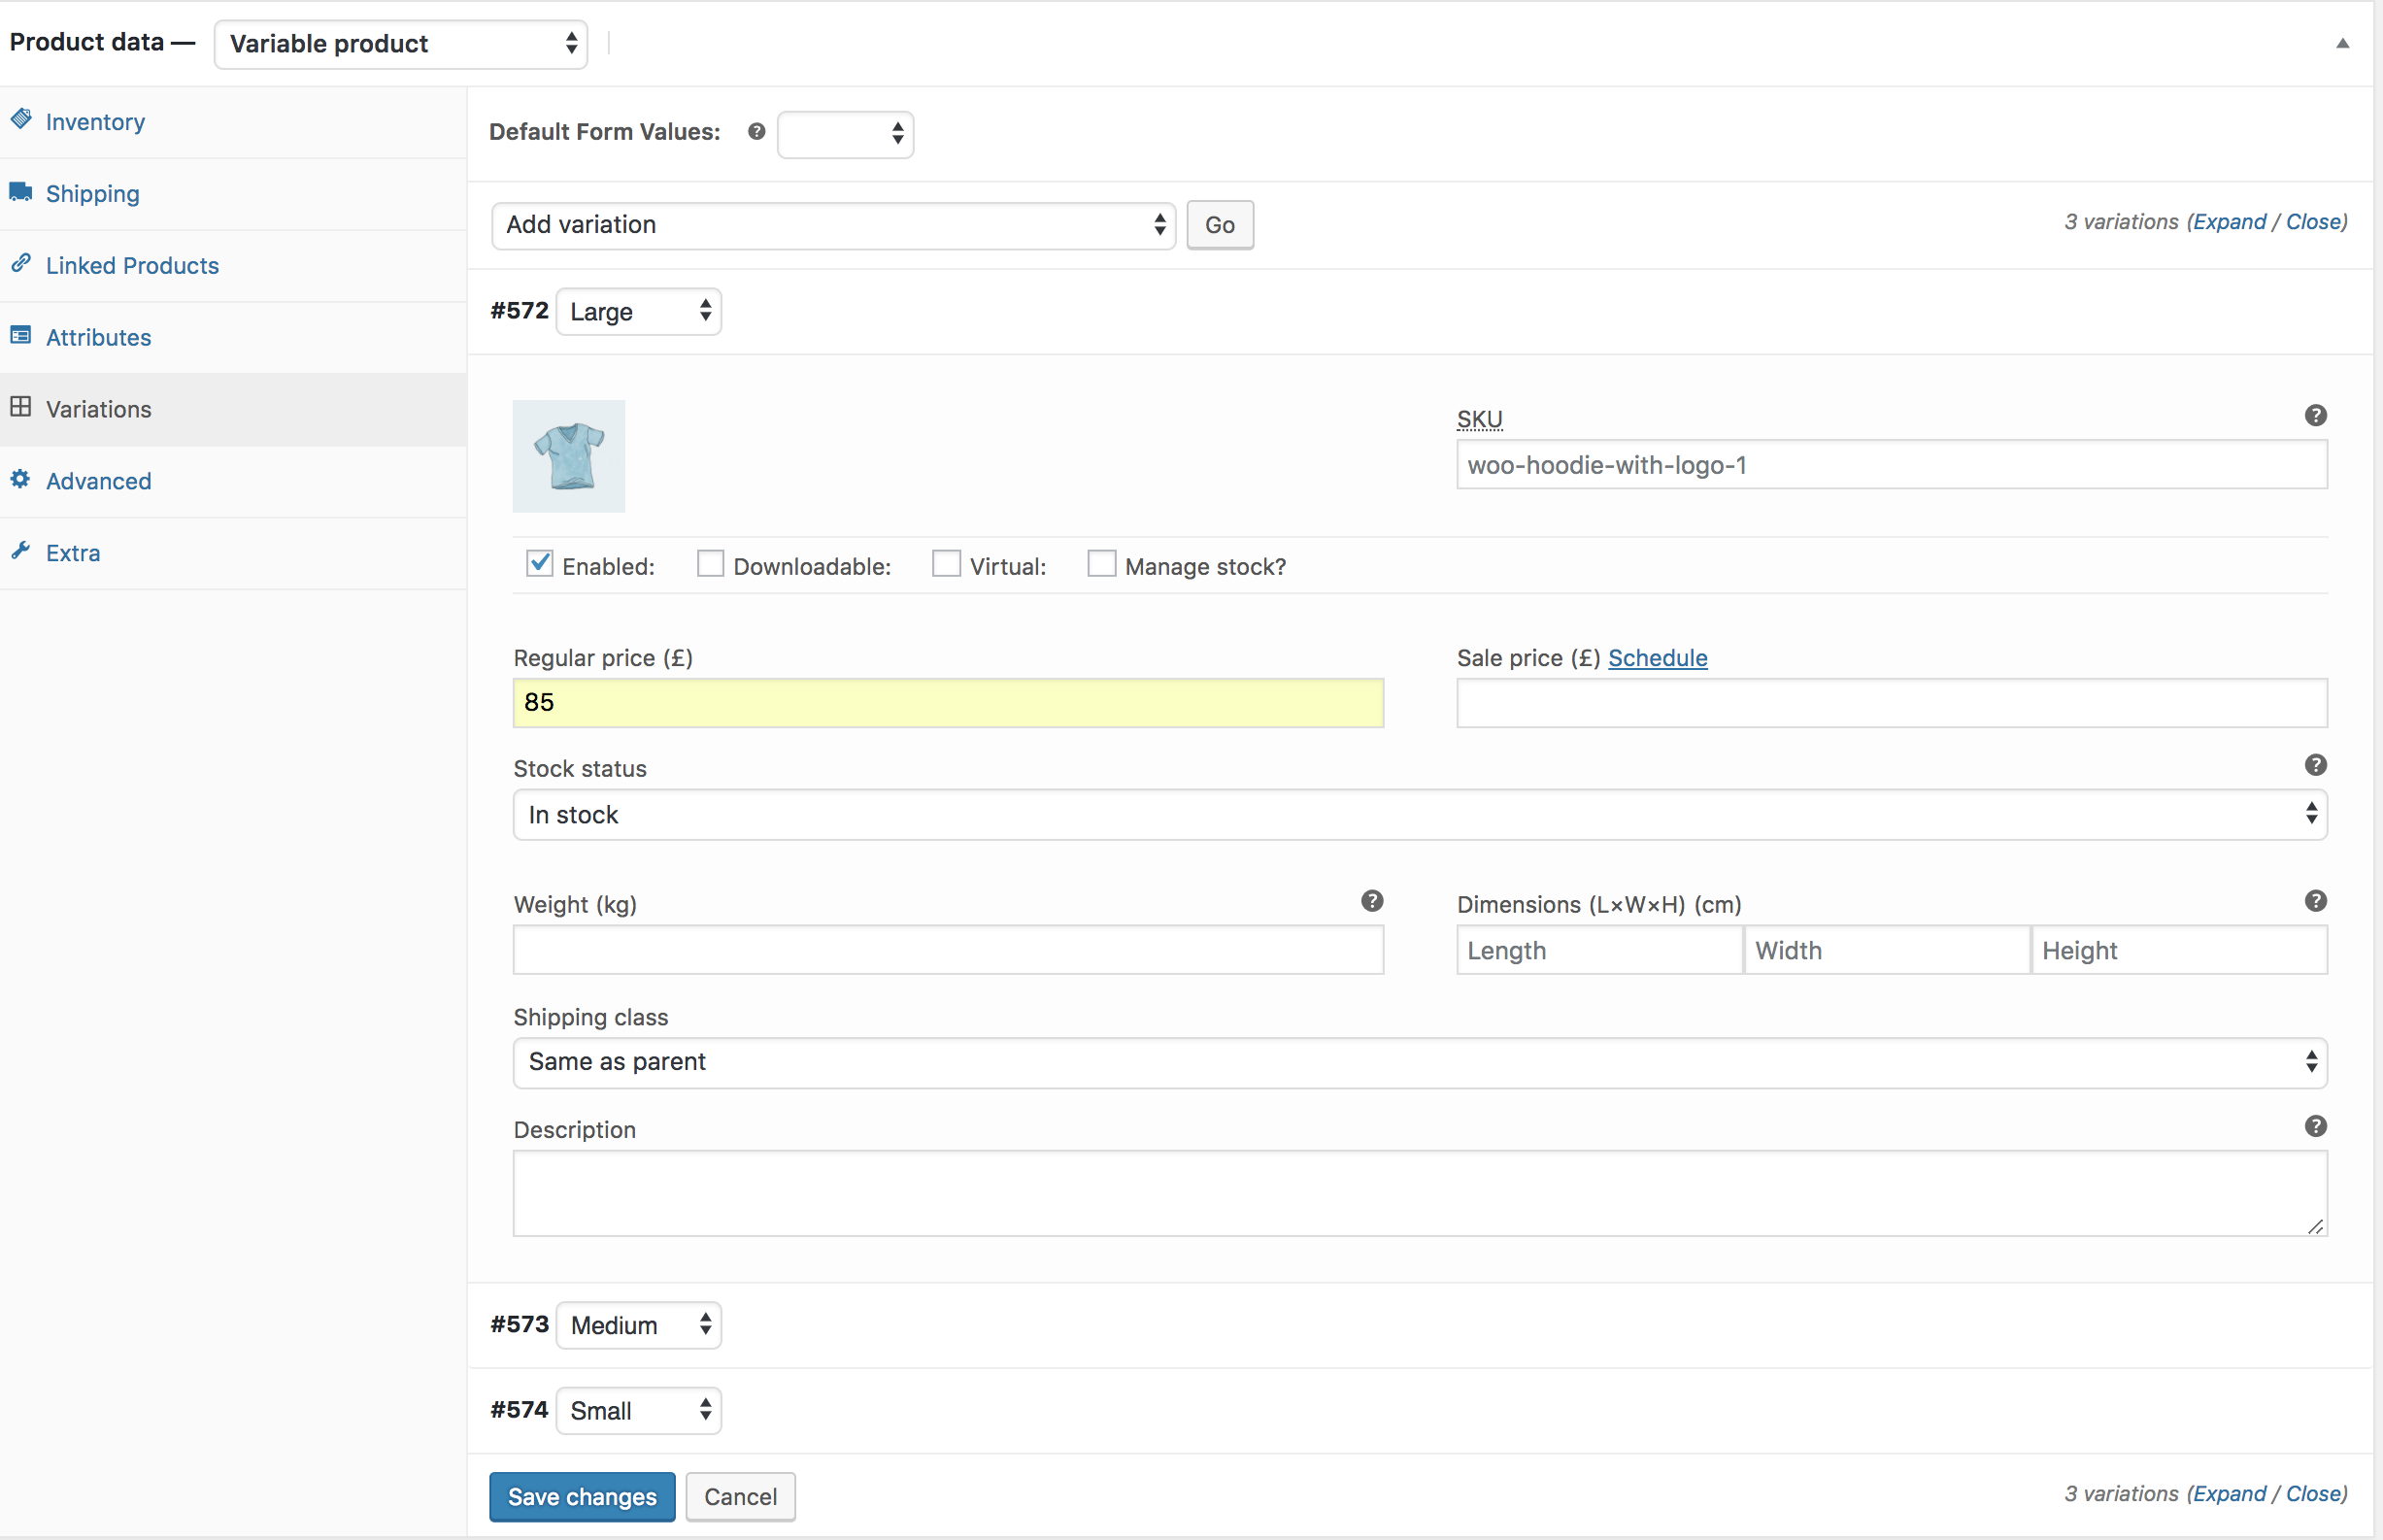
You can see the above image that Small, Medium, and Large image variations are there. From this screen you can add variation image, variation price, and other variation specific details. When you have done with adding all your required details in each variation, click the Save Changes button.
Remember! Don’t forget to add the price in each variation, otherwise, variations won’t be visible on the product frontend.
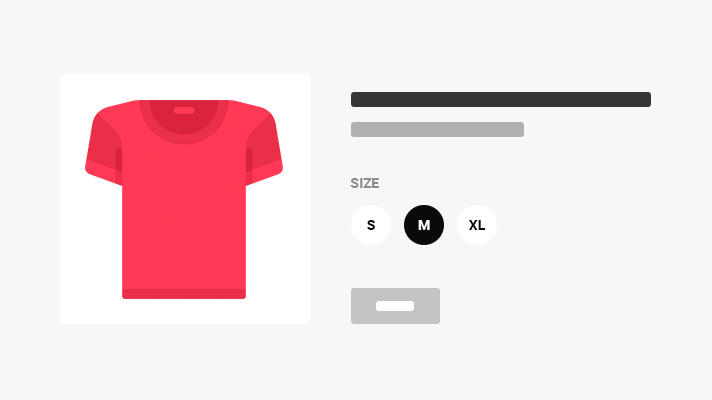
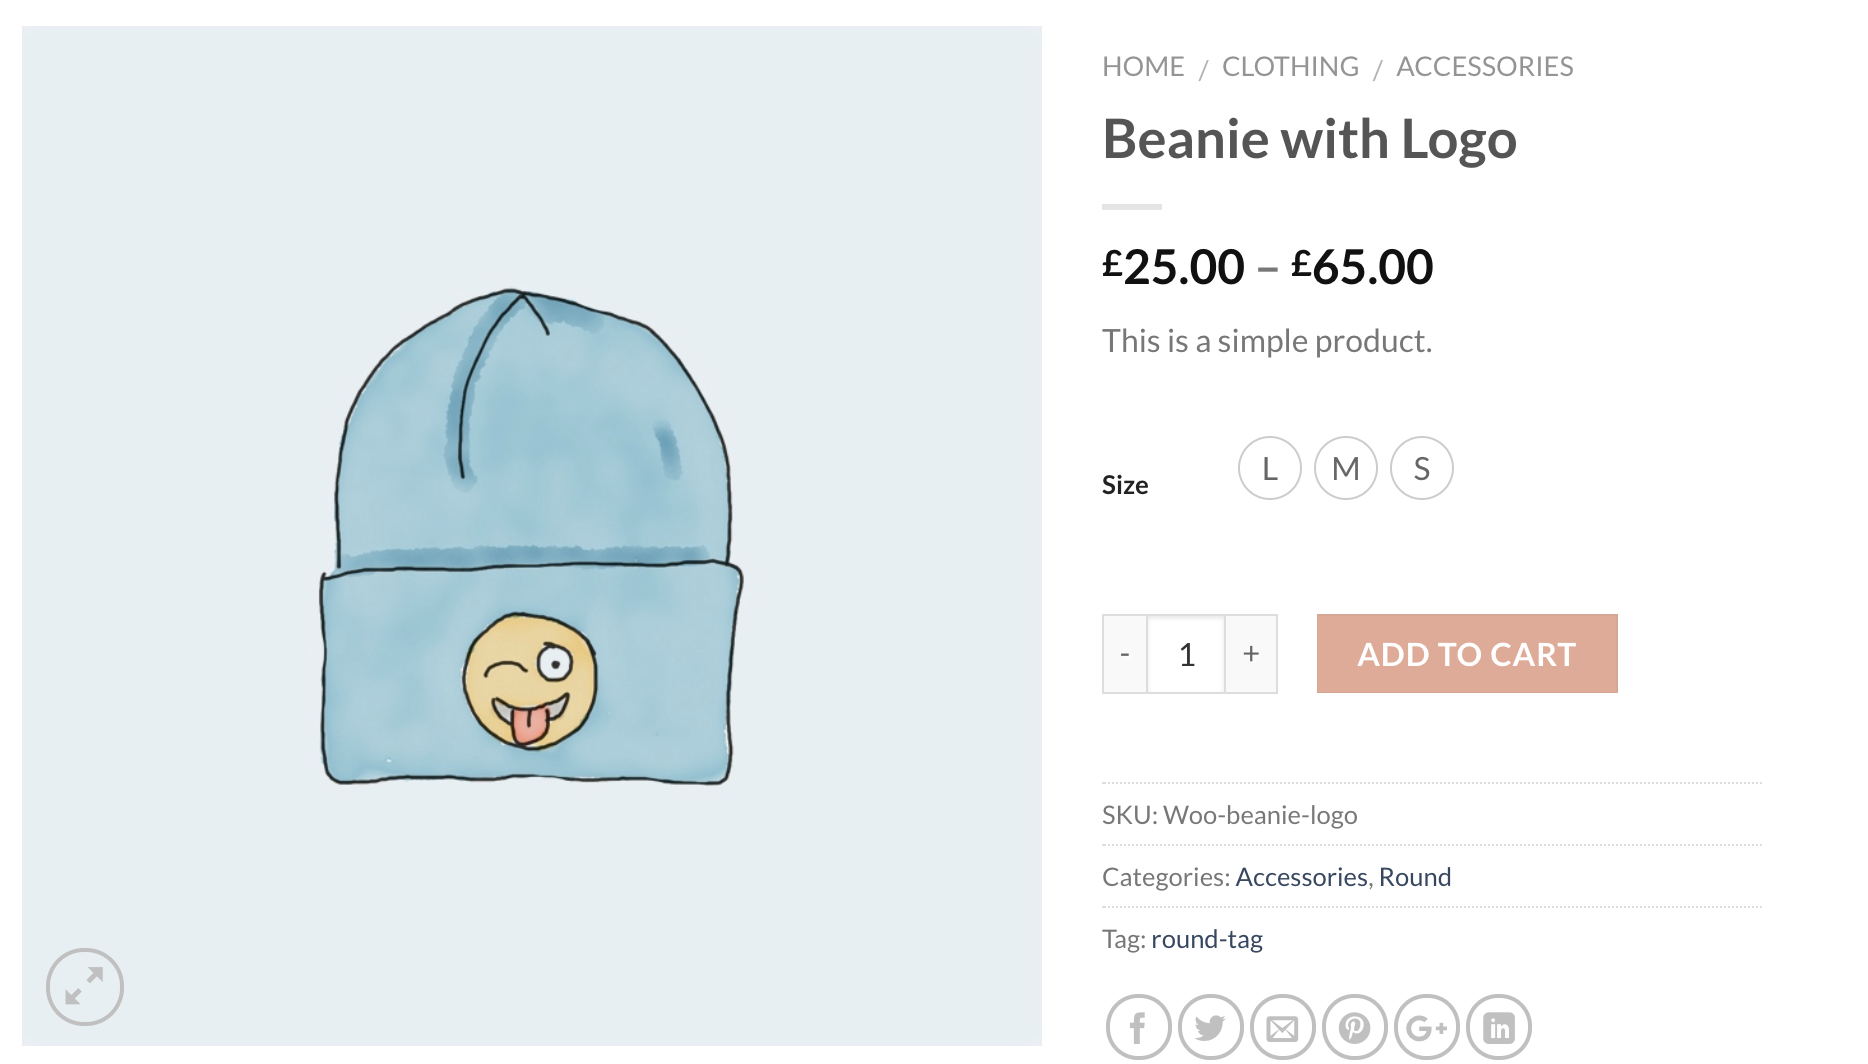
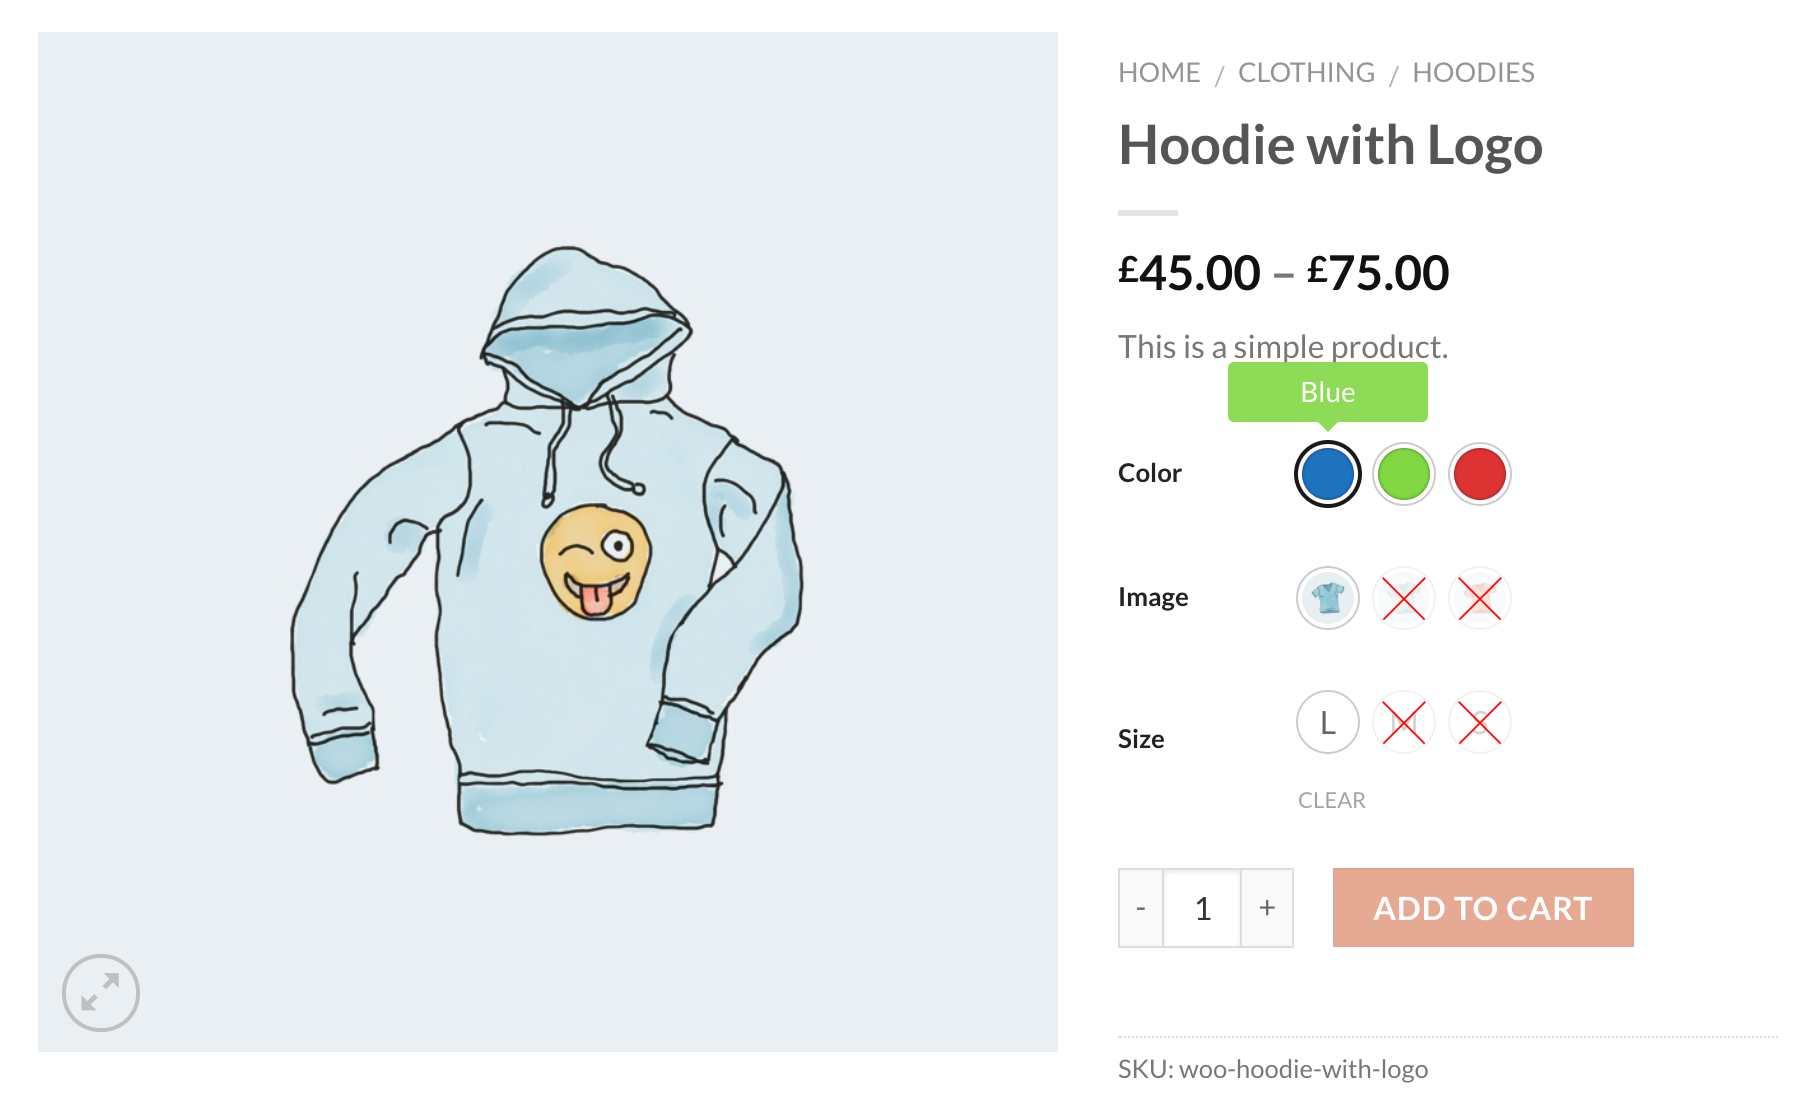
If you can successfully add variation. You can see the following swatches in your product frontend.
Simple Settings
The WooCommerce variation swatch is a powerful plugin. It allows you to enable Tooltip, disable plugin default stylesheet, and switch between Round and Square shapes.
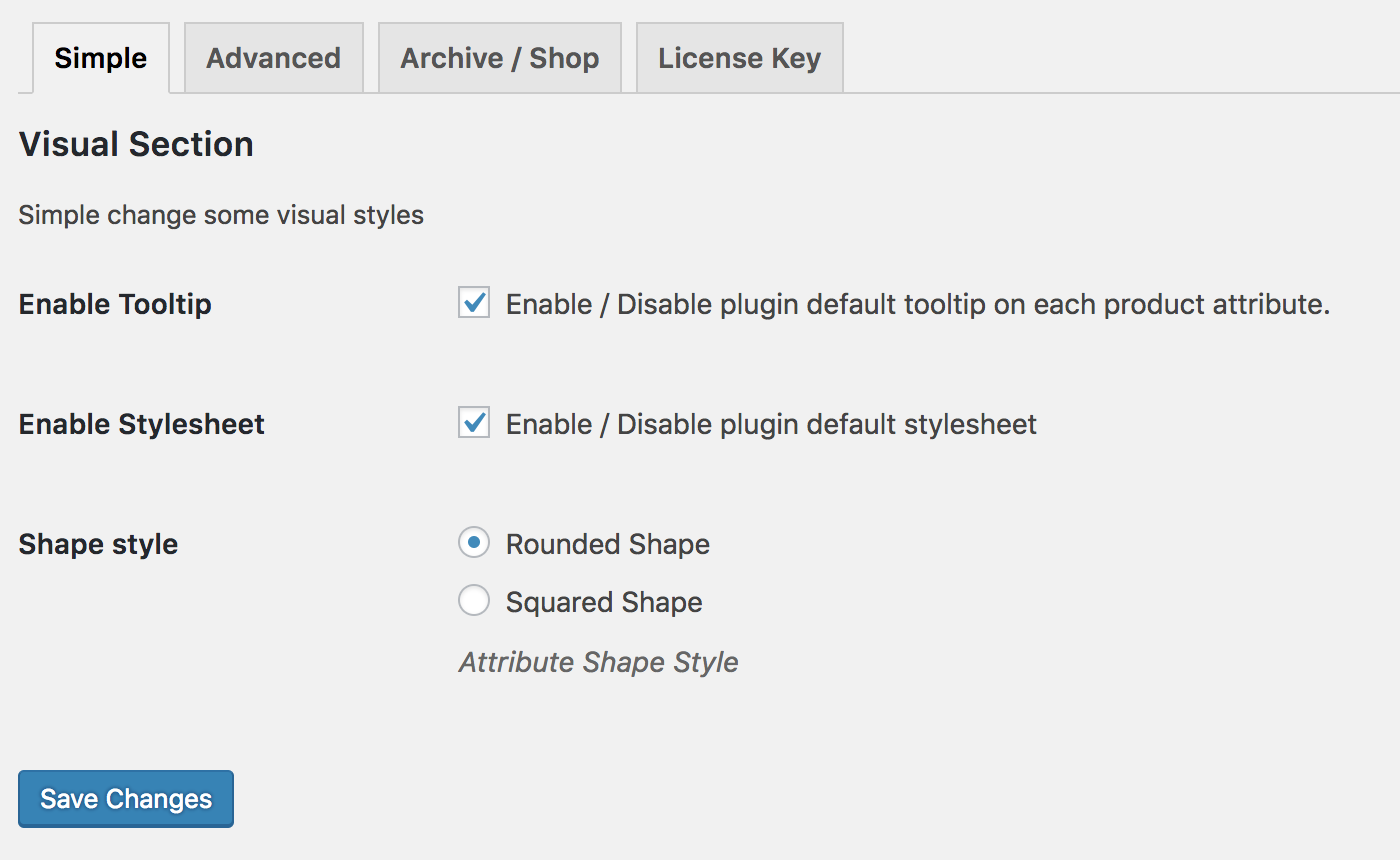
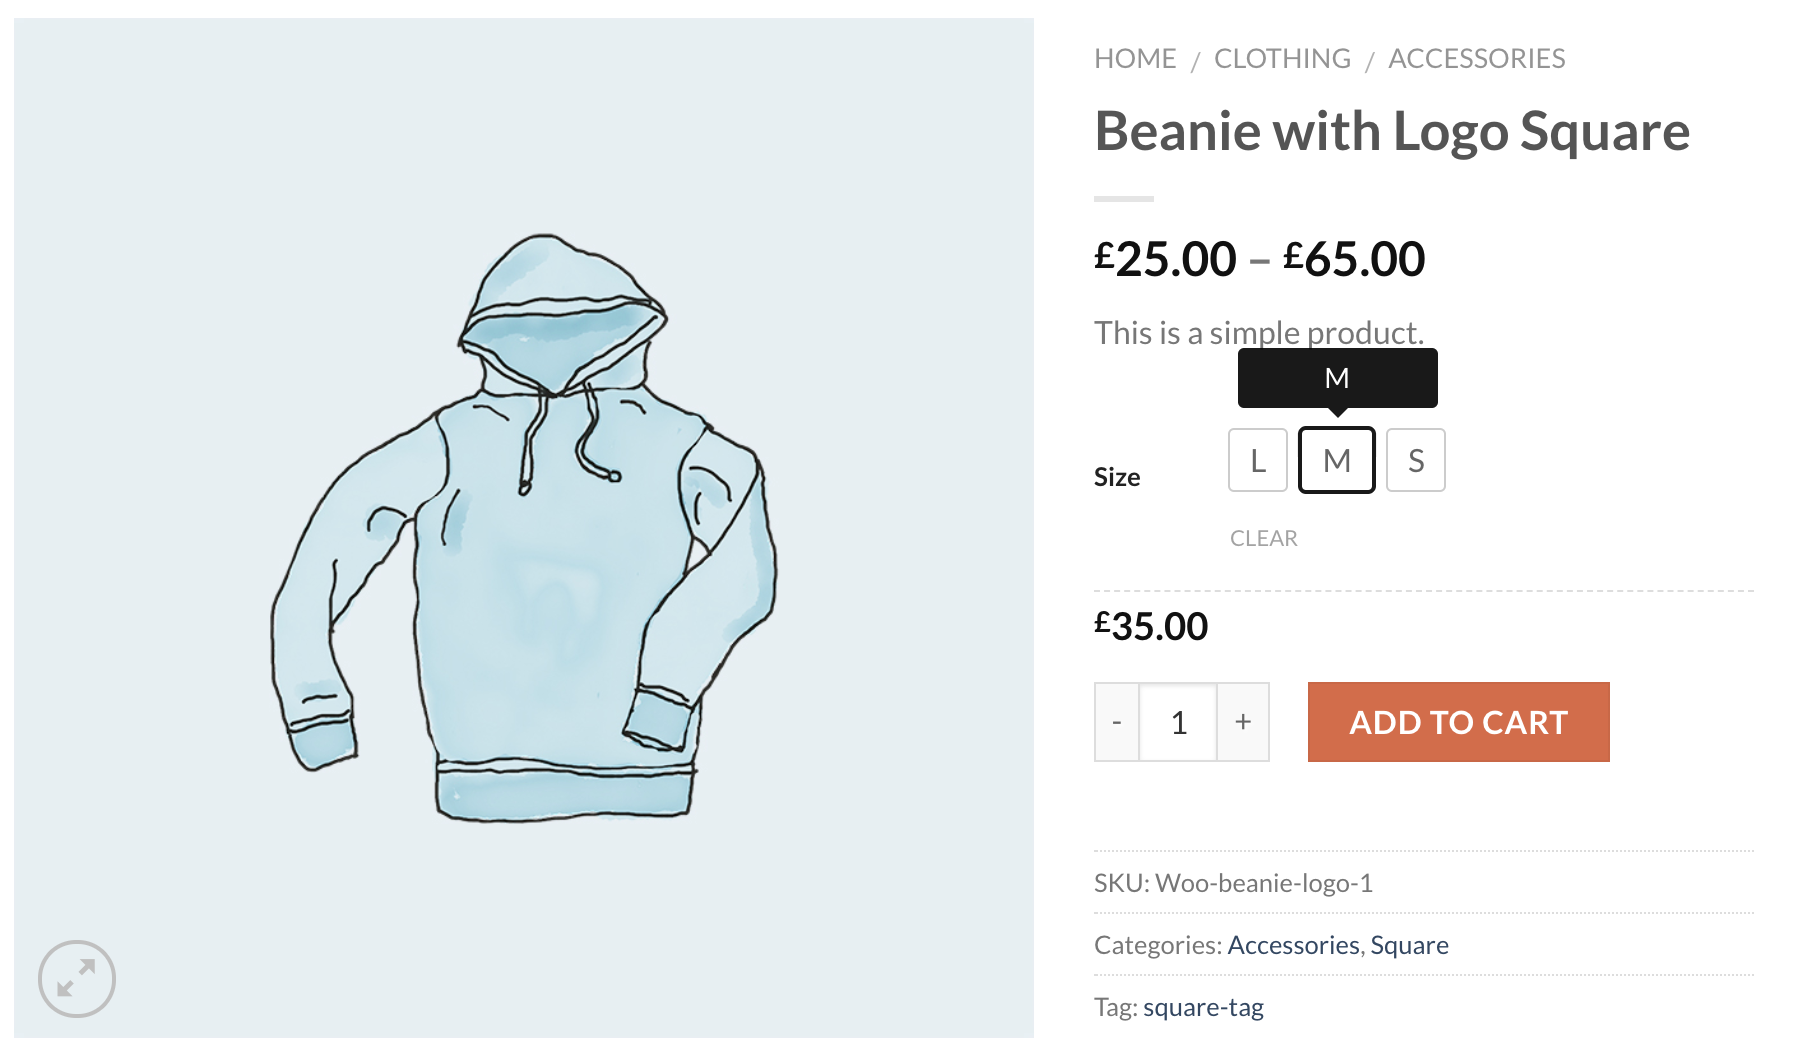
If you want to select Shape style from Round to Square and enable Tooltip, the frontend product page looks like the following.
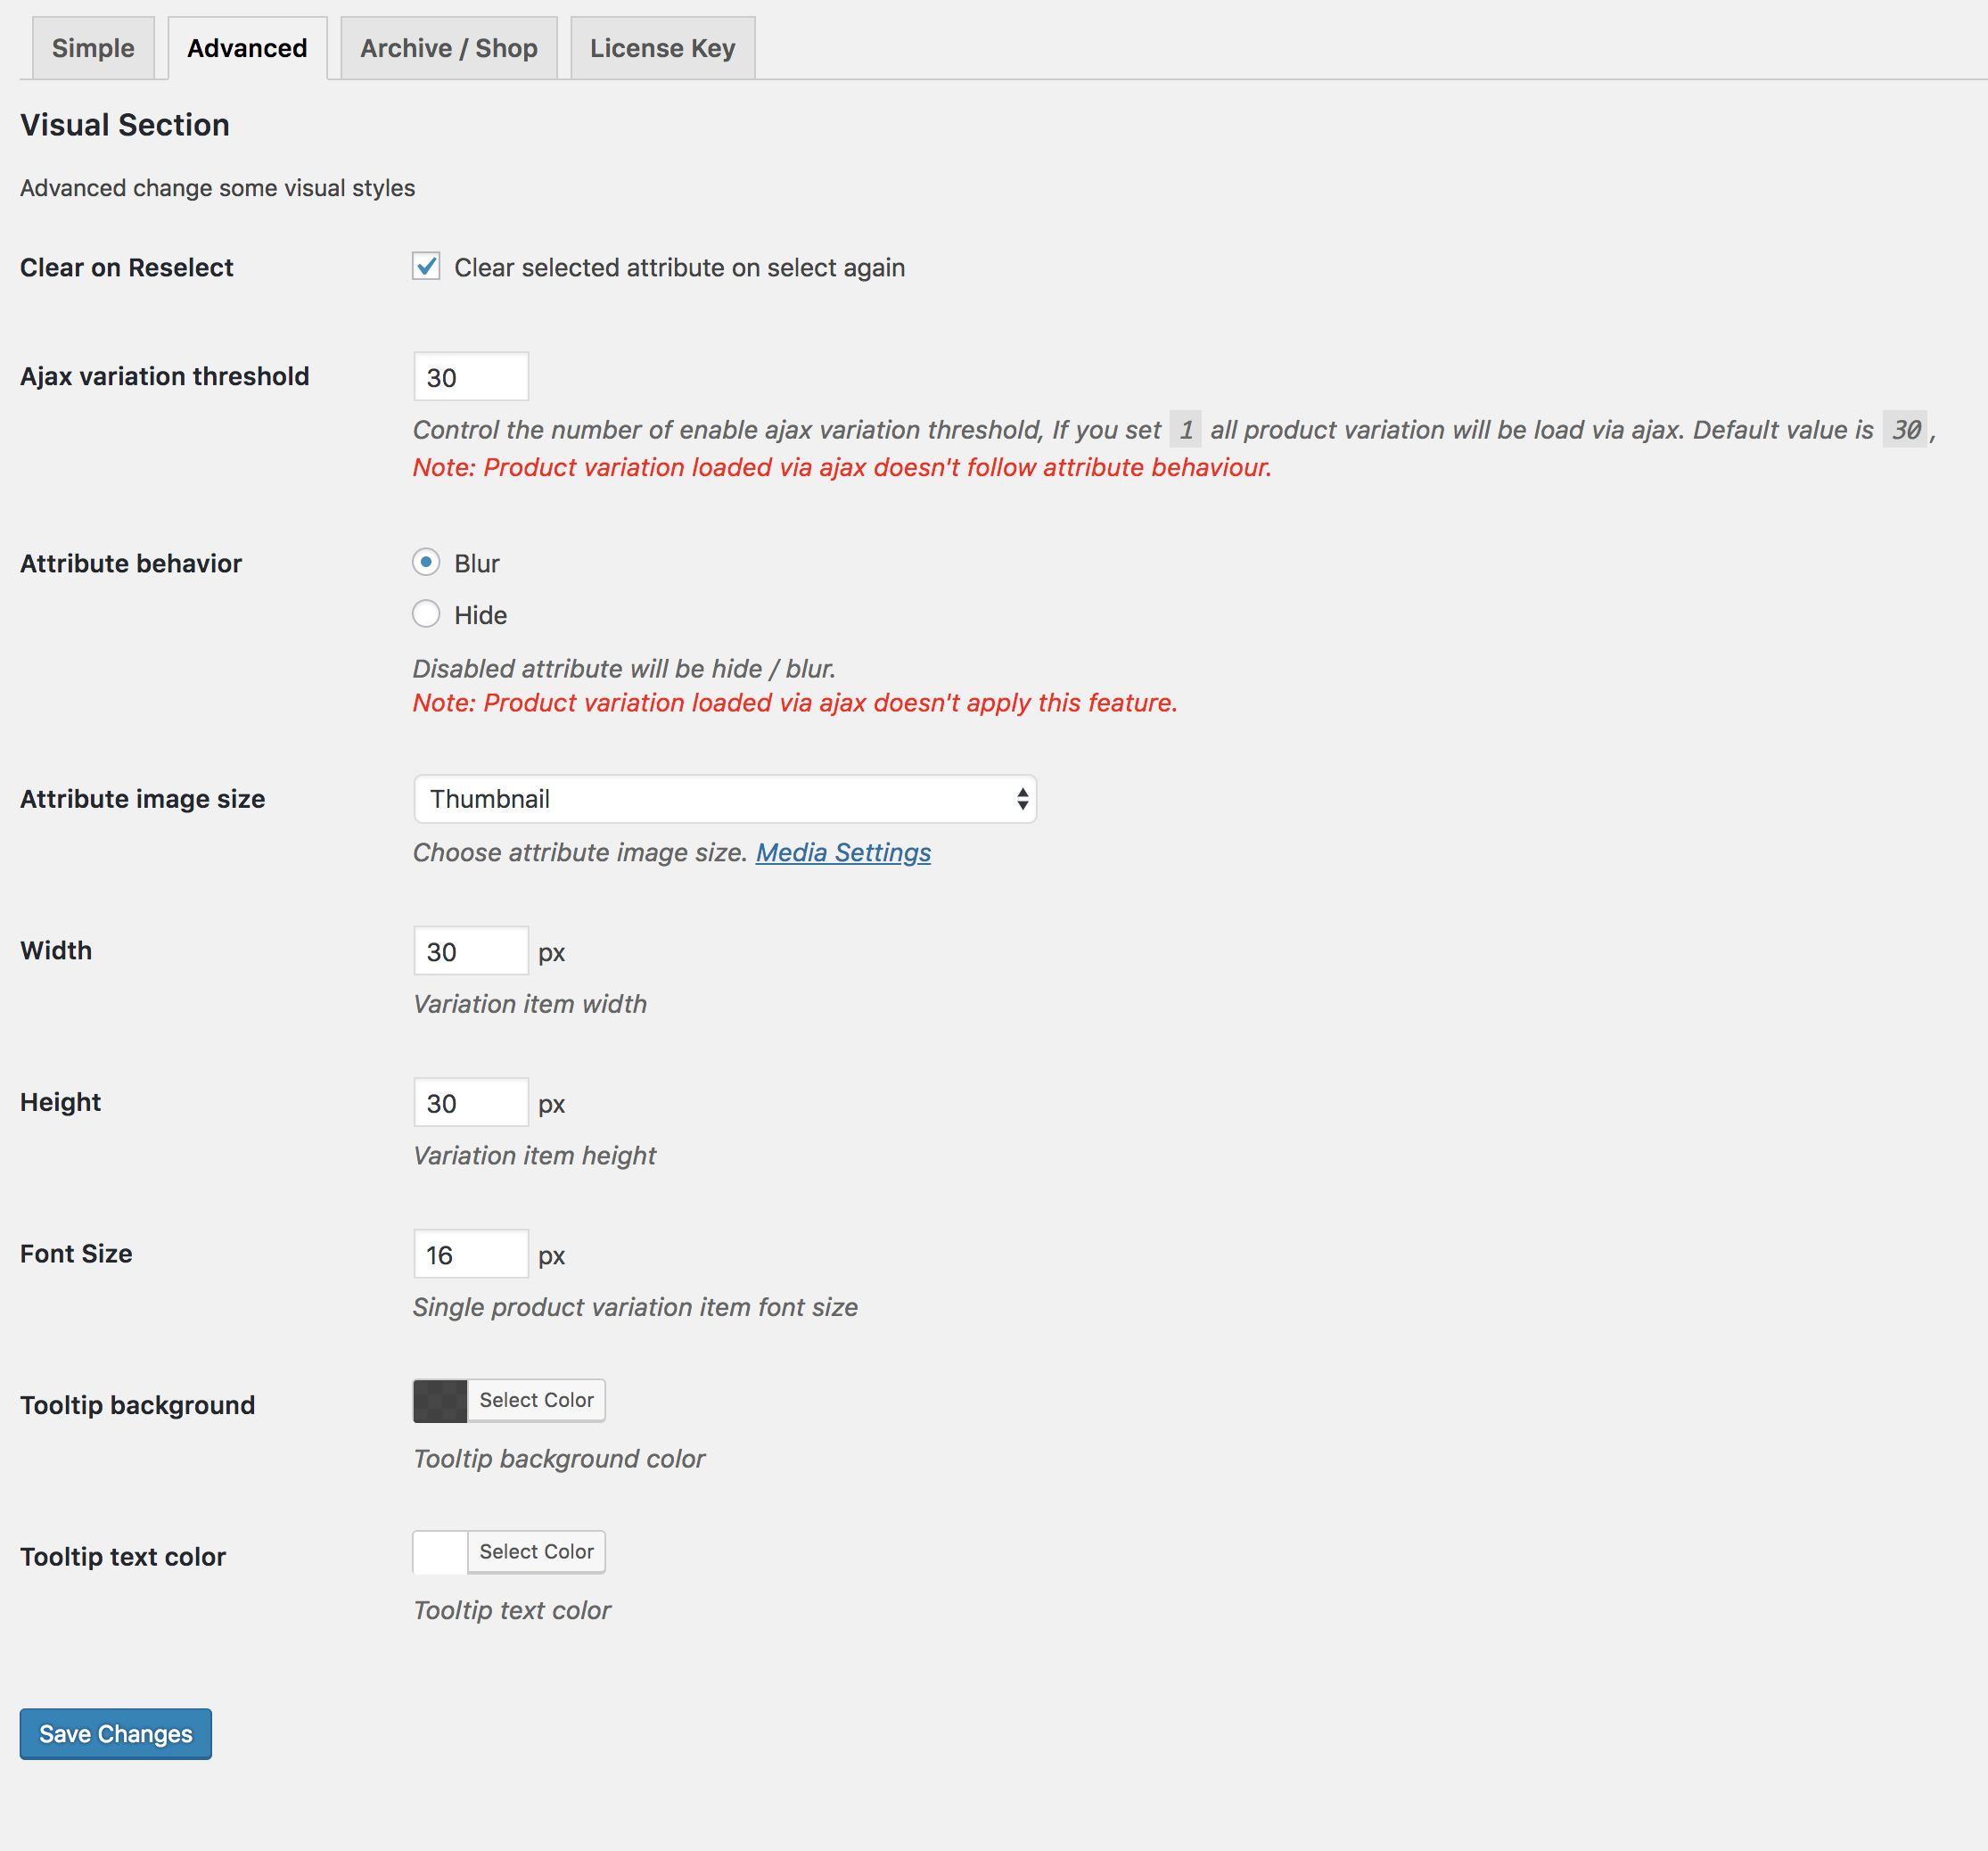
Advanced Settings
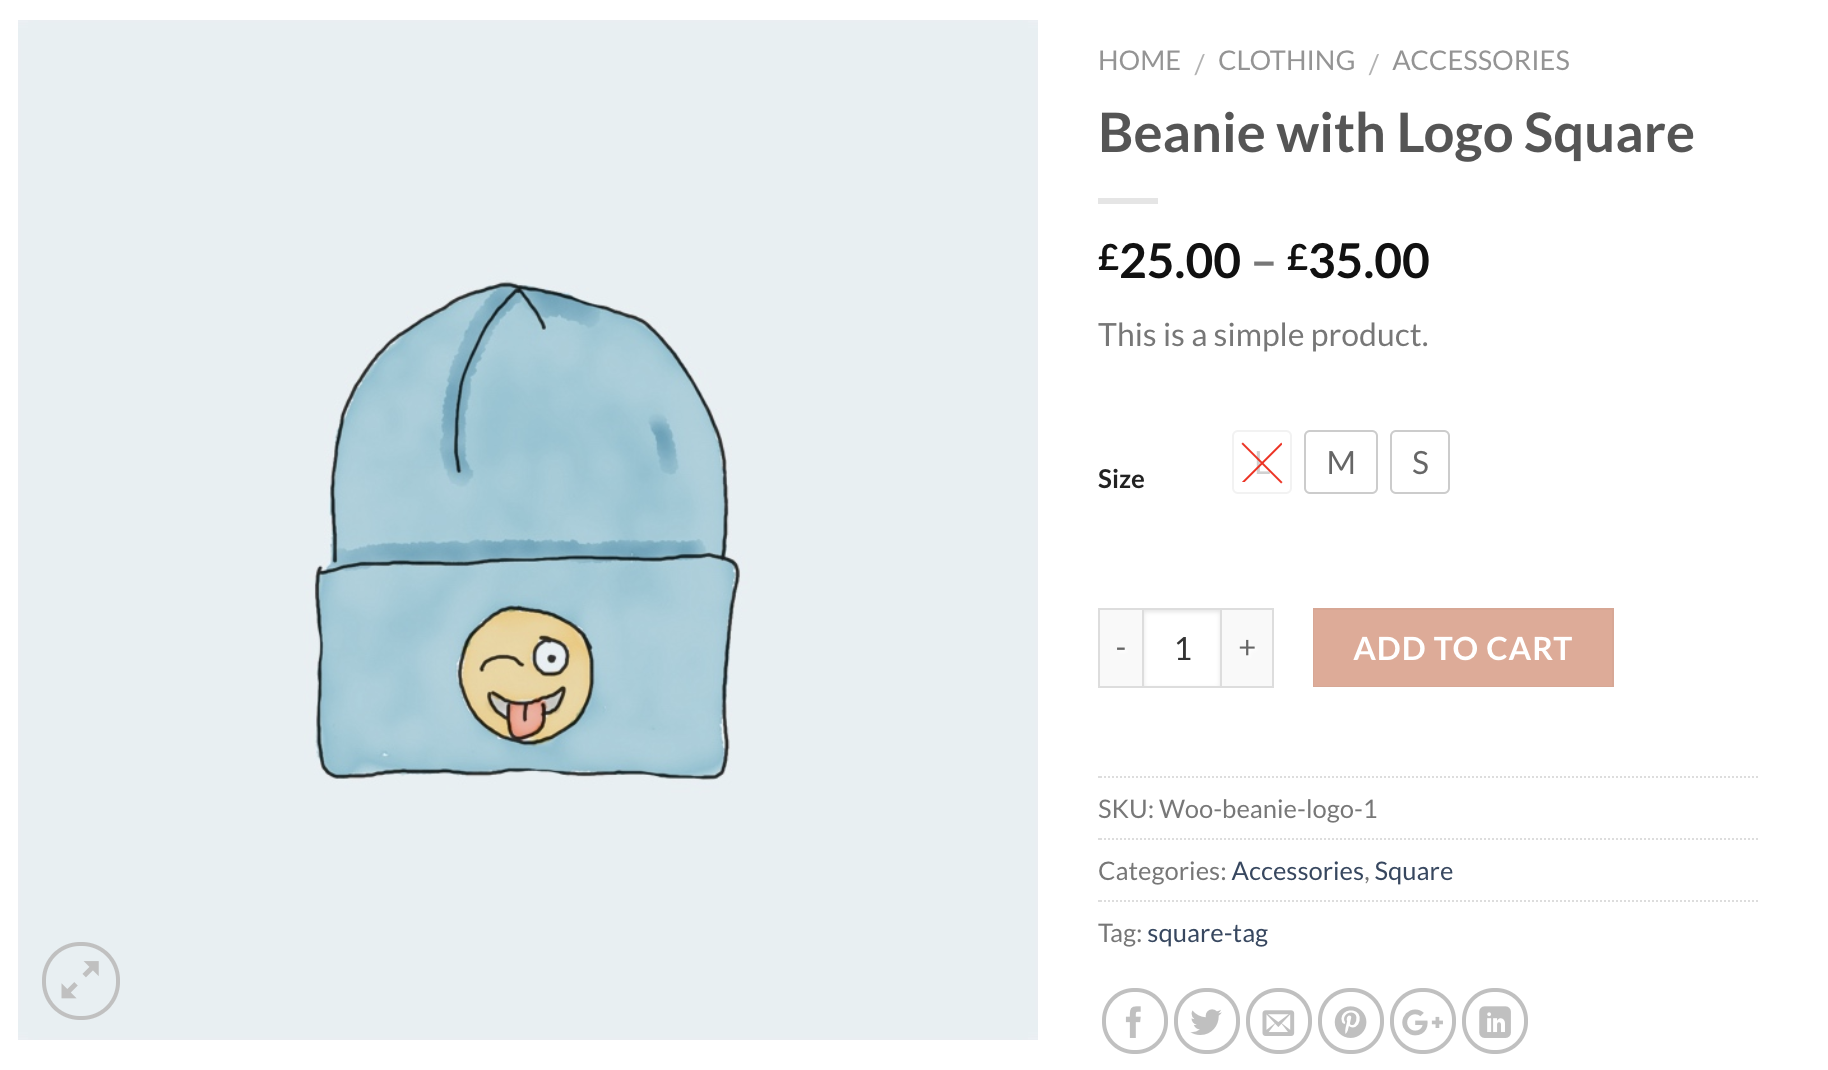
To provide ultimate flexibility, WooCommerce Variation Swatches plugin offers a couple of advanced settings to give you more. The settings allow you to control variation swatch width, height, and font-size. The awesome part, I’ll post is the Attribute Behavior option to present out of stock variation smartly.
If you select a Blur option from Attribute Behavior, the out of stock variation would look like the following screenshot.
Customize Tooltip and Swatch On the Store/Archive Pages
Customizing tooltip text and making swatches enabled is the premium feature of this plugin. To enable this, you have to download Premium Version of WooCommerce Variation Swatches plugin first.
Enable Tooltip
You can customize tooltip background and text color from the Advanced settings. Check the following screenshot to customize the tooltip style.

The tooltip frontend Preview looks like the following screenshot.
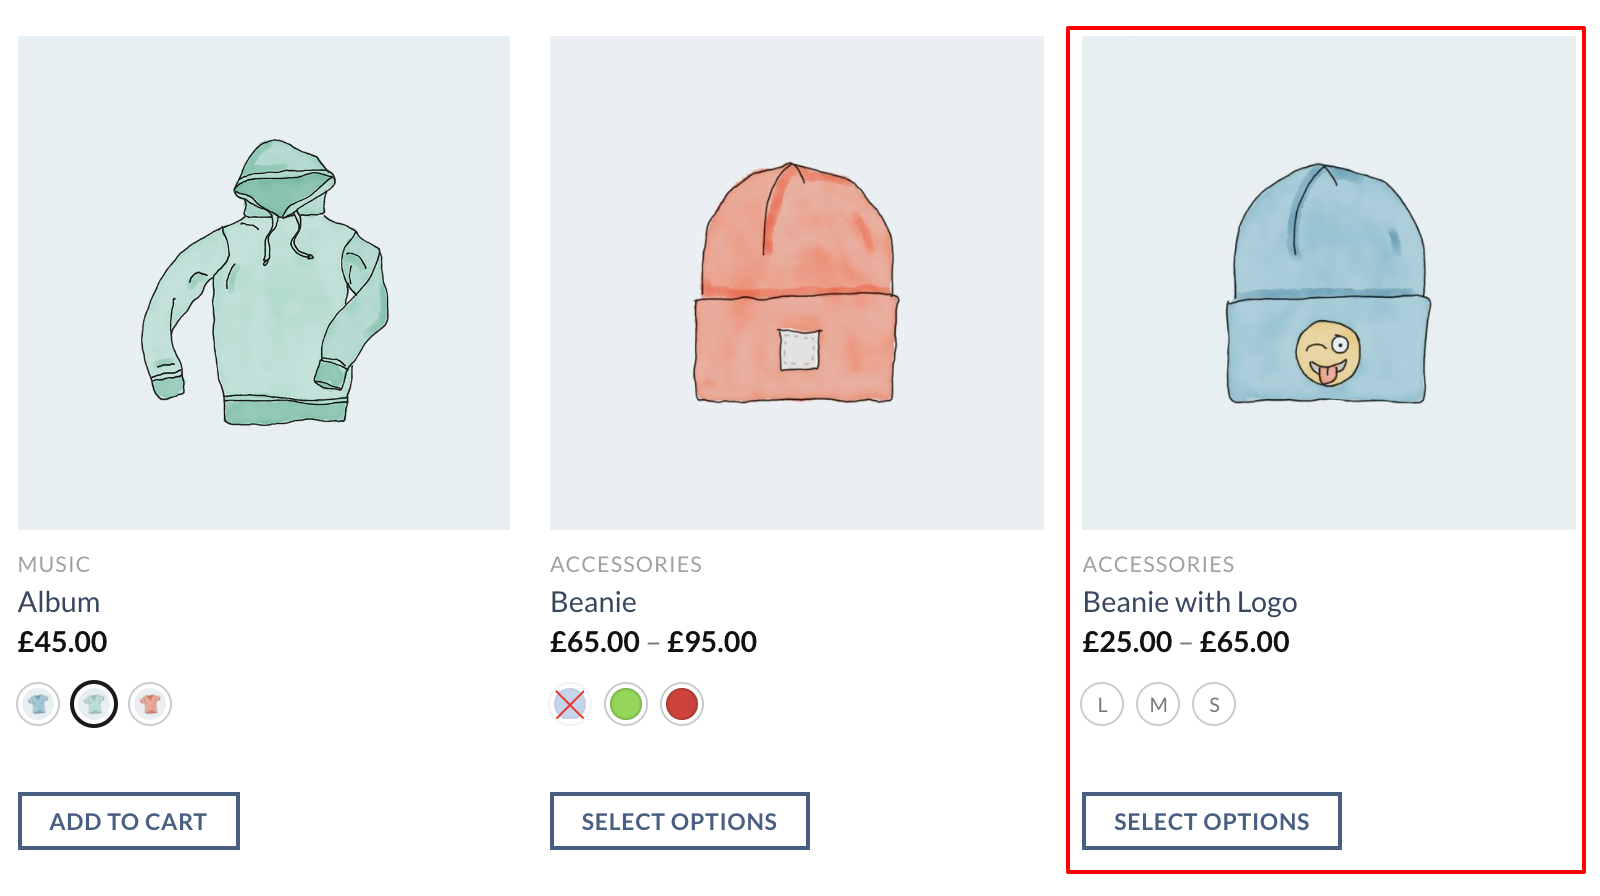
Enable Swatches on Store Pages
To enable label swatches on the store pages. Navigate to Archive / Shop page. Check the settings Show on archive to show label swatches in the store/archive page. Even In Flatsome theme you can enable swatches before and after add to cart button in the store from Archive Swatches Position settings. On top of that you can exclusively control the size of label variation swatch from this settings.

After making swatches enabled on the store page, it looks like the following screenshot.
Conclusion:
This technology will boost your site usability and conversion. If you face any issue while installing this plugin in Flatsome Theme, let me know in the comment below.