Your store has 50 products today. Next year it may have 500. Without a plan, finding anything gets hard, for you and for your customers.
That plan is your product management category taxonomy. “Taxonomy” is just a fancy word for “a way to group things.” WooCommerce gives you three ways: categories, tags, and attributes.
This guide shows you how to set up WooCommerce product categories, then tags and attributes, step by step. You will also learn when to use each one, and which mistakes to avoid.
Quick answer: In WooCommerce, use categories for broad sections (Shirts, Shoes). Use tags for traits that cross sections (Cotton, Eco-Friendly). Use attributes for options customers choose or filter by (Size, Color). Manage all three from the Products menu in your dashboard.
What is a Product Management Category Taxonomy in WooCommerce?
A product management category taxonomy is the system you use to organize your product catalog. In WooCommerce, it is made of three parts:
- product categories
- product tags
- product attributes
Together, they help customers browse, filter, and find products, and help you manage them faster. The three overlap a little. But each has its own job. Get that right early, and your store stays tidy as it grows.
Categories vs Tags vs Attributes: Quick Comparison
| Topics | Categories | Tags | Attributes |
|---|---|---|---|
| Structure | Hierarchical (parent > child) | Flat, no sub-tags | A name plus terms (options) |
| Best for | Broad, main sections | Traits shared across categories | Variations and filters |
| Example | Shirts > Long-sleeve | Cotton, Water-Resistant | Size: S, M, L, XL |
| Needed for variable products? | No | No | Yes |
| Where to manage | Products → Categories | Products → Tags | Products → Attributes |
| Every product needs one? | Yes (a default is assigned) | No | No |
Keep this table in mind. The rest of the guide unpacks each column.
How to Manage WooCommerce Product Categories
Categories are the main way to group similar products. They are hierarchical. That means a category can have subcategories.
Say you sell clothes. “Shirts,” “Hoodies,” and “Pants” could be top-level categories. “Short-sleeve” and “Long-sleeve” could sit under “Shirts.”
Two simple rules apply:
- A subcategory can have only one parent.
- A parent can have many subcategories.
You can nest subcategories several levels deep. But WooCommerce’s own advice is to keep things as simple as possible. Customers should not need five clicks to reach a product.
How to Add a Product Category
Go to Products → Categories. Then fill in the “Add new category” form:
- Name: the category name customers will see.
- Slug (optional): the URL-friendly version of the name. WooCommerce makes one for you if you leave it blank.
- Parent category: pick one only if this is a subcategory.
- Description (optional): some themes show this under the category name on its page.
- Display type: choose what the category page shows. “Default” uses your theme’s setting. “Subcategories” shows only subcategories. “Products” shows only products. “Both” shows subcategories first, then products.
- Thumbnail image (optional): some themes show category images. The Storefront theme, for example, shows them on the homepage template.
- Click Add new category.
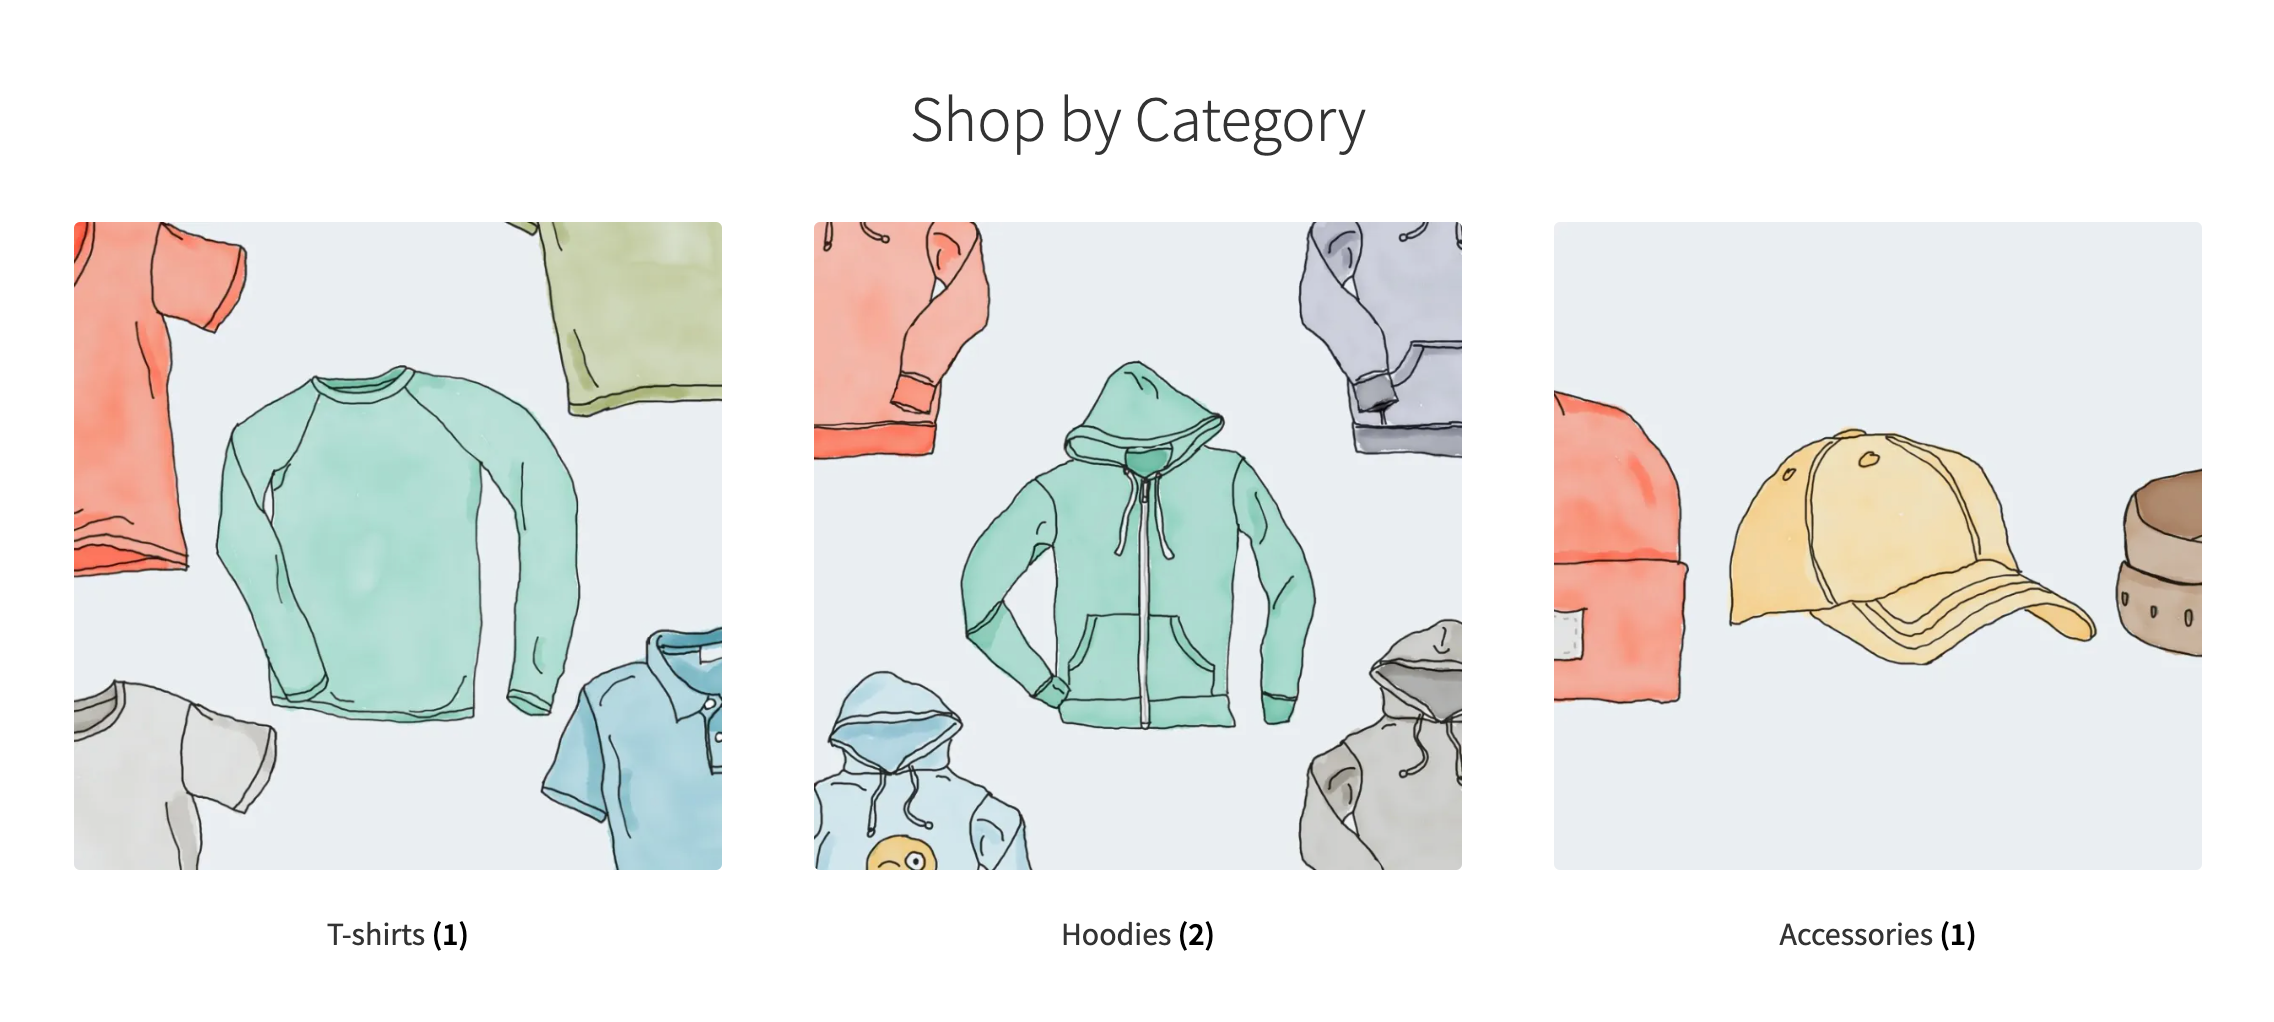
How to check it worked: Hover over the new category in the list and click View. You should see its landing page.
What Is the Default Category (and Can You Delete “Uncategorized”)?
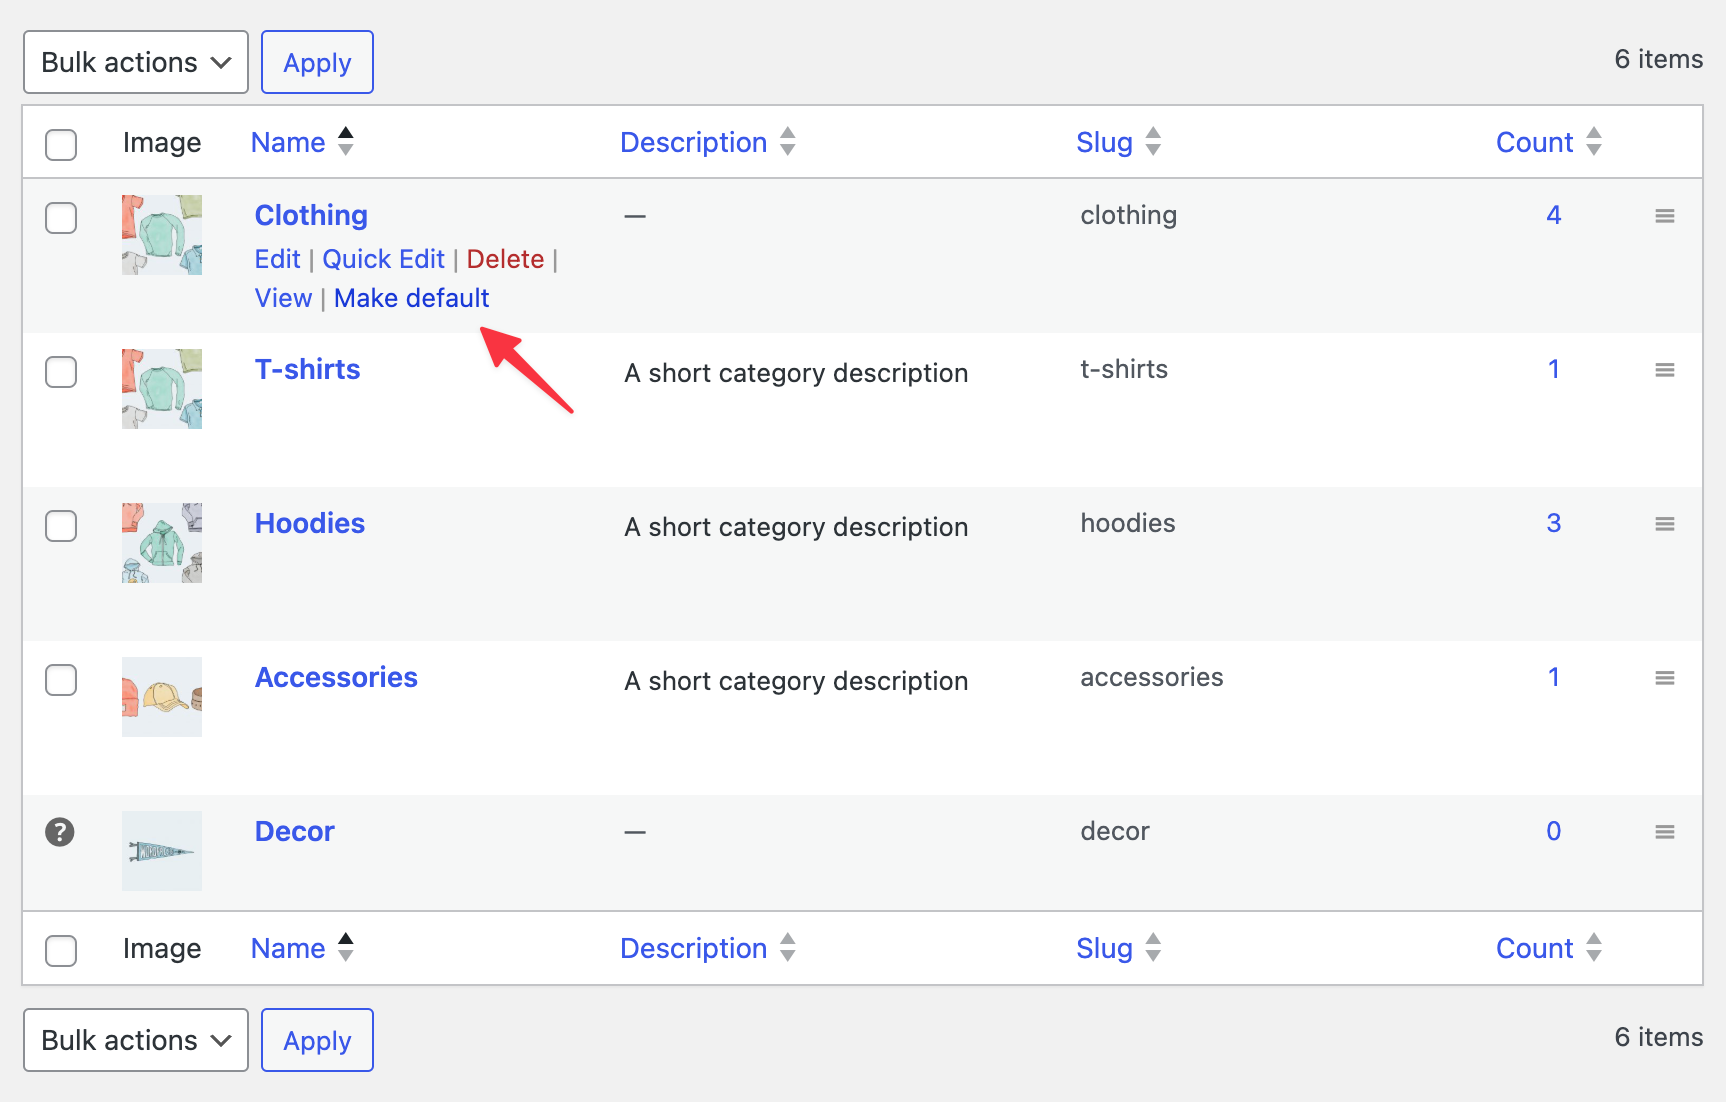
Every product must belong to a category. If you don’t pick one, WooCommerce assigns the default category. Out of the box, that is “Uncategorized.”
You can’t delete the default category. But you can:
- Rename it to something useful, or
- Switch the default. Use the Make default link under another category’s name. After that, “Uncategorized” can be deleted.
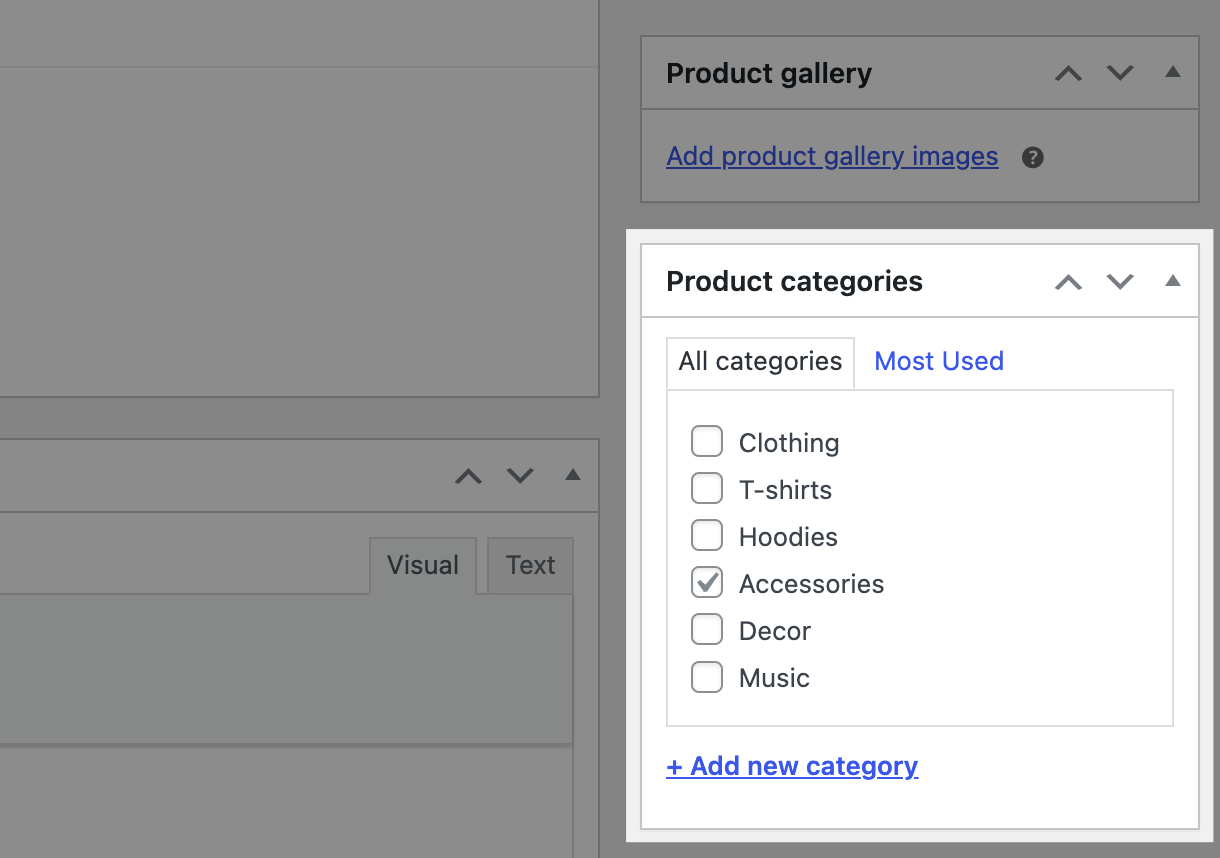
You can also add a category while creating a product. Use Add New Product Category inside the Product Categories box on the product screen.
How to Reorder Categories
You can drag and drop categories into your preferred order. WooCommerce uses that order on the front end, in widgets and in category and subcategory views.

One catch: if you sort the list by Name, Description, Slug, or Count, drag and drop stops working. Clear that sorting first.
How to Add Categories to Your Menu
Customers need a way in. Your menu is the fastest one. The steps depend on your theme type.
Classic theme:
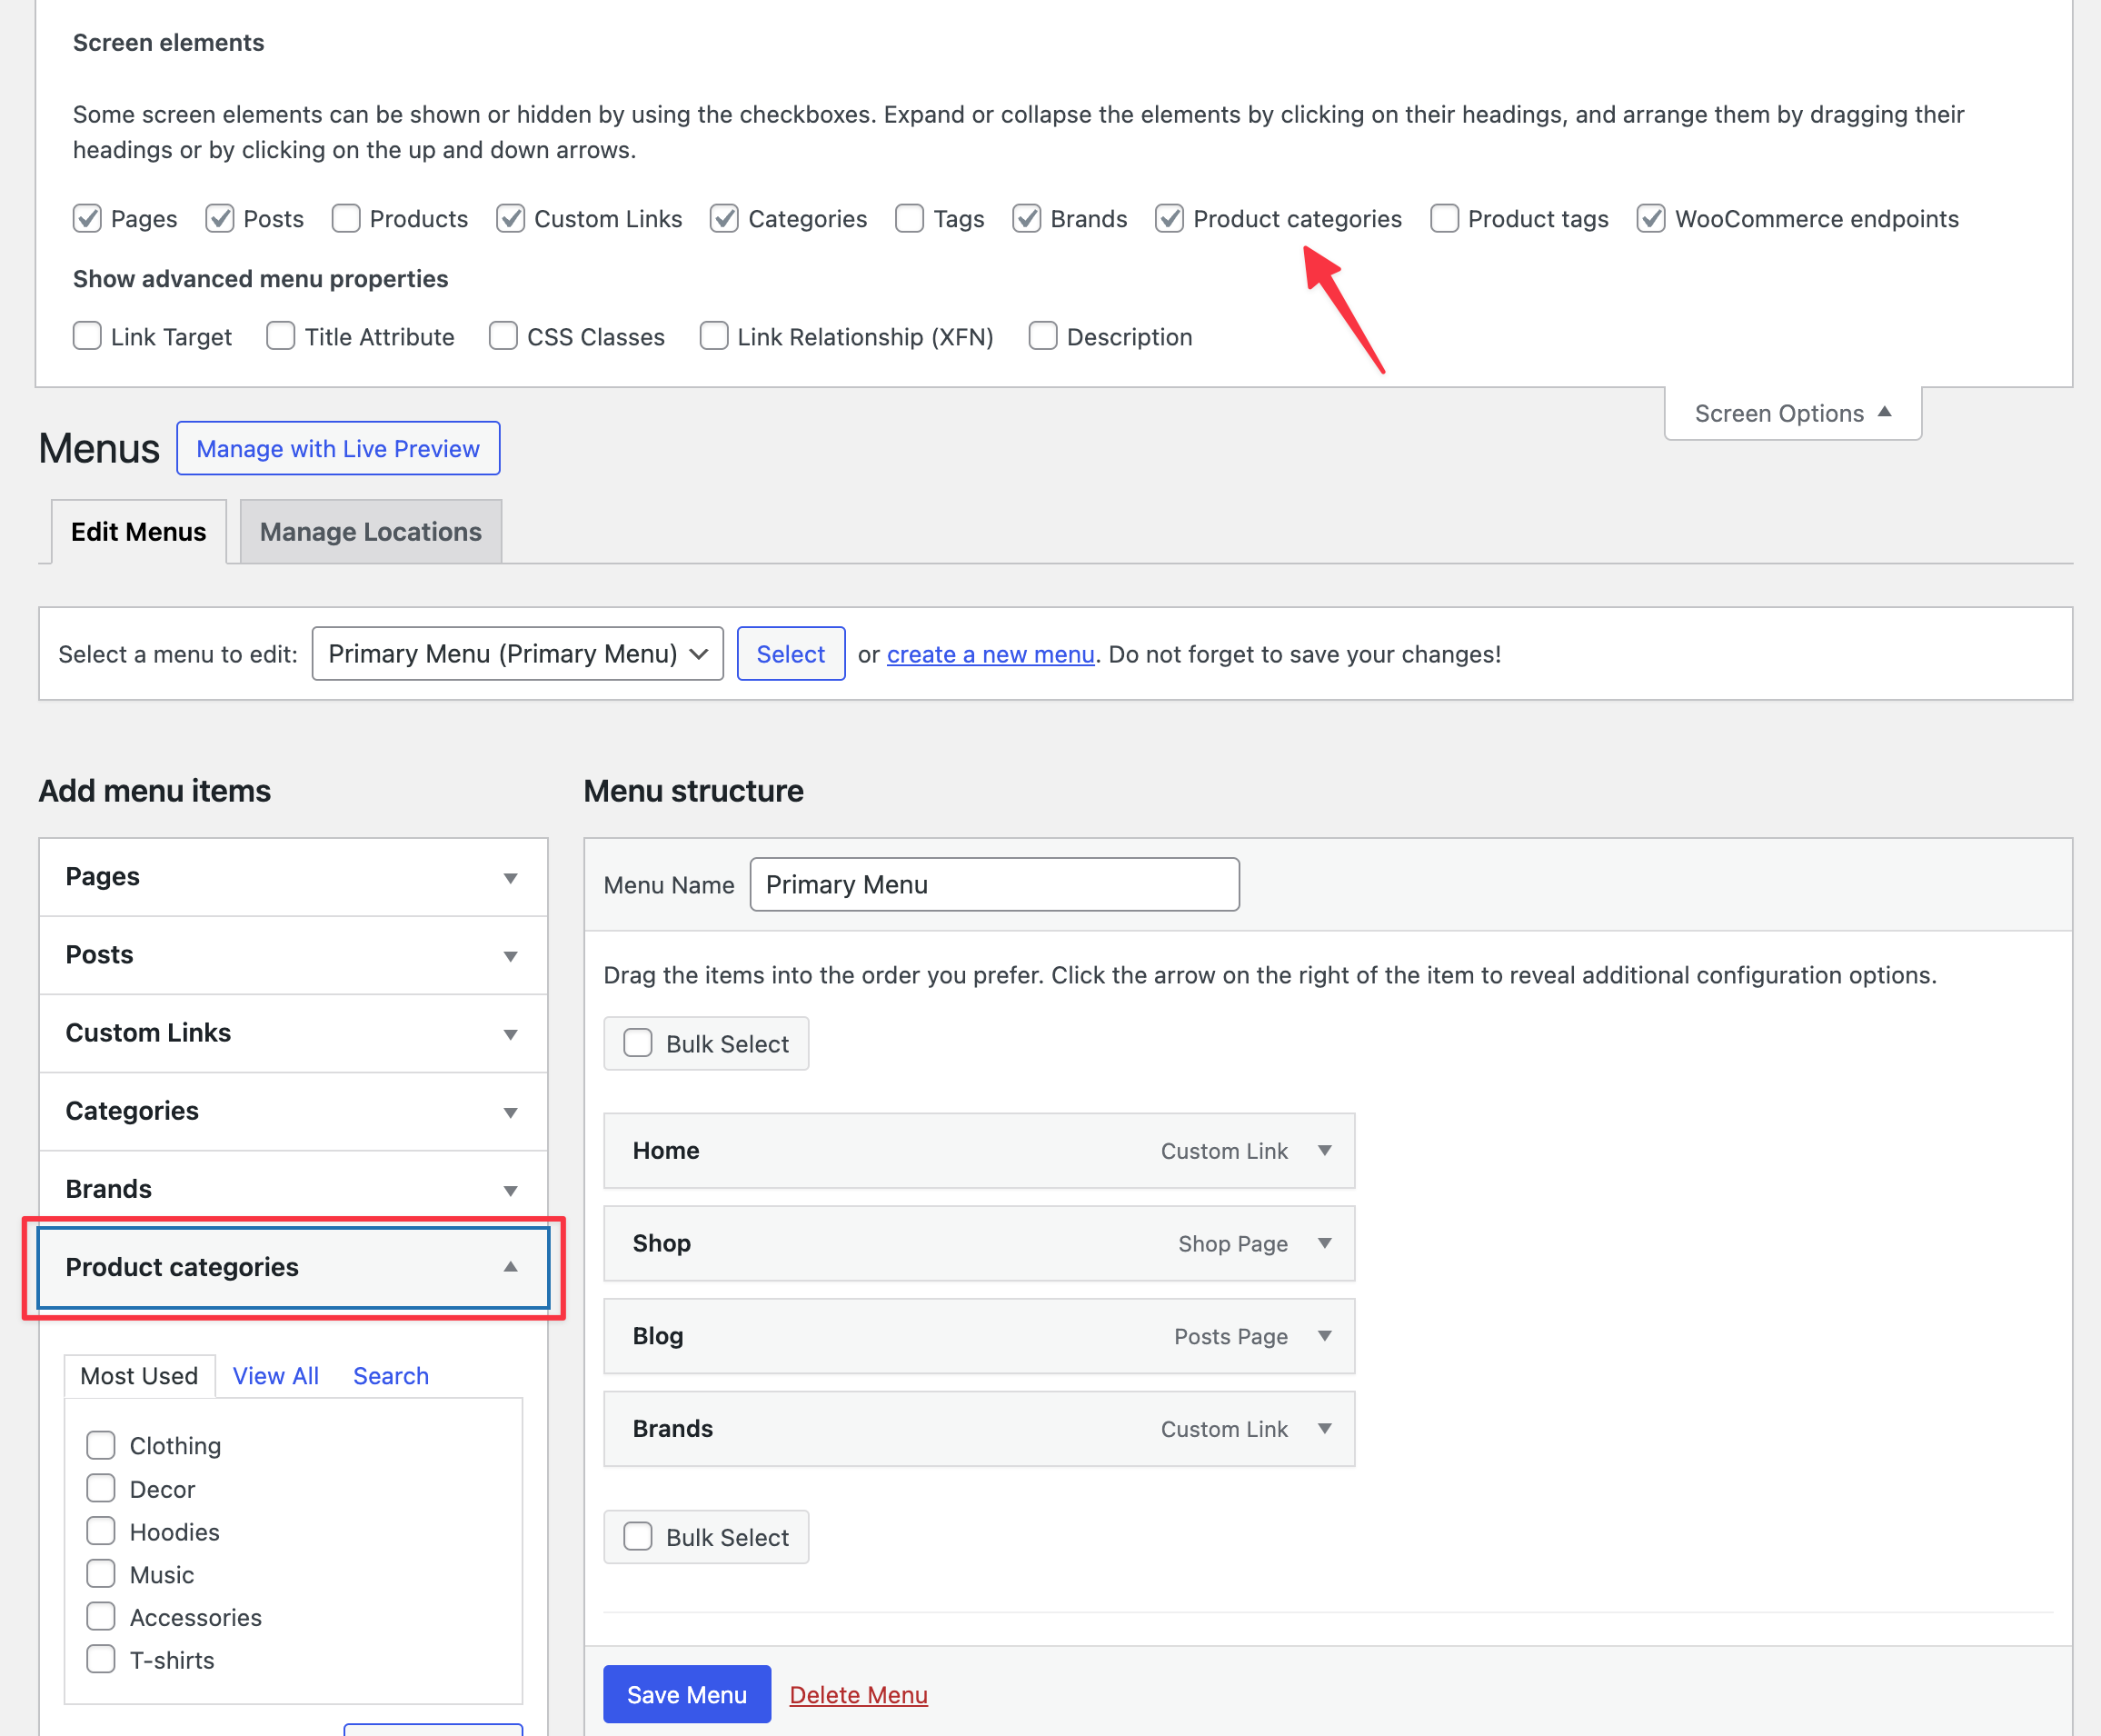
- Go to Appearance → Menus.
- Open Screen Options (top right) and tick Product categories.
- Use the new Product categories tab in the sidebar to add categories to your menu.
Block theme:
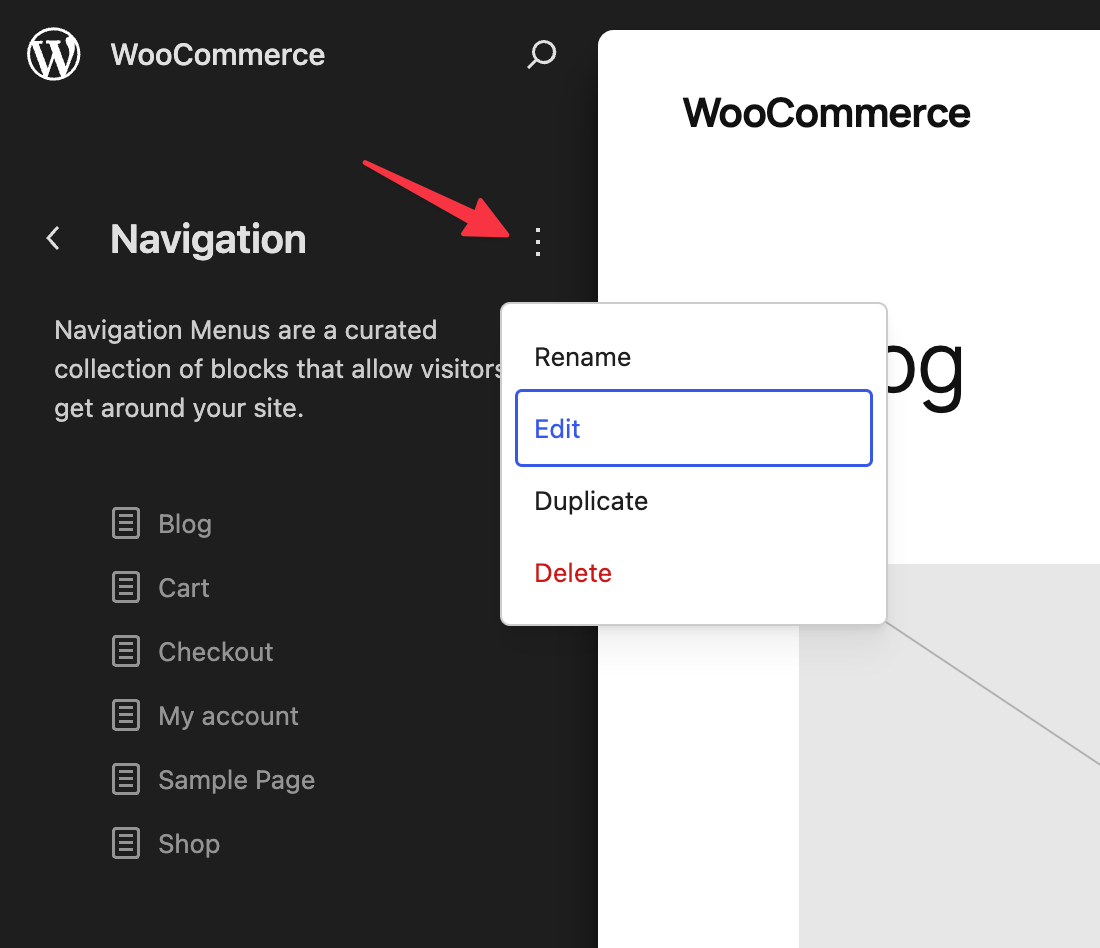
- Go to Appearance → Editor → Navigation and choose your menu.
- Open the three-dot menu and choose to edit it.
- Click the plus icon, choose Add block, and search for Product Category Link.
- Pick the category to add.
Tips for a Clean Category Structure
These are practical suggestions, not WooCommerce rules:
- Name categories the way customers talk. “Men’s Shoes” beats “Footwear M.”
- Write a short, unique description for your main categories, if your theme displays it.
- Don’t create a category for a single product. A tag or attribute may fit better.
- Review your list every few months. Merge or rename categories that no longer fit.
How to Manage Product Tags
Tags are labels you stick on products. Unlike categories, tags have no hierarchy. There are no “sub-tags.”
That makes tags useful for traits that cut across categories. Picture a fashion store. Categories might be Men’s, Women’s, and Children’s. Tags like Cotton, Polyester, or Water-Resistant mark the material, no matter the category. A customer who loves cotton can click the “Cotton” tag and see every cotton item.
Three Ways to Add Product Tags
1. From Products → Tags. Enter a name, an optional slug, and an optional description. Click Add new tag.
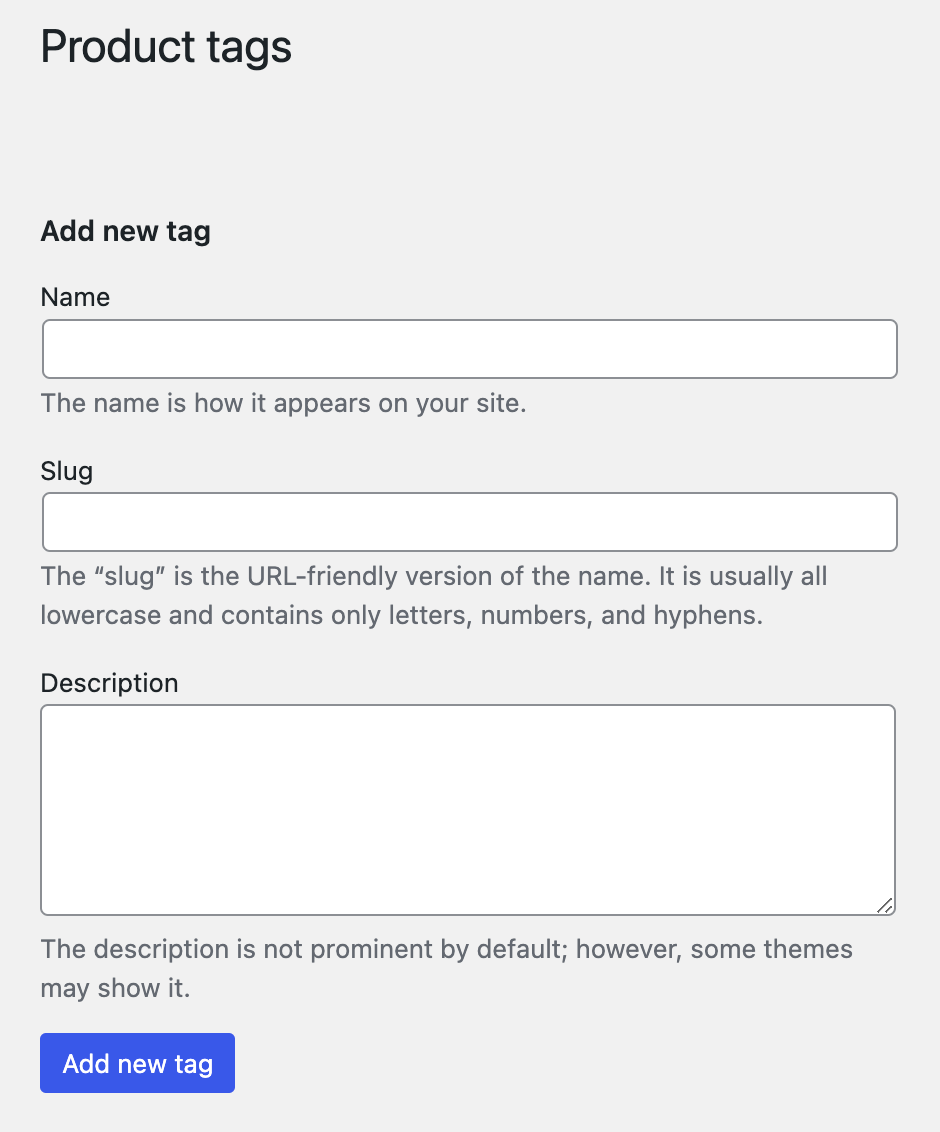
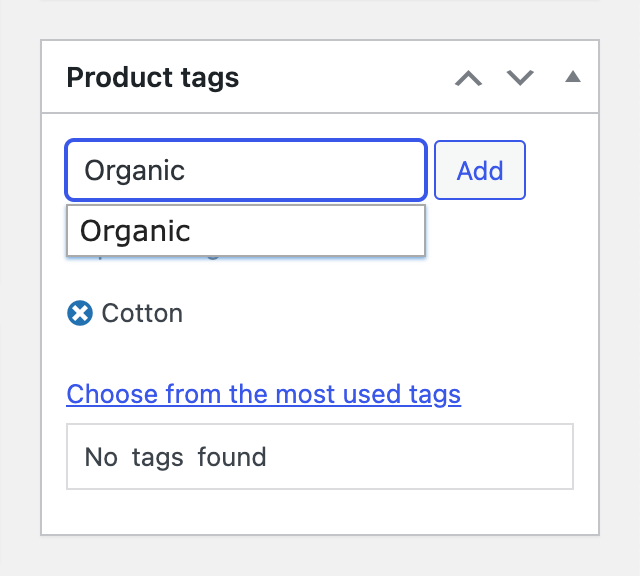
2. From the product edit screen. In the Product Tags box, type a tag name and click Add. Existing tags appear as you type. You can also click Choose from the most used tags.
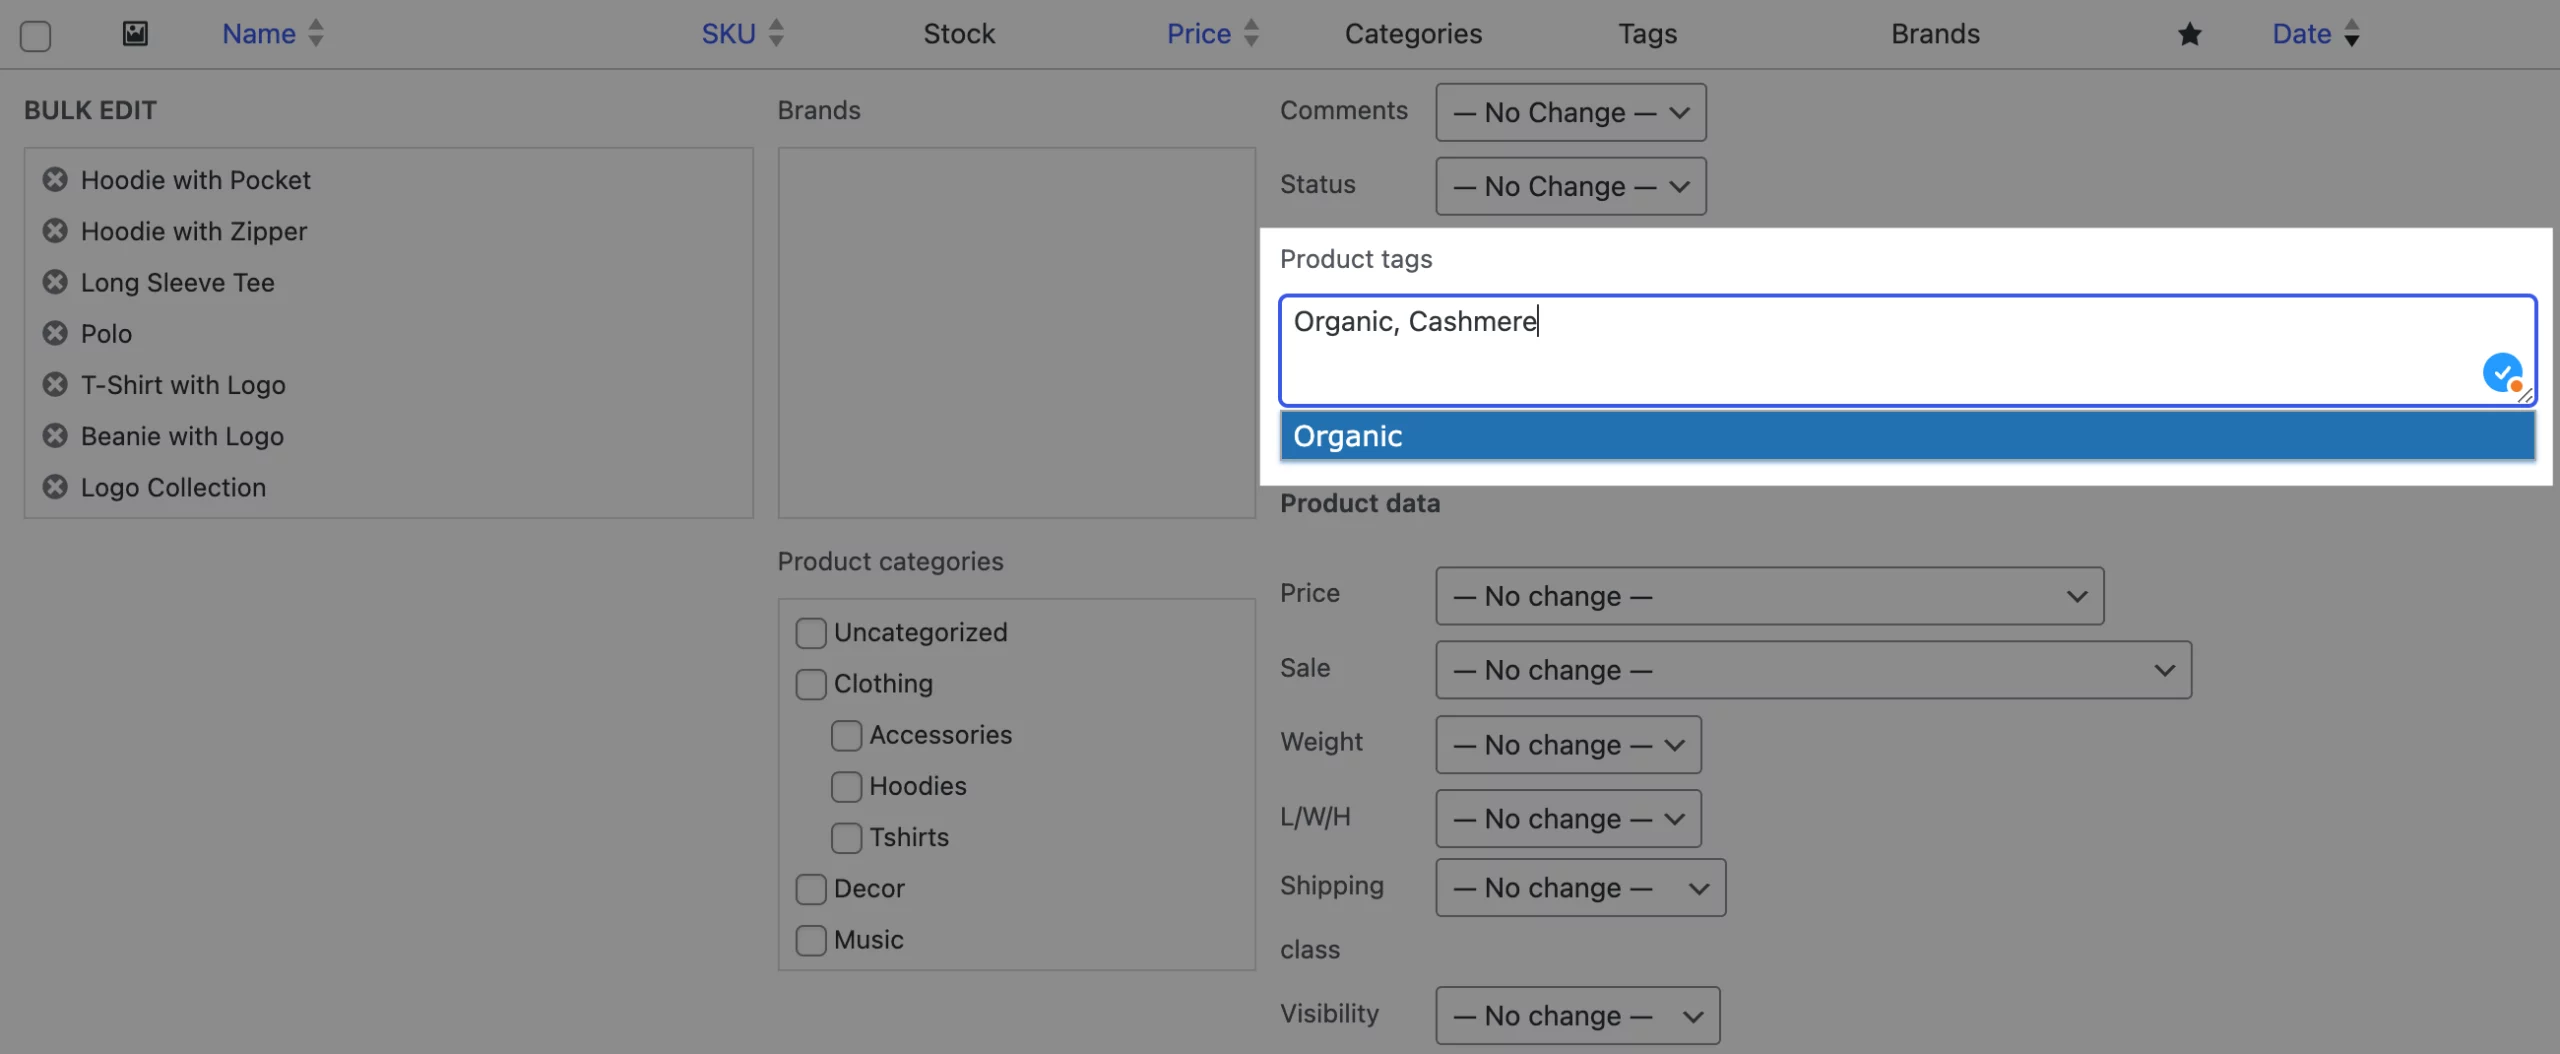
3. With bulk edit. Go to Products → All Products. Tick the products you want. Choose Bulk actions → Edit, then type tags into the Product tags field.
How to check it worked: Click a tag name on a product page, or click View next to it in Products → Tags. You’ll see the tag’s landing page.
How to Manage Product Attributes
Attributes do two jobs:
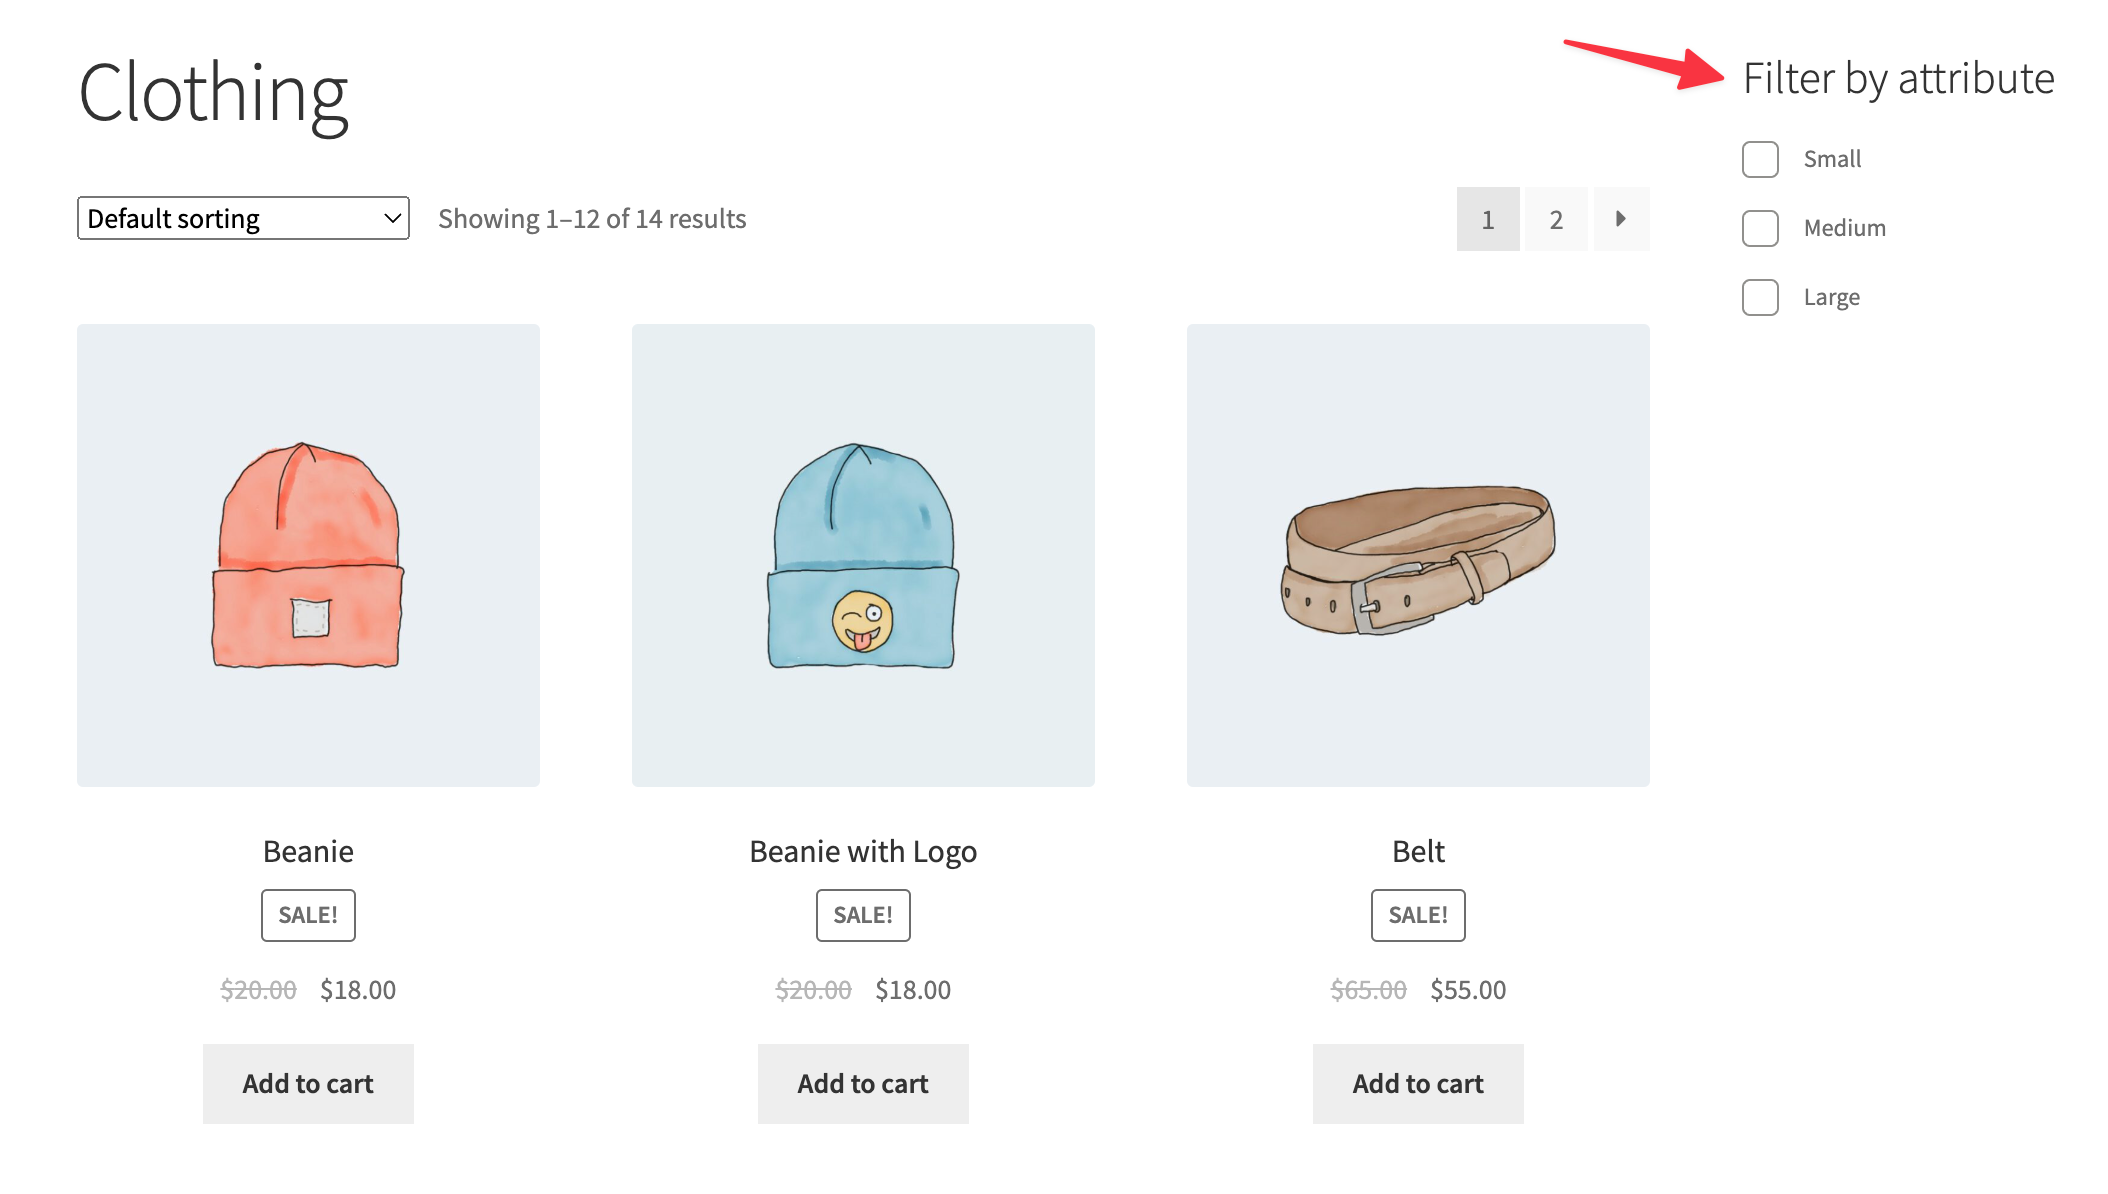
- They help customers filter products (for example, by color or size).
- They define variations in variable products. A shirt with Color and Size attributes can have a variation for each pair.
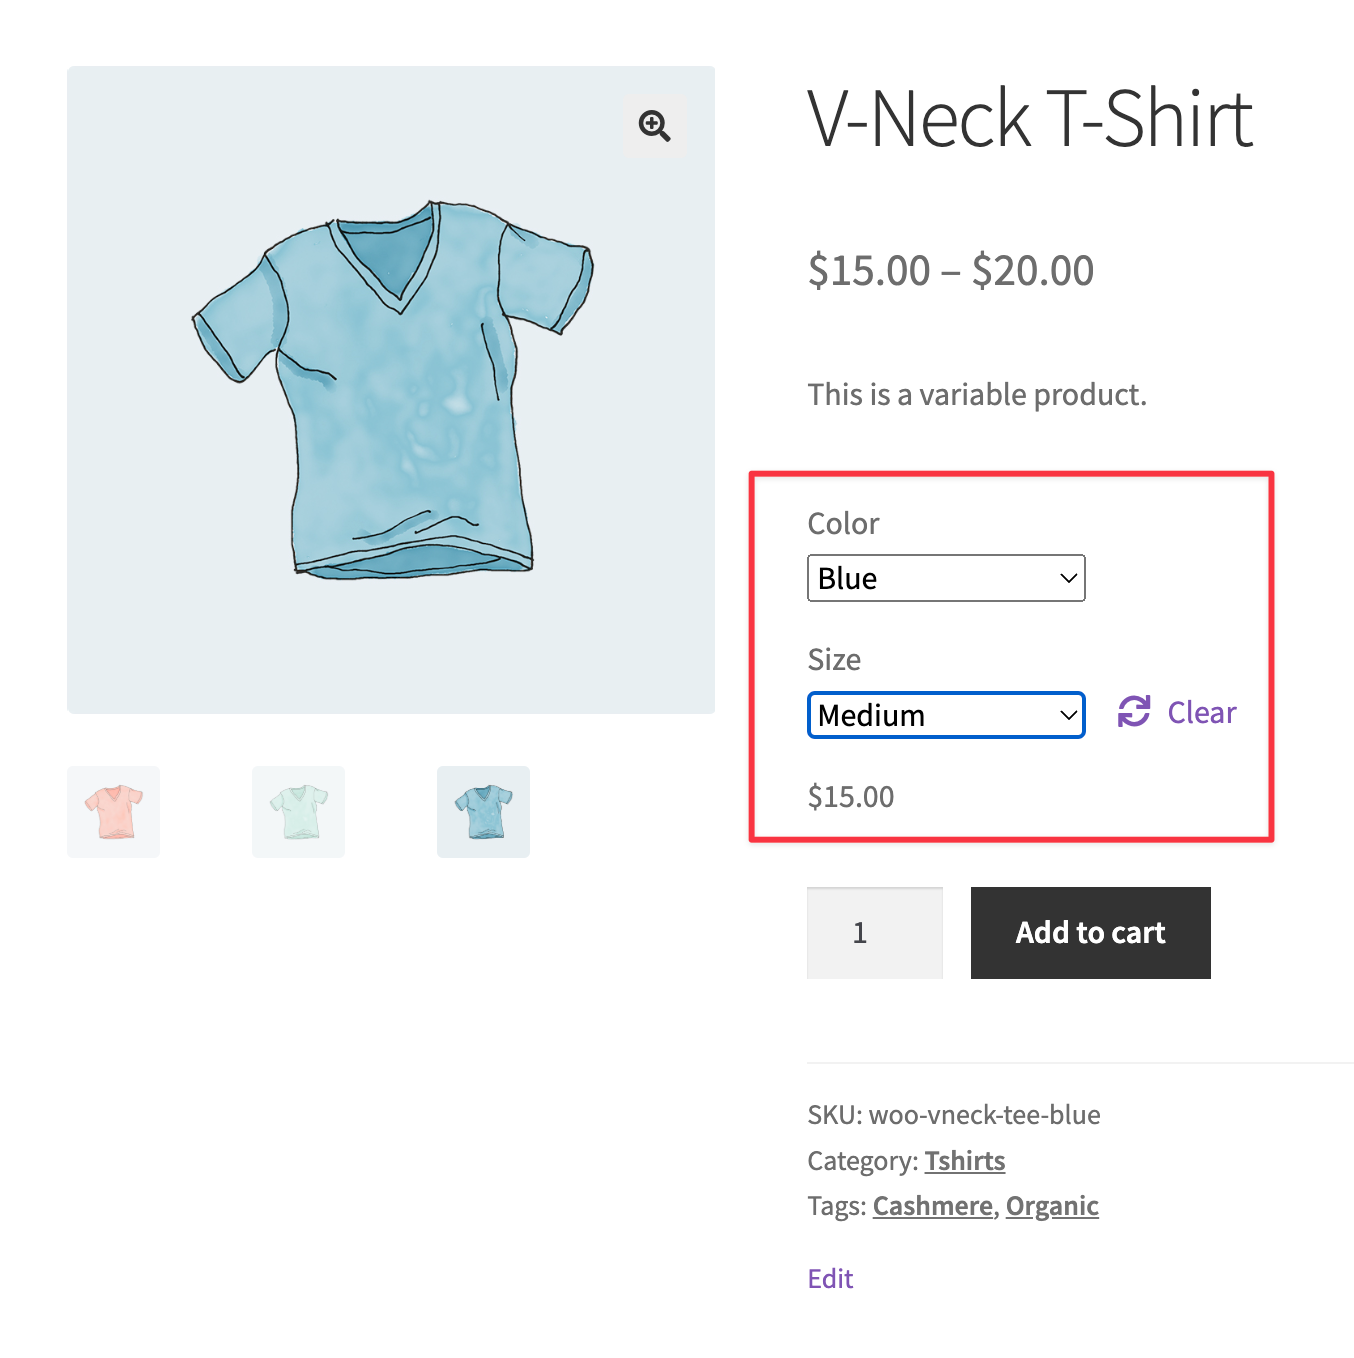
An attribute has a name and terms. The name is “Size.” The terms are “S,” “M,” “L,” and so on.
Global vs Custom Attributes
You can create attributes in two ways:
- Global attributes work across your whole store. You set them up once, then reuse them on any product.
- Custom attributes live on a single product. Other products can’t use them.
WooCommerce recommends global attributes in most cases. Here is why. Suppose your team decides to rename “Blue” to “Cerulean.” With a global attribute, you change it once. Every product updates.
How to Create a Global Attribute
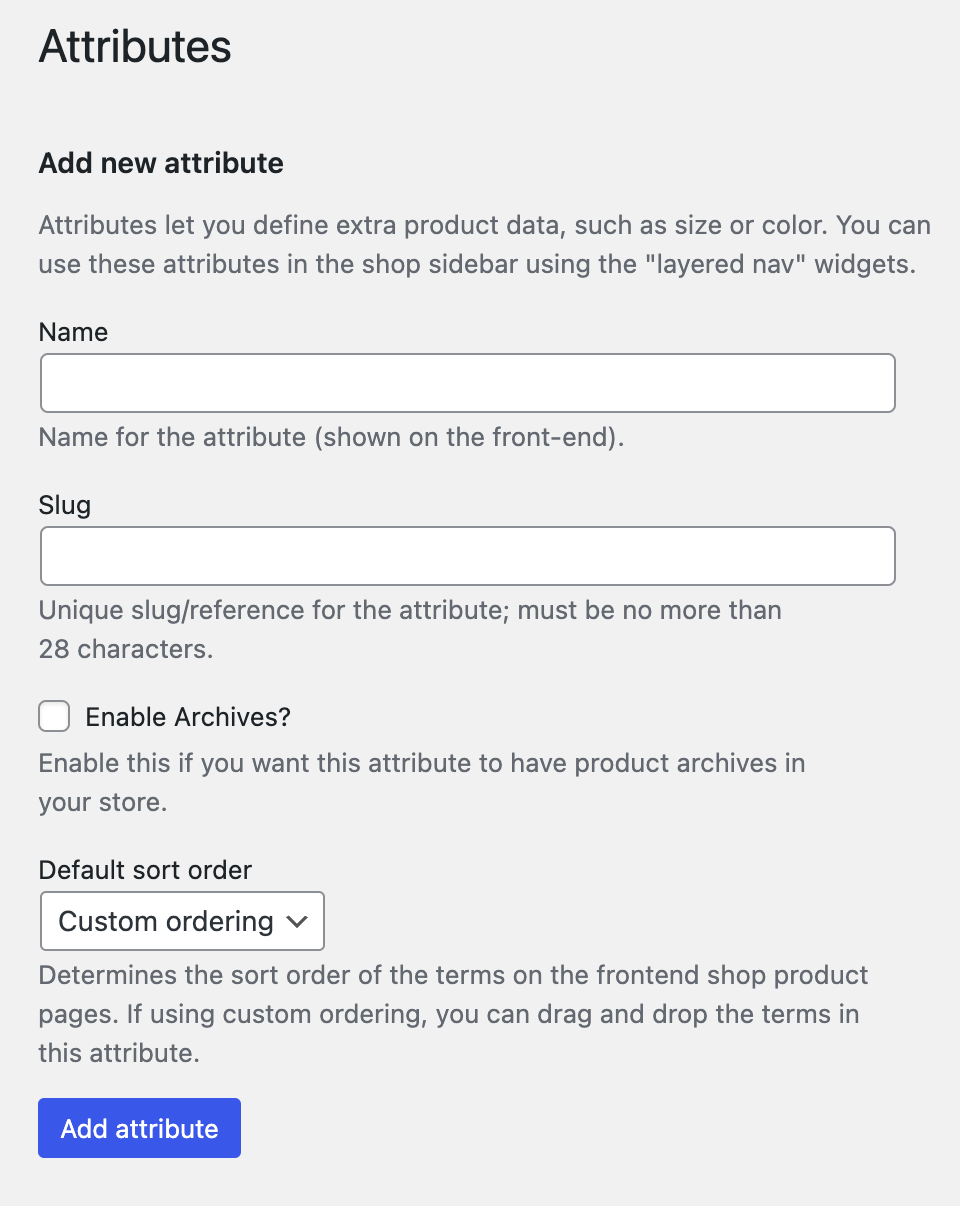
- Go to Products → Attributes.
- Enter a Name.
- Add a Slug (optional).
- Pick a Type. Most attributes use Select.
- Tick Enable Archives if you want a page listing all products with that attribute. For example,
yourstore.com/color/black/would list all black items. - Choose a Default sort order: Name, Name (numeric), Term ID, or Custom ordering. Use “Name (numeric)” for number values like shoe sizes. For variable products, this order also sets the order of options in the product dropdown.
- Click Add Attribute.
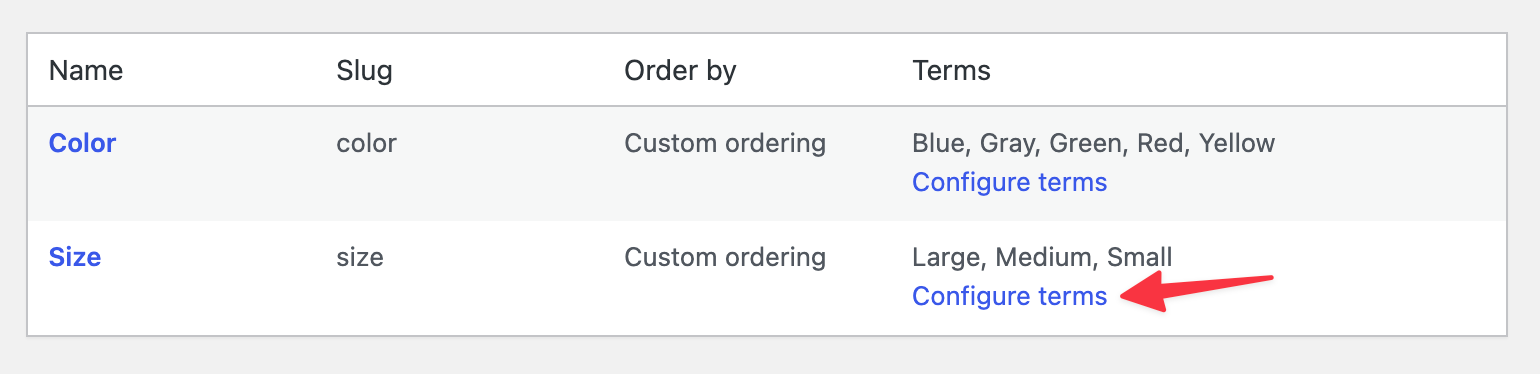
Now add the terms. Click Configure terms next to your new attribute. Type a name for each option, add a slug and description if you like, then click Add new. If you chose Custom ordering, drag terms into place here.
How to Add a Global Attribute to a Product
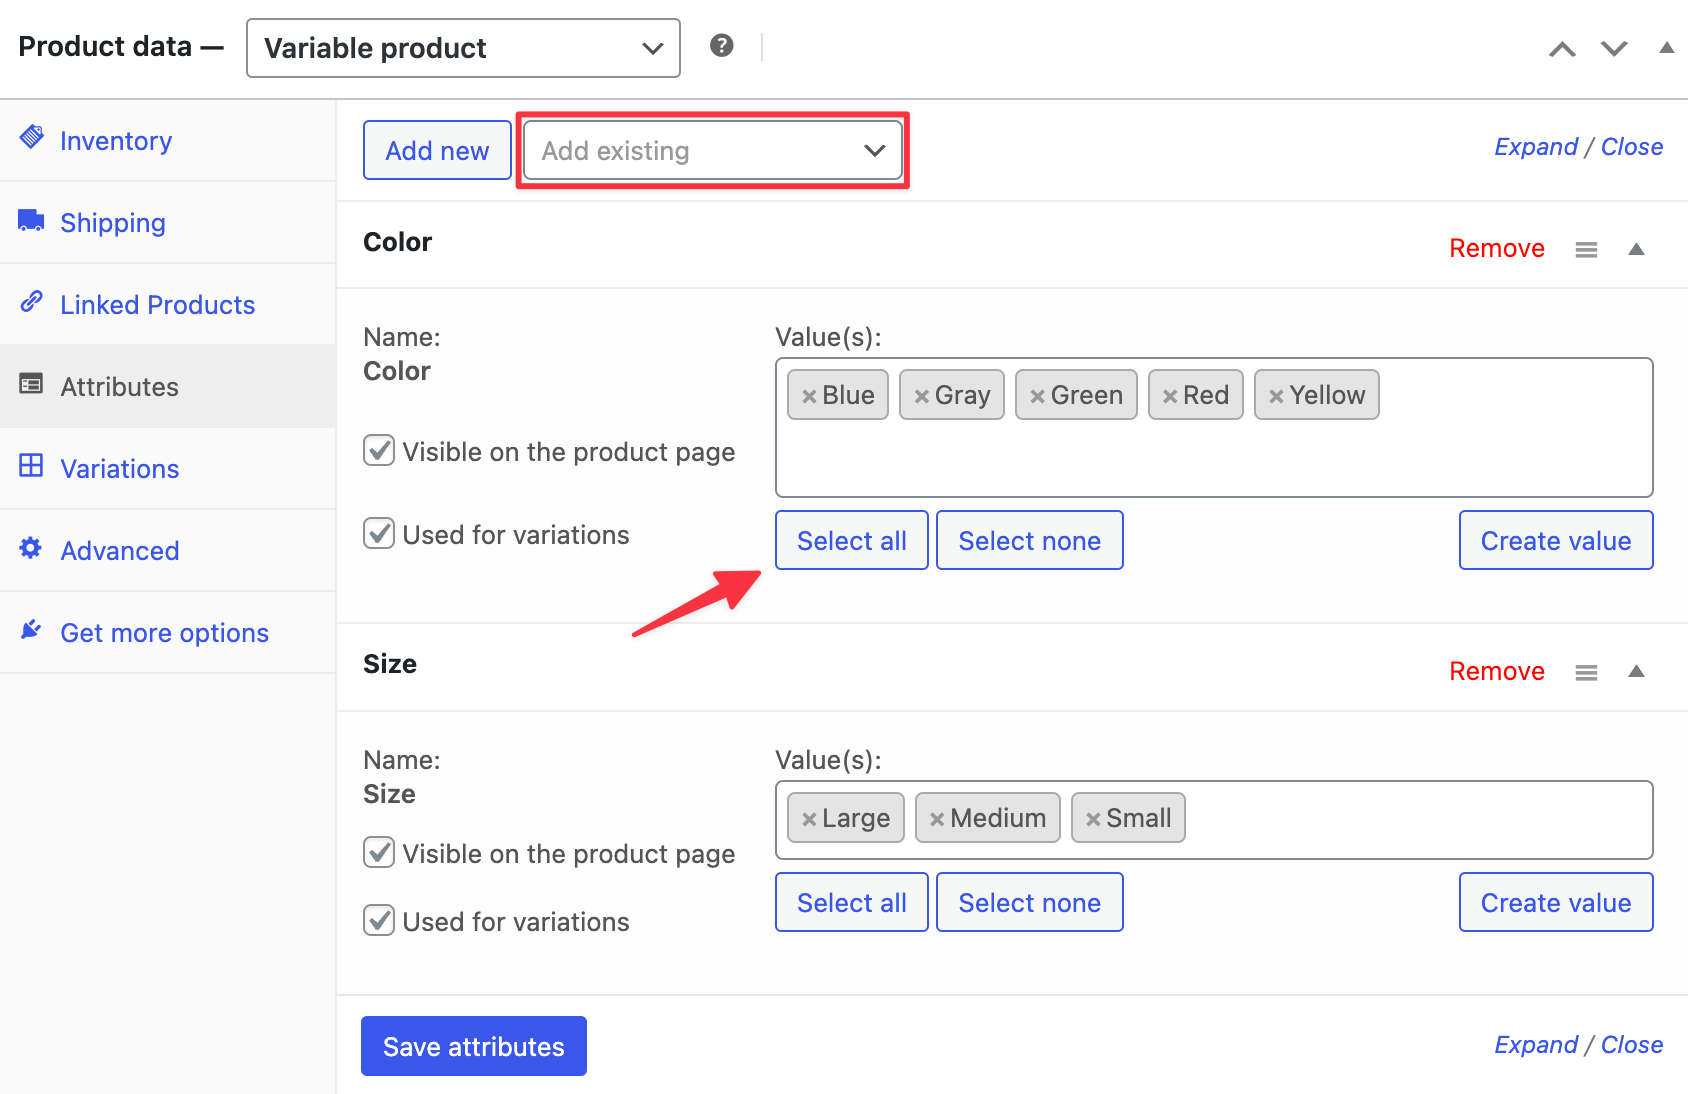
- Open Products → Add Product (or edit one).
- In the Product data box, click the Attributes tab.
- Choose your attribute from the Add existing dropdown.
- Select values one by one, or click Select all.
If you use Select all, values are added in the attribute’s sort order. That is the order customers will see.
To make variations from these attributes, follow WooCommerce’s variable product guide.
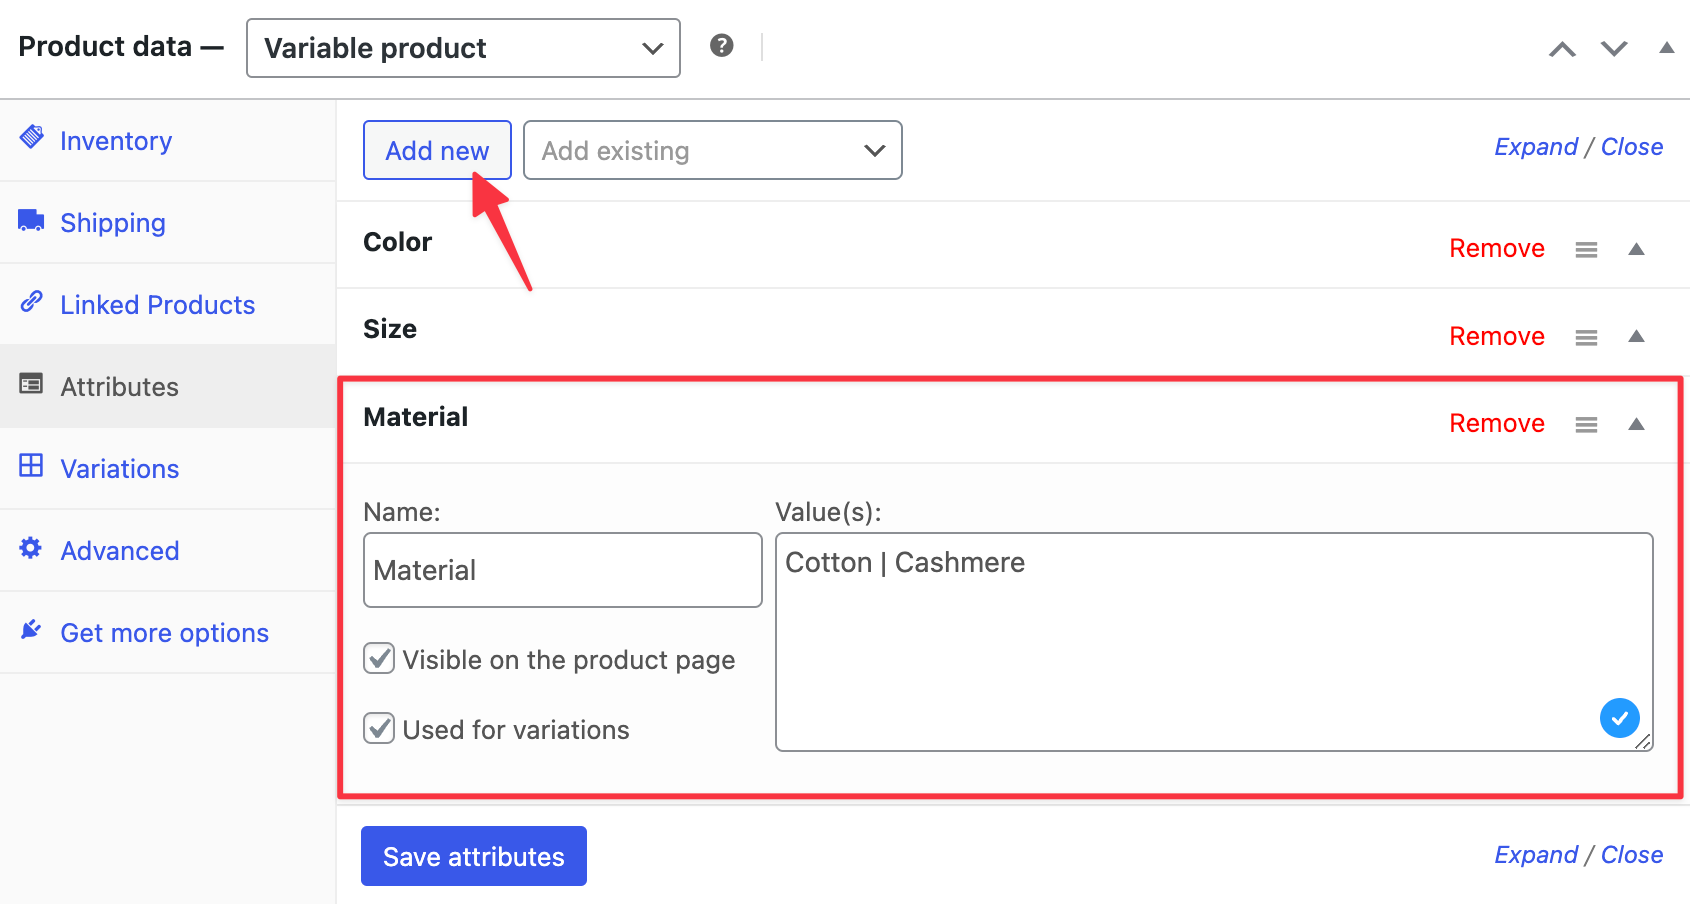
How to Add a Custom Attribute
Use this for one-off details on a single product.
- In the Attributes tab, click Add new.
- Name the attribute.
- Type the values in the box, separated by the pipe symbol
|.
A Note on Core Color Swatches (Experimental)
WooCommerce now includes an experimental “Color swatches for attributes” feature. It adds a Color / image attribute type. Two limits matter:
- It is off by default. Turn it on under WooCommerce → Settings → Advanced → Features.
- The toggle only appears on block themes. On a classic theme, it isn’t listed.
Because it is experimental, test it on a staging site first. Source: WooCommerce’s taxonomy documentation, last modified 11 September 2026.
Which One Should You Use? A Simple Decision Guide
Ask one question about each detail you want to show.
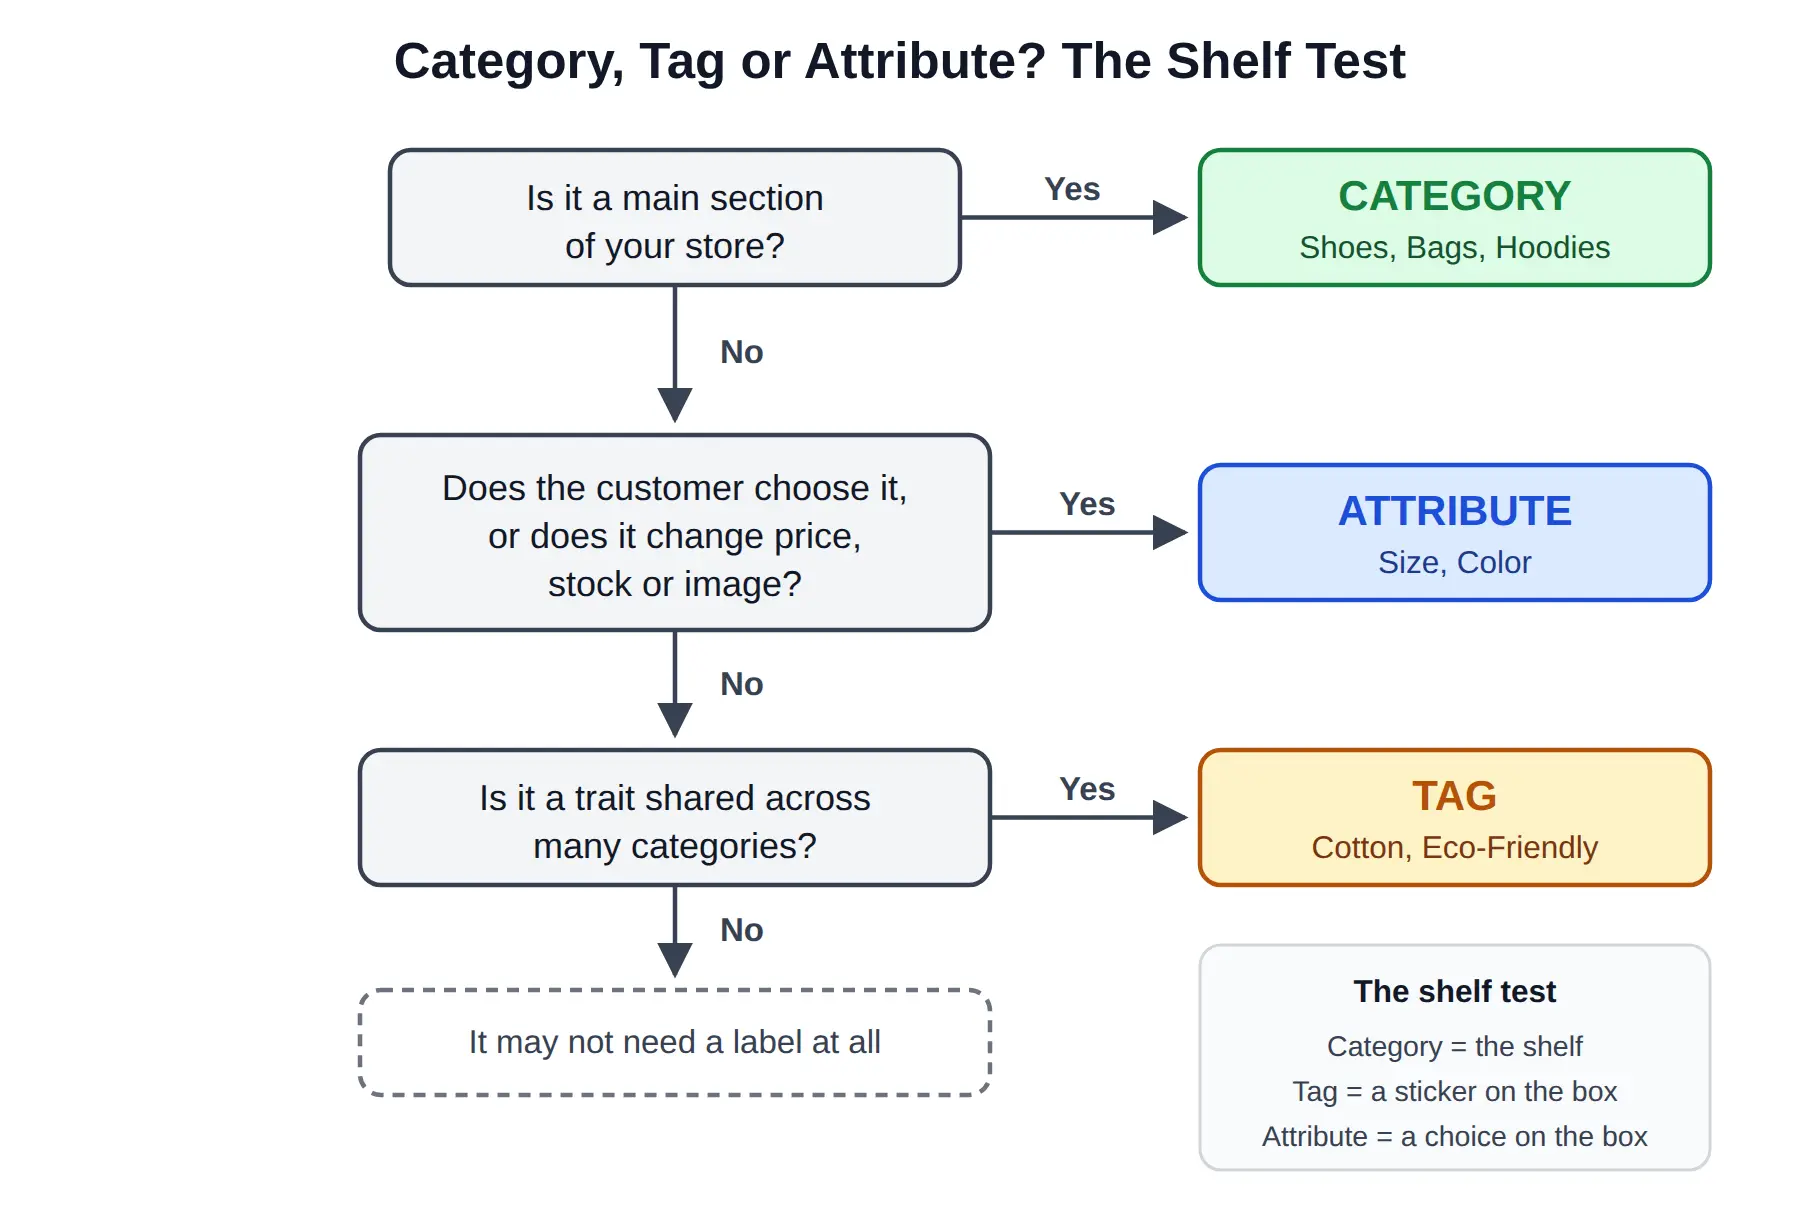
- “Is it a main section of my store?” Use a category. (Shoes, Bags, Hoodies)
- “Does it apply to products in many categories, but customers won’t choose it before buying?” Use a tag. (Eco-Friendly, Cotton)
- “Does the customer choose it, or filter by it?” Use an attribute. (Size, Color)
- “Does it change price, stock, or image for the same product?” Use an attribute, and build a variation.
Still unsure? Try the “shelf test.” A category is the shelf in the store. A tag is a sticker on the box. An attribute is a choice on the box, like the size.
Common Mistakes to Avoid
Using tags as categories. If you have a tag like “Shirts,” it should probably be a category.
Nesting too deep. Every extra level adds a click. WooCommerce advises keeping it simple.
Leaving “Uncategorized” in place. Products without a category land there. Rename it or switch the default.
Making one-off attributes when they’ll repeat. If “Color” appears on ten products, make it global.
Sorting the category list, then wondering why drag and drop broke. Clear the column sorting first.
Skipping descriptions and slugs. They are optional, but clear names and slugs make your store easier for customers to browse and for you to manage.
Managing Attributes by Hand vs Using a Plugin
Let’s be honest about the two paths.
Doing it by hand is fine when your store is small, you have few variable products, and plain dropdowns suit your products. Everything above works with core WooCommerce alone. You don’t need a plugin to build a solid taxonomy.
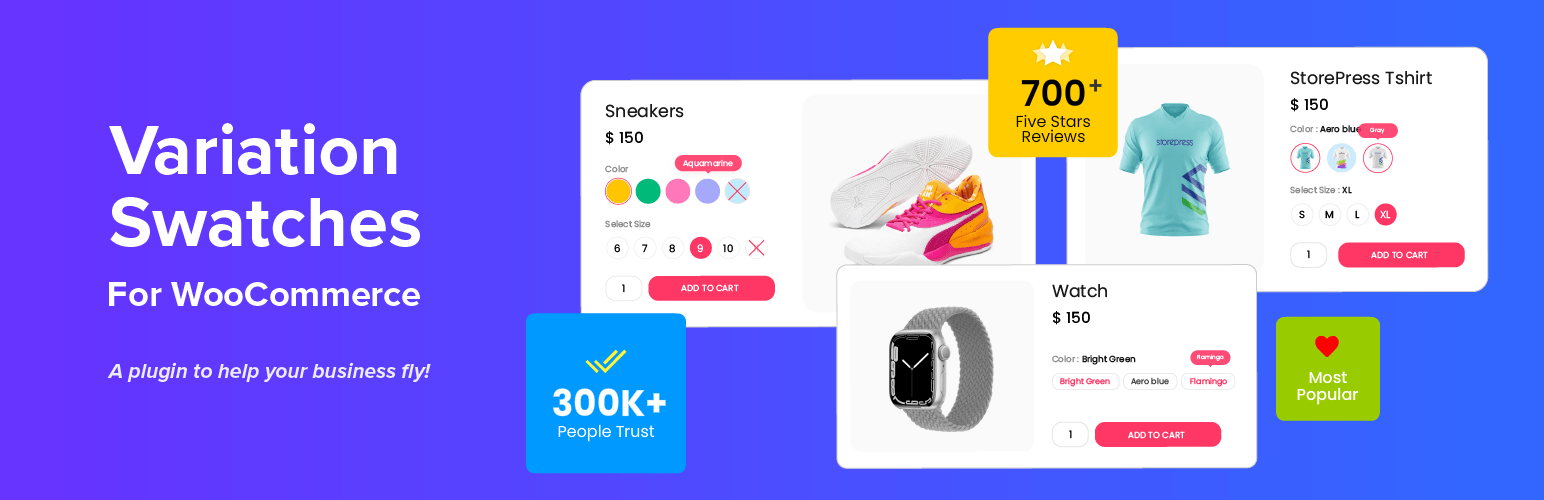
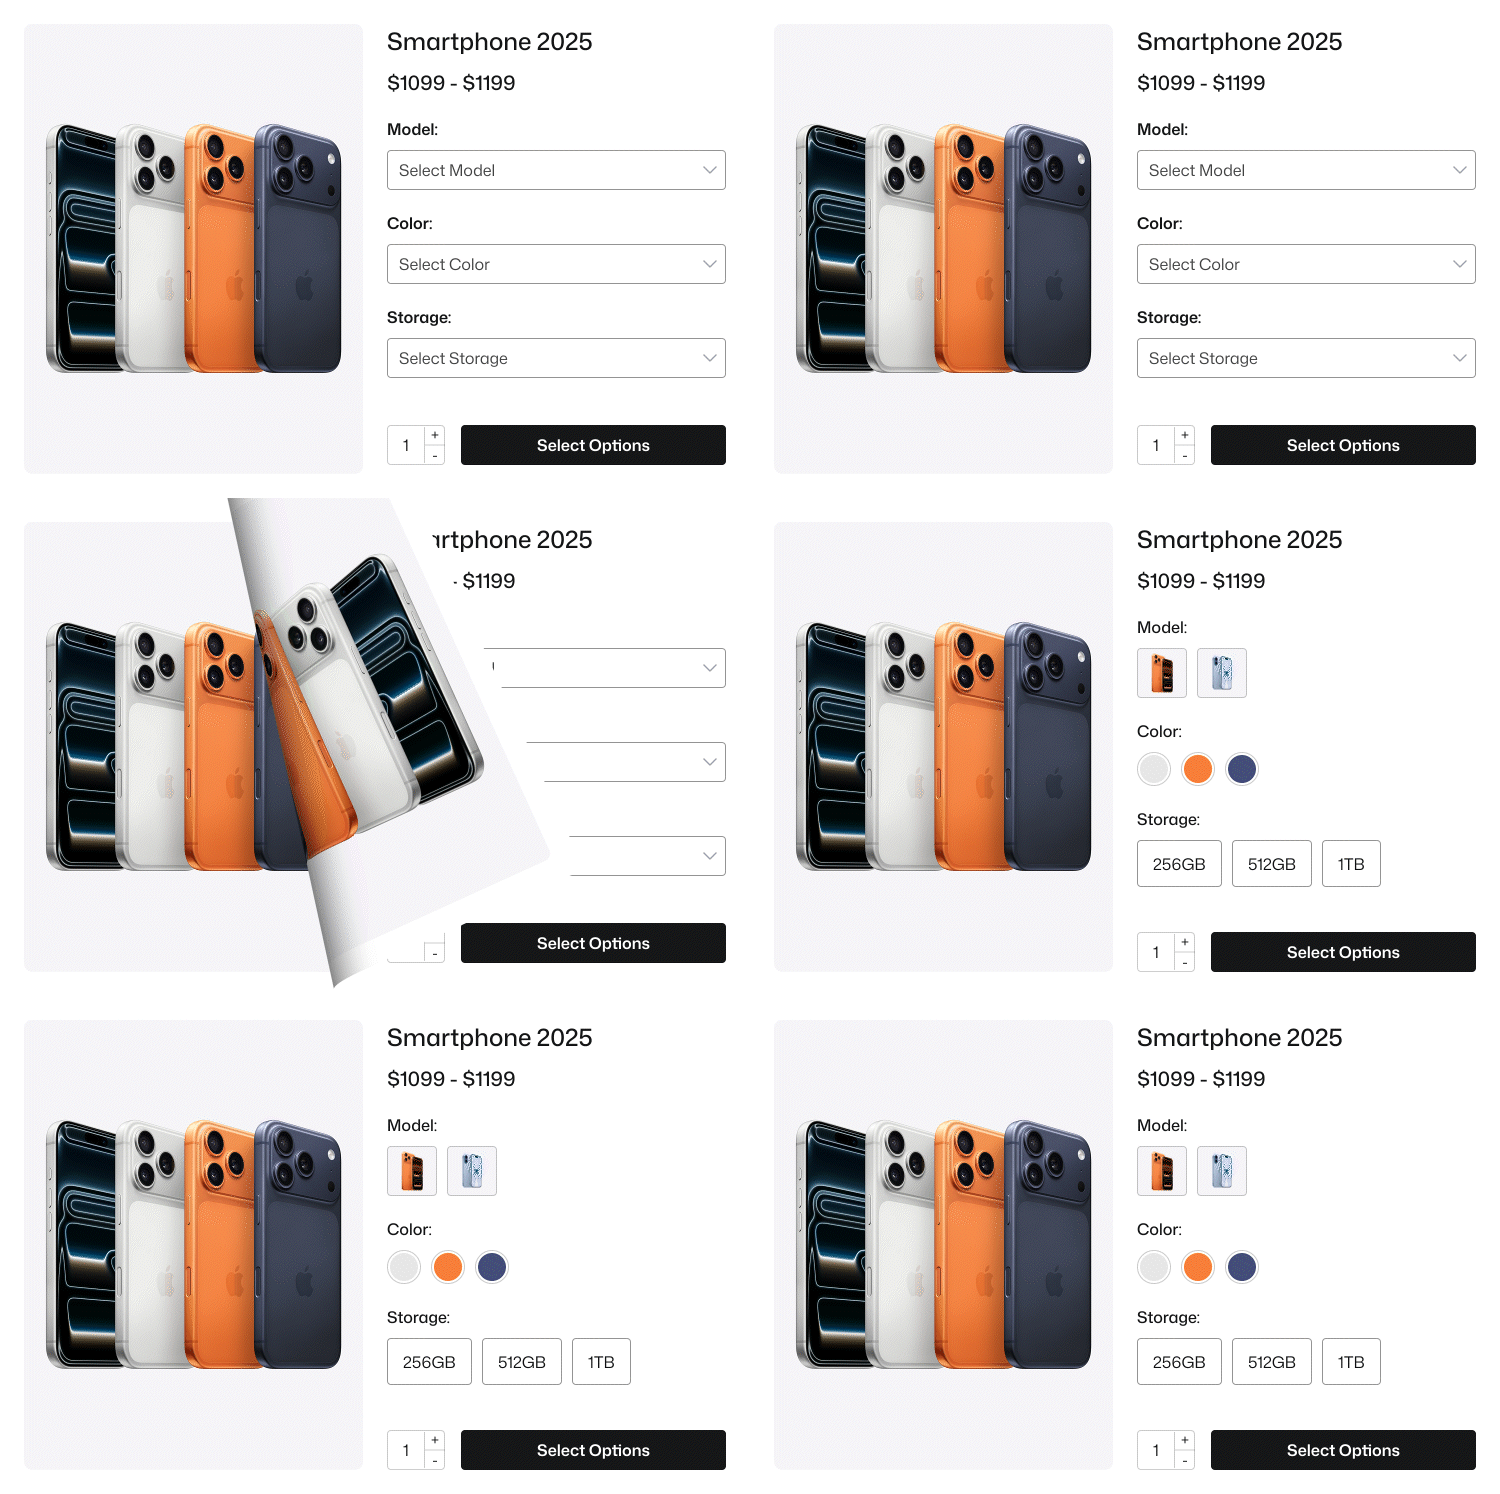
A plugin helps when the way attributes look matters. By default, attribute terms show as dropdowns on the product page. Customers can’t see the color before they pick it.
Variation Swatches for WooCommerce changes how those attribute terms are shown. It replaces dropdowns with color, image, button, and radio swatches. It can also show swatches on shop and archive pages, and turn the “Filter Products by Attribute” widget into swatches. You can also override the look on a single product.
You still create attributes and terms in Products → Attributes, as shown above. The plugin changes what customers see, not how you organize your catalog.
There is a free version on WordPress.org. Premium adds more.
Want to see it in action? Try the live demo or read our color swatches guide.
FAQ
What is product taxonomy in WooCommerce?
Product taxonomy is how you group and label products. WooCommerce has three main types: categories, tags, and attributes. Categories create the main sections. Tags mark shared traits. Attributes define options like size and color. You manage all three from the Products menu.
What is the difference between categories and tags in WooCommerce?
Categories are hierarchical, so they can have parent and child levels. Tags are flat, with no sub-tags. Use categories for broad sections, such as Shirts. Use tags for traits shared across categories, such as Cotton. Every product must have a category, but tags are extra labels.
How many subcategory levels can I create?
Subcategories can be nested several levels deep. Each subcategory can have only one parent. WooCommerce recommends keeping the structure as simple as possible, so customers reach products in a few clicks.
Can I delete the “Uncategorized” category?
Not while it is the default category. First, click Make default on another category. After that, you can delete “Uncategorized.” You can also just rename it.
Should I use global or custom attributes?
Use global attributes in most cases. You set them up once and reuse them on any product. Renaming a term updates everywhere. Use custom attributes only for details that belong to a single product.
Do I need attributes to create variable products?
Yes. Variations are built from attributes such as Color and Size. Add the attributes to the product first, then use them to define variations.
How do I add product categories to my menu?
On a classic theme, go to Appearance → Menus, enable Product categories in Screen Options, and add them from the sidebar. On a block theme, edit your menu in Appearance → Editor → Navigation and add the Product Category Link block.

