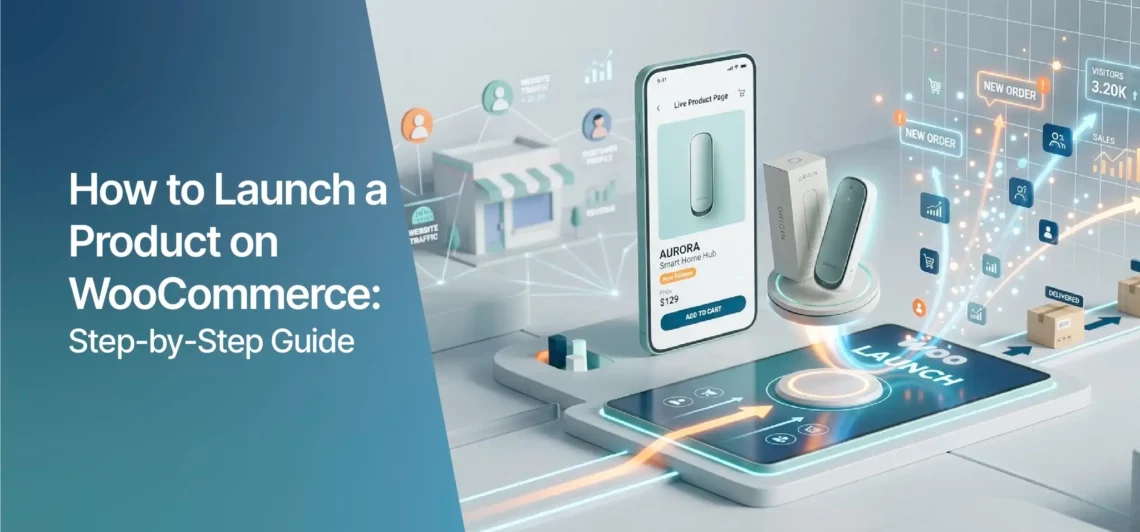
Launching a product successfully on WooCommerce isn’t just about uploading an image and hitting “publish.” It’s a strategic process that combines market research, technical setup, customer psychology, and marketing execution.
Whether you’re introducing a new skincare line, a tech gadget, or handmade crafts, knowing how to launch a product effectively can mean the difference between a quiet debut and a bestseller. This guide walks you through every critical stage from pre-launch preparation to post-launch optimization ensuring your WooCommerce store is primed for conversion and visibility.
We’ll also highlight how essential WooCommerce plugins like Variation Swatches For WooCommerce, Additional Variation Images Gallery For WooCommerce, PikSprout – Image Hotspot for Gutenberg, and Payment Gateway – 2Checkout for WooCommerce can elevate your product presentation, streamline checkout, and boost customer confidence. These tools aren’t just nice-to-haves-they’re game-changers when launching a product that stands out in a crowded marketplace.
Why a Strategic Product Launch Matters on WooCommerce
A well-executed product launch does more than generate initial sales-it builds momentum, collects valuable customer feedback, and establishes your brand’s credibility. On WooCommerce, where competition is fierce and customer attention spans are short, a haphazard launch can result in missed opportunities and wasted ad spend.
Think of your product launch as a theatrical premiere: the buzz starts weeks in advance, the experience is seamless, and every detail is designed to impress. With WooCommerce’s flexibility, you have the power to create that experience-but only if you plan meticulously.
From optimizing product pages to integrating the right tools, each step contributes to a launch that converts browsers into buyers.
Key Benefits of a Structured Launch
- Higher conversion rates through optimized product pages and clear calls to action.
- Improved SEO rankings as fresh content and user engagement signal relevance to search engines.
- Stronger customer trust via professional presentation and secure payment options.
- Data-driven insights from launch metrics to refine future offerings.
Step 1: Validate Your Product Idea Before Launch
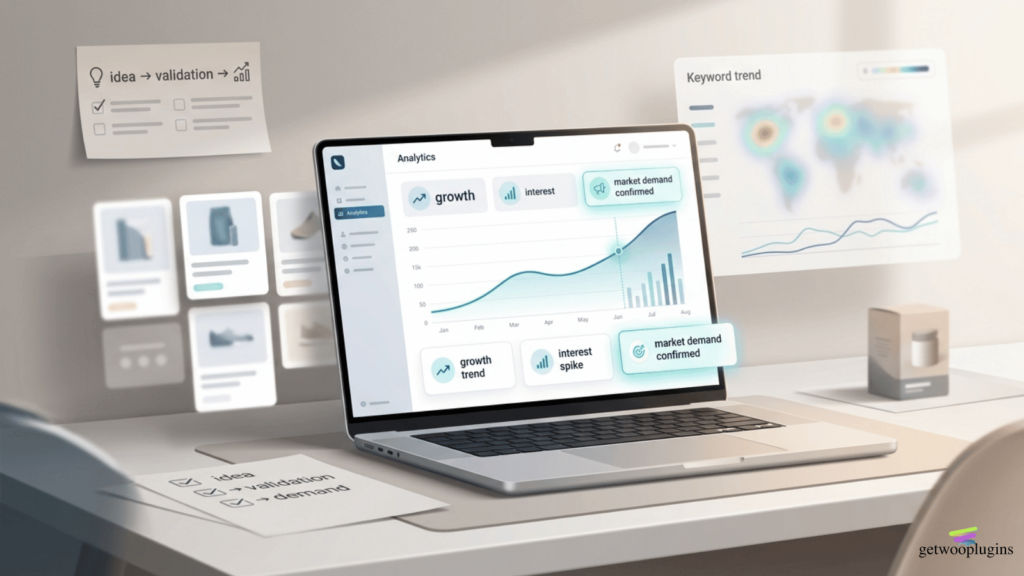
Before investing time and money into a full launch, validate that there’s real demand for your product. Skipping this step is one of the most common reasons product launches fail. Use market research tools, competitor analysis, and customer surveys to assess interest.
Start by identifying your target audience: Who are they? What problems do they face? How does your product solve those problems better than existing solutions? Tools like Google Trends, Facebook Audience Insights, and keyword research (using Ahrefs or SEMrush) can reveal search volume and buyer intent.
Next, analyze competitors on WooCommerce. Visit similar stores and note how they present their products, what images they use, how they describe features, and what pricing strategies they employ. This isn’t about copying, but about understanding industry standards and identifying gaps you can fill.
Quick Validation Checklist
- Conduct at least 20 customer interviews or surveys.
- Run a small paid ad campaign to test interest (e.g., Facebook Ads with a “coming soon” landing page).
- Check Google search volume for your product keywords (aim for 500+ monthly searches).
- Review competitor product reviews to identify common complaints or desires.
Step 2: Optimize Your WooCommerce Product Page
Your product page is the heart of your launch. It’s where visitors decide whether to buy or bounce. A high-converting page combines compelling copy, high-quality visuals, social proof, and seamless functionality. On WooCommerce, you have full control over these elements-use it wisely.
Start with the product title. It should be clear, keyword-rich, and benefit-driven. For example, instead of “Wireless Earbuds,” try “Noise-Canceling Wireless Earbuds; 30-Hour Battery & IPX7 Waterproof.” This tells the customer exactly what they’re getting and includes search-friendly terms.
The product description should focus on benefits, not just features. Use short paragraphs, bullet points, and bold text to highlight key advantages. Answer common questions upfront: Is it easy to use? Does it come with a warranty? How fast is shipping?
Enhancing Visuals with the Right Plugins
Images are critical. Shoppers can’t touch your product, so visuals must do the talking. Use high-resolution photos from multiple angles, lifestyle shots, and close-ups of details. But don’t stop there-leverage plugins to make your visuals interactive and informative.
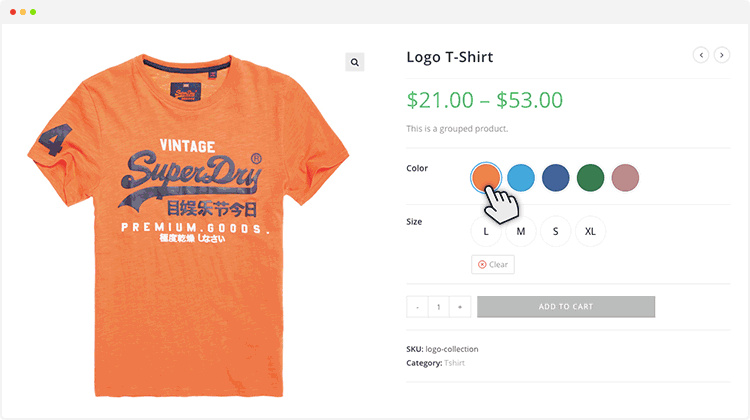
The Additional Variation Images Gallery For WooCommerce plugin allows you to assign unique images to each product variation (like color or size).
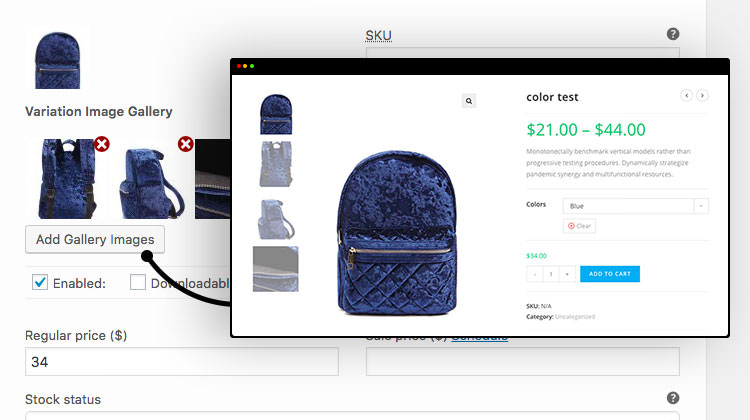
This means when a customer selects “Blue,” they instantly see the blue version-no confusion, no frustration. It reduces returns and increases confidence in purchase decisions.
For complex products, consider PikSprout – Image Hotspot for Gutenberg.
This plugin lets you add clickable hotspots to your product images. For example, on a backpack, you can highlight the waterproof zipper, hidden pocket, or ergonomic straps. When users click, a tooltip explains the feature. It’s an engaging way to showcase value without cluttering your description.
Step 3: Simplify Product Variations with Variation Swatches
If your product comes in multiple colors, sizes, or styles, managing variations can become messy. Default WooCommerce dropdowns are functional but not user-friendly. They slow down the buying process and increase cart abandonment.
That’s where Variation Swatches For WooCommerce shines. This plugin replaces dull dropdown menus with visual swatches-color circles, size buttons, or image thumbnails. Customers can instantly see their options and select with one click.
Imagine selling t-shirts: instead of a dropdown with “Red, Blue, Green,” users see colored circles. They click “Red,” and the product image updates automatically. It’s intuitive, fast, and visually appealing. This small change can significantly boost conversion rates, especially on mobile devices where dropdowns are harder to use.
Best Practices for Using Variation Swatches
- Use high-contrast colors for swatches to ensure visibility.
- Include a “Clear Selection” button for easy resetting.
- Test swatch performance on mobile-ensure touch targets are large enough.
- Combine with the Additional Variation Images Gallery for a seamless visual experience.
Step 4: Build Anticipation with a Pre-Launch Campaign

A product launch isn’t just about the day it goes live-it’s about the buzz you build beforehand. A pre-launch campaign creates urgency, collects early emails, and generates social proof before the first sale.
Start by creating a “Coming Soon” landing page on your WooCommerce site. Offer early access, exclusive discounts, or free shipping to people who sign up. Use a plugin like Mailchimp for WooCommerce to capture emails and automate follow-up sequences.
Promote your pre-launch across social media, email newsletters, and paid ads. Tease behind-the-scenes content: “We’re finalizing the packaging-what do you think?” or “Only 50 units available at launch price.” This builds excitement and makes customers feel involved.
Influencer collaborations can also amplify reach. Send free samples to micro-influencers in your niche and ask for honest reviews. Their authentic content feels more trustworthy than branded ads and can drive targeted traffic to your store.
Pre-Launch Timeline Example
- Week 1: Finalize product and set up landing page.
- Week 2: Launch email capture campaign and begin social teasers.
- Week 3: Partner with 3–5 influencers for unboxing content.
- Week 4: Send early access to email subscribers 48 hours before public launch.
Step 5: Ensure a Smooth Checkout Experience
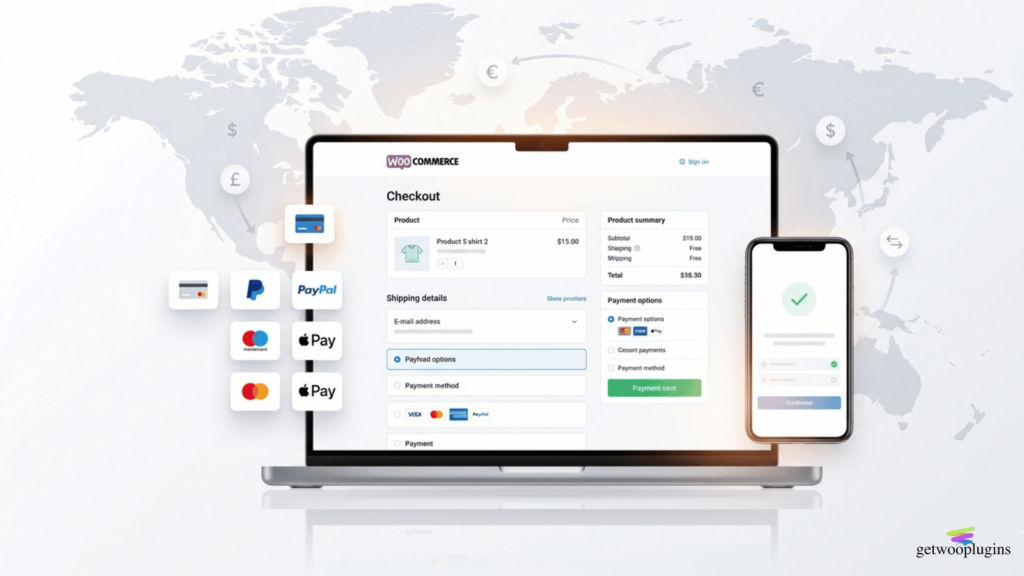
Even the best product page won’t save you if the checkout process is clunky. Cart abandonment is one of the biggest challenges in e-commerce, and a complicated payment flow is a top reason.
WooCommerce offers flexibility, but you must configure it properly. Enable guest checkout so users don’t have to create an account. Offer multiple payment options-credit cards, PayPal, Apple Pay-to cater to different preferences.
This is where Payment Gateway – 2Checkout for WooCommerce becomes invaluable. It supports over 100 payment methods, 50+ currencies, and 50k+ merchants worldwide making it ideal for global launches. Whether your customer is in Brazil, Japan, or Germany, they can pay in their local currency with familiar options.
Withdrawing funds is easy in 2Checkout. You can get paid many of currencies and plenty of methods including Electronic Funds Transfer that goes directly to your bank accounts, international Wire Transfer, or a 2Checkout branded Payoneer MasterCard. Plus, its seamless integration with WooCommerce means no coding is required. Just install, configure, and go live.
Checkout Optimization Tips
- Display trust badges (SSL, secure payment icons) near the checkout button.
- Show progress indicators (e.g., “Step 1 of 3”) to reduce anxiety.
- Offer free shipping thresholds to increase average order value.
- Use exit-intent popups to recover abandoning carts with a discount.
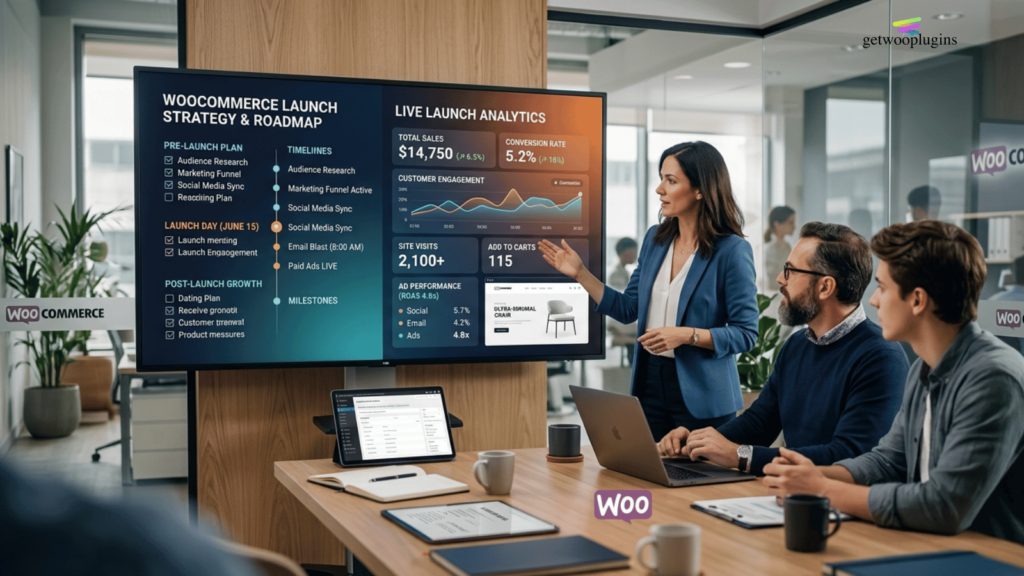
Step 6: Launch Day Execution and Real-Time Monitoring
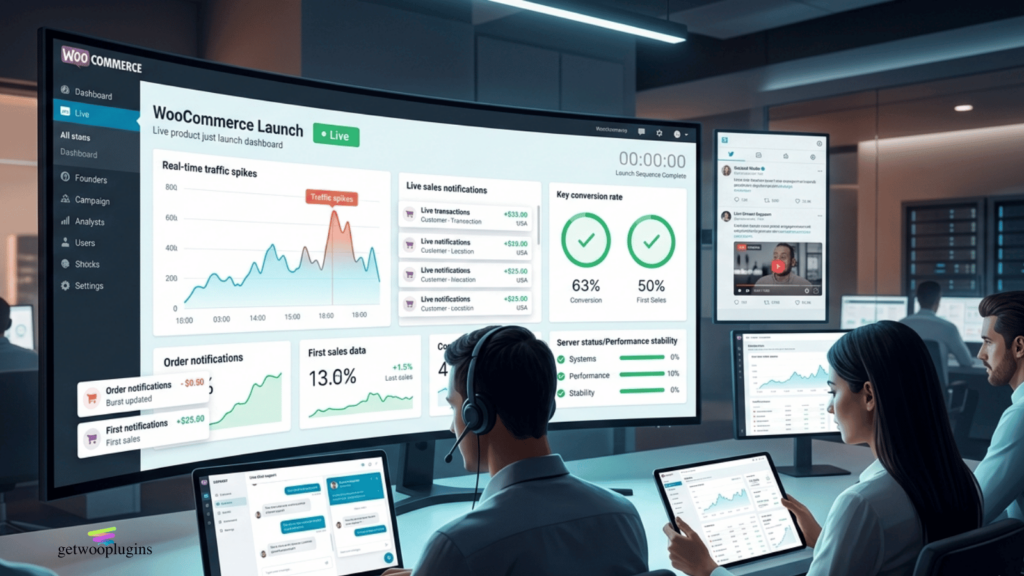
Launch day is not the time to wing it. Have a clear plan for timing, promotions, and customer support. Schedule your product to go live at a peak traffic time, usually mid-morning on a weekday when email open rates are highest.
Use WooCommerce’s scheduling feature to publish your product at the exact moment. Activate any limited-time offers (e.g., “First 100 buyers get 20% off”) and ensure countdown timers are visible.
Monitor your store in real time. Check server performance; high traffic can crash unprepared sites. Use tools like Google Analytics and WooCommerce’s built-in reports to track visits, conversions, and bounce rates.
Be ready to respond to customer questions instantly. Enable live chat (via Tidio or LiveChat) and assign team members to monitor social media and email. Quick responses build trust and reduce purchase hesitation.
Launch Day Checklist
- Test all links, buttons, and payment gateways 24 hours before launch.
- Ensure mobile responsiveness; over 60% of traffic comes from phones.
- Prepare customer support scripts for common questions.
- Have a backup plan for technical issues (e.g., a temporary discount code if checkout fails).
Step 7: Post-Launch Optimization and Feedback Loop
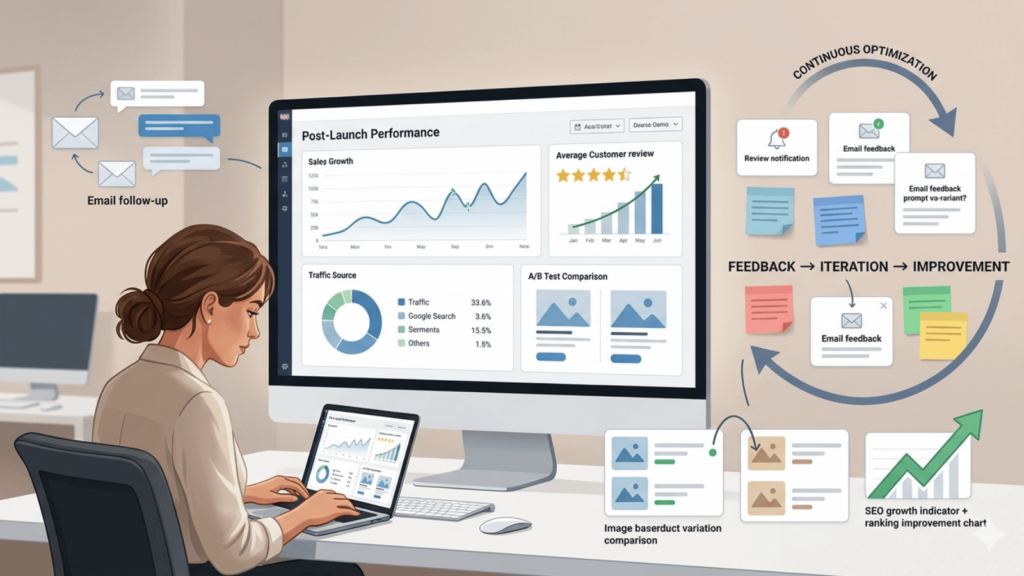
The launch doesn’t end when the product goes live; it evolves. Use the first 30 days to gather feedback, analyze data, and refine your approach. This phase is crucial for long-term success.
Encourage reviews by sending follow-up emails after delivery. Offer a small incentive (like a discount on the next purchase) for honest feedback. Reviews not only build social proof but also improve SEO; Google loves fresh, user-generated content.
Analyze your sales data. Which variations sold best? Which traffic sources converted the highest? Use this insight to adjust inventory, marketing spend, and product descriptions.
Don’t forget A/B testing. Try different product images, headlines, or pricing strategies to see what resonates. WooCommerce integrates with tools like Nelio A/B Testing to run experiments without coding.
Post-Launch Metrics to Track
- Conversion rate (aim for 2-5% for most niches).
- Average order value (AOV).
- Cart abandonment rate (industry average is ~70%).
- Customer acquisition cost (CAC) vs. lifetime value (LTV).
- Return and refund rates.
Key Takeaways: How to Launch a Product on WooCommerce Successfully
Launching a product on WooCommerce is a multi-stage process that requires planning, execution, and continuous optimization. Here’s a quick recap of what matters most:
- Validate demand before investing in production or marketing.
- Optimize your product page with clear titles, benefit-driven descriptions, and high-quality visuals.
- Use plugins like Variation Swatches and Additional Variation Images Gallery to enhance user experience and reduce confusion.
- Leverage PikSprout for interactive image hotspots to highlight key features in an engaging way.
- Build pre-launch buzz with email campaigns, social teasers, and influencer partnerships.
- Ensure a seamless checkout with reliable payment gateways like 2Checkout for WooCommerce.
- Monitor launch day performance and be ready to troubleshoot in real time.
- Collect feedback and iterate to improve future launches.
FAQ: Common Questions About Launching a Product on WooCommerce
How long should a product launch take from start to finish?
A typical product launch takes 4-8 weeks, depending on complexity. This includes validation, production, page setup, pre-launch marketing, and launch execution. Rushing increases the risk of errors and poor performance.
Do I really need all these plugins to launch successfully?
While not mandatory, plugins like Variation Swatches, Additional Variation Images Gallery, PikSprout, and 2Checkout significantly improve user experience and conversion rates. They solve common pain points like confusing variations, poor visuals, and limited payment options, making them highly recommended for serious sellers.
Can I launch a product without paid advertising?
Yes, but organic reach is limited. You can use SEO, social media, email marketing, and influencer collaborations to drive traffic. However, paid ads (Google Ads, Facebook) often provide the fastest and most measurable results, especially for competitive niches.
Final Thoughts: Turn Your Product Launch into a Growth Engine
Knowing how to launch a product on WooCommerce is more than a technical skill; it’s a strategic advantage. With the right preparation, tools, and mindset, your launch can do more than sell units. It can build a loyal customer base, generate word-of-mouth, and position your brand as a leader in your niche.
Remember, every great product started with a single launch. Use the steps in this guide, leverage the power of WooCommerce plugins, and focus on delivering value at every touchpoint. Your next bestseller is just one well-executed launch away.