In the very first tutorial, I explained to enable WooCommerce color swatches for product attribute variation. Today, I am going to write a tutorial on creating WooCommerce dual color swatches in few steps.
It’s the premium feature of WooCommerce Variation Swatches plugin. If you haven’t downloaded it yet, don’t now. For the convenience of the newcomer, I’ve added a free version of the plugin.
How To Create WooCommerce Dual Color Swatches
I am assuming you both the free and premium version of WooCommerce swatches plugin activated. Get ready to enable multi-color variation Swatches on your WooCommerce powered website.
Step 01: Define Attribute Type
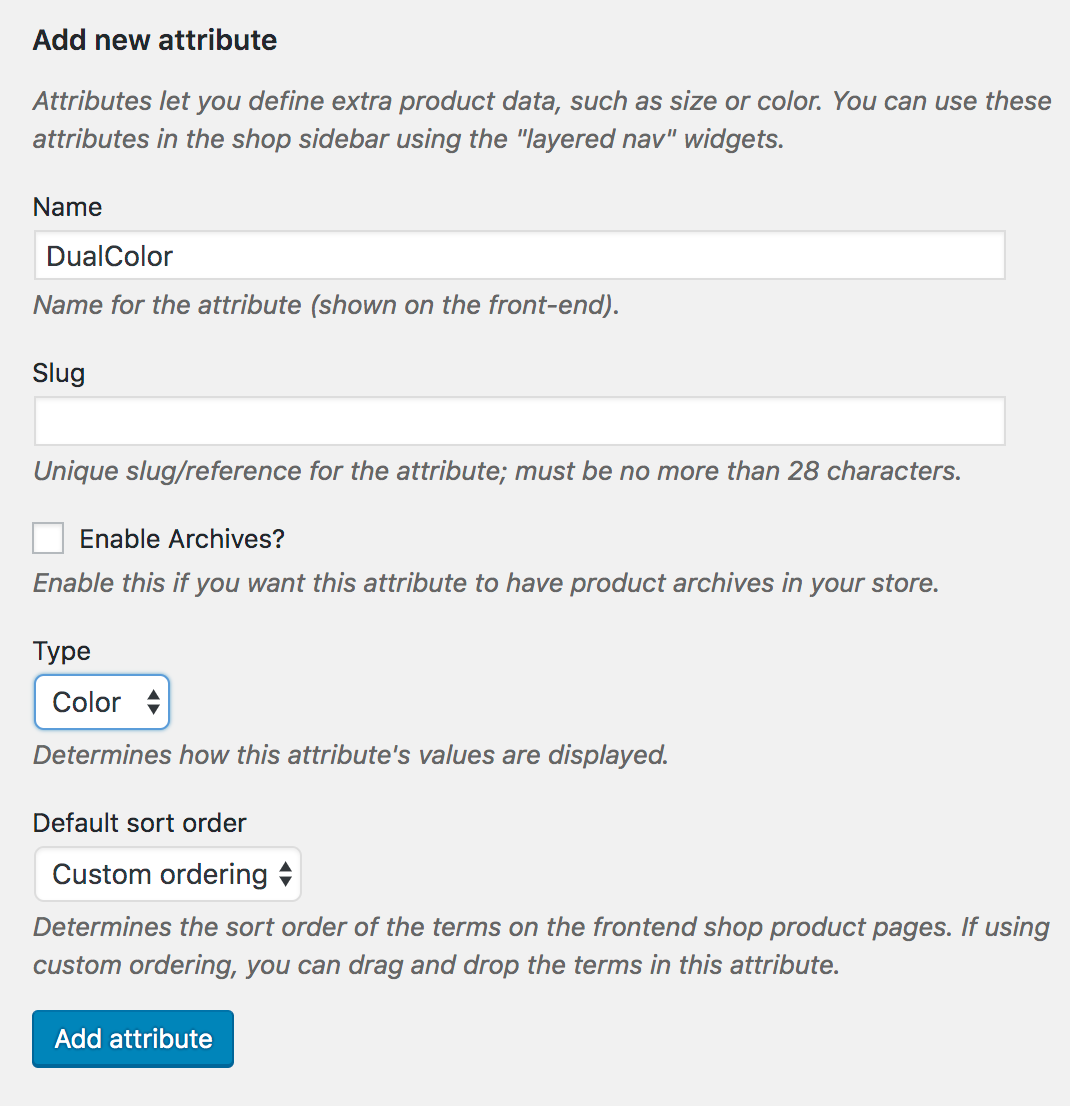
To kickstart creating multi/dual color variation swatches globally, navigate to Products >> Attributes. Fill Name field with your desired product attribute name. I am going to name this attribute DualColor.
Leave the Slug field empty. The system will create attribute slug on its own. Select Color attribute type from the type dropdown. Press Add Attribute button to continue the process.
After pressing Add Attribute button, you will notice a list on the right side. In the list, you can find DualColor attribute there.

Step 02: Create Variation for DualColor Attribute
From the attribute list table, you have to press Configure terms link to create variations from DualColor attribute row.
In this list table, you will find all your product attributes. All attributes come with Configure terms link. So, whenever you need to add new or edit existing variations you, you have to go in this way.
Now, we’ll create Red&Blue and Green&Black variations for DualColor attribute.
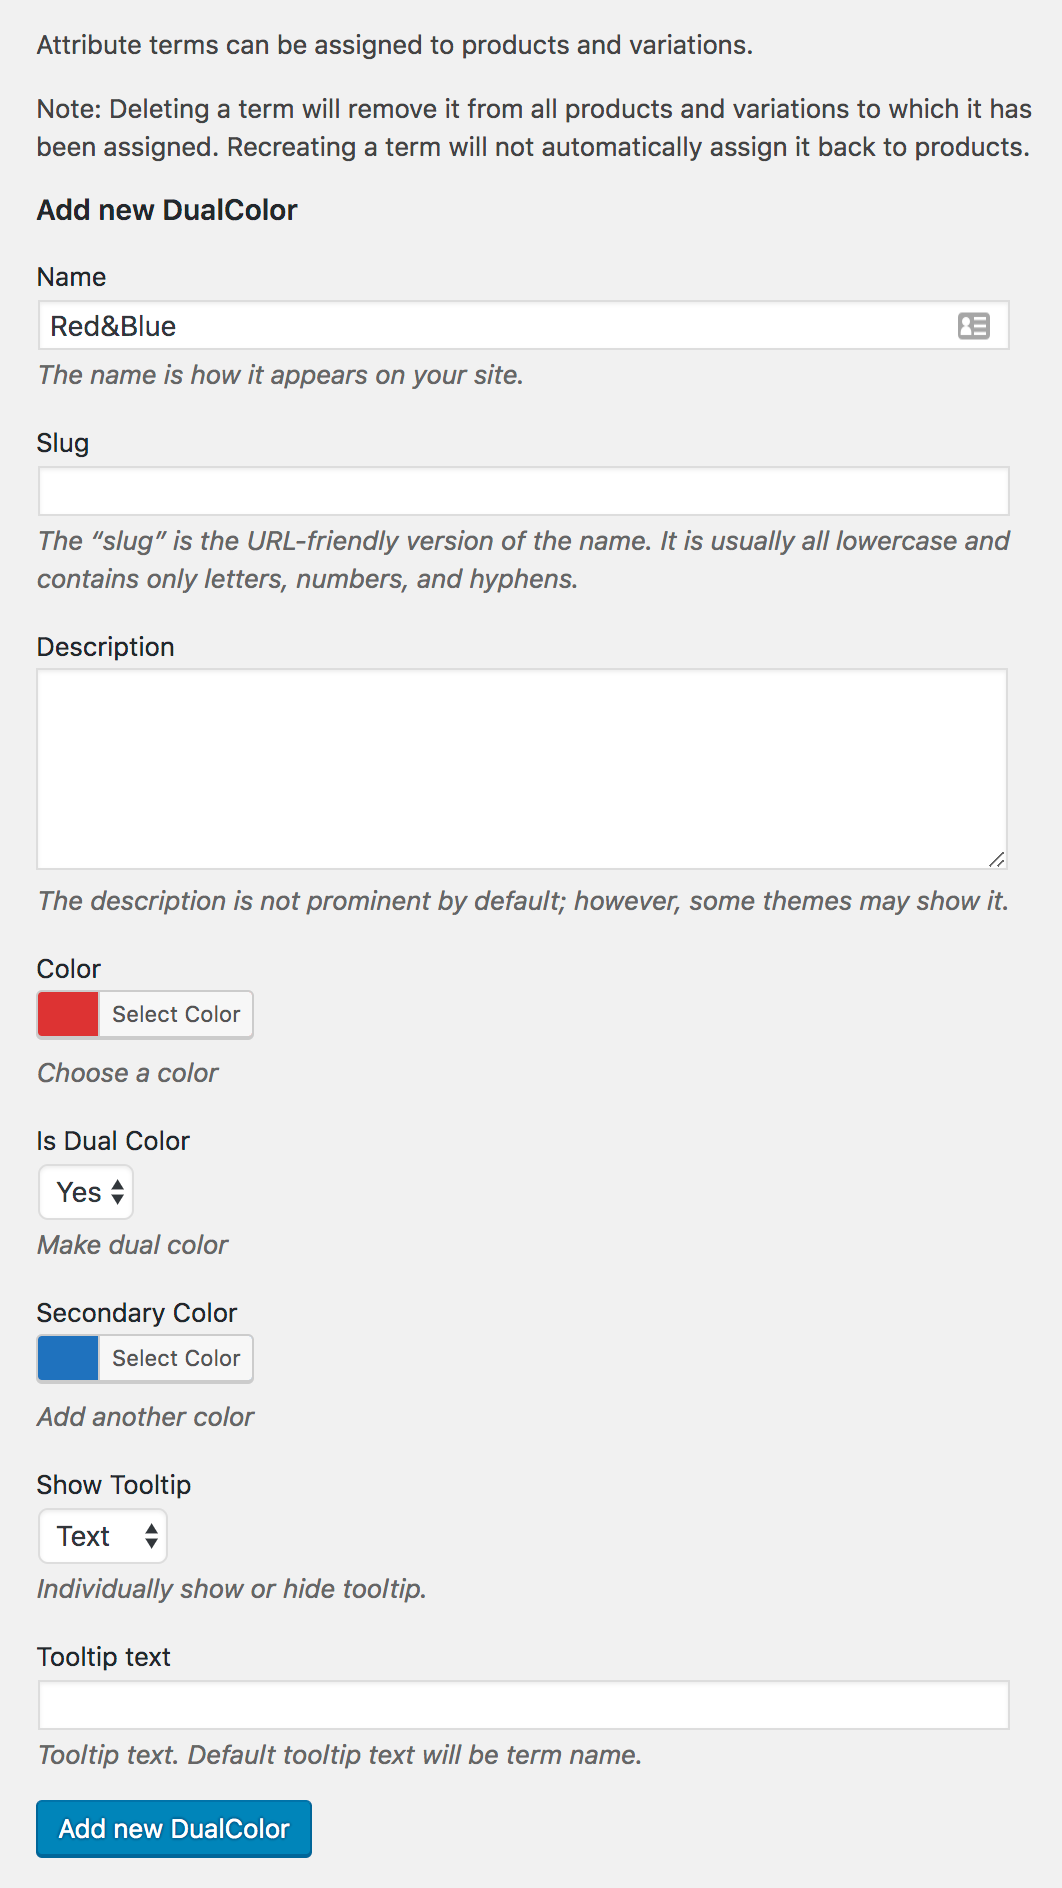
Creating Attribute Variation is the same as creating Attribute itself. Fill the Name field with desired variation name, keep empty Slug field empty. Pick your desired Primary color and select Yes from is Dual Color option. Afterward, Secondary Color option comes up. pick the secondary color from color-picker. Press Add new button to save the changes.
For demonstration purposes, I’ve filled Name field with Red&Blue title. Added Red color for primary and Blue color for secondary color options.
I’ll do the same for the Green&Black variation. After creating all your attribute variations, you can a variation list on the right side of the product variation creating form. So, you can see my created variable product variations.
Step 03: Enable WooCommerce Dual Color Swatches On Variable Products
We have successfully created WooCommerce multicolor swatches for product attribute variations globally. Now, It’s time to link them with variable products.
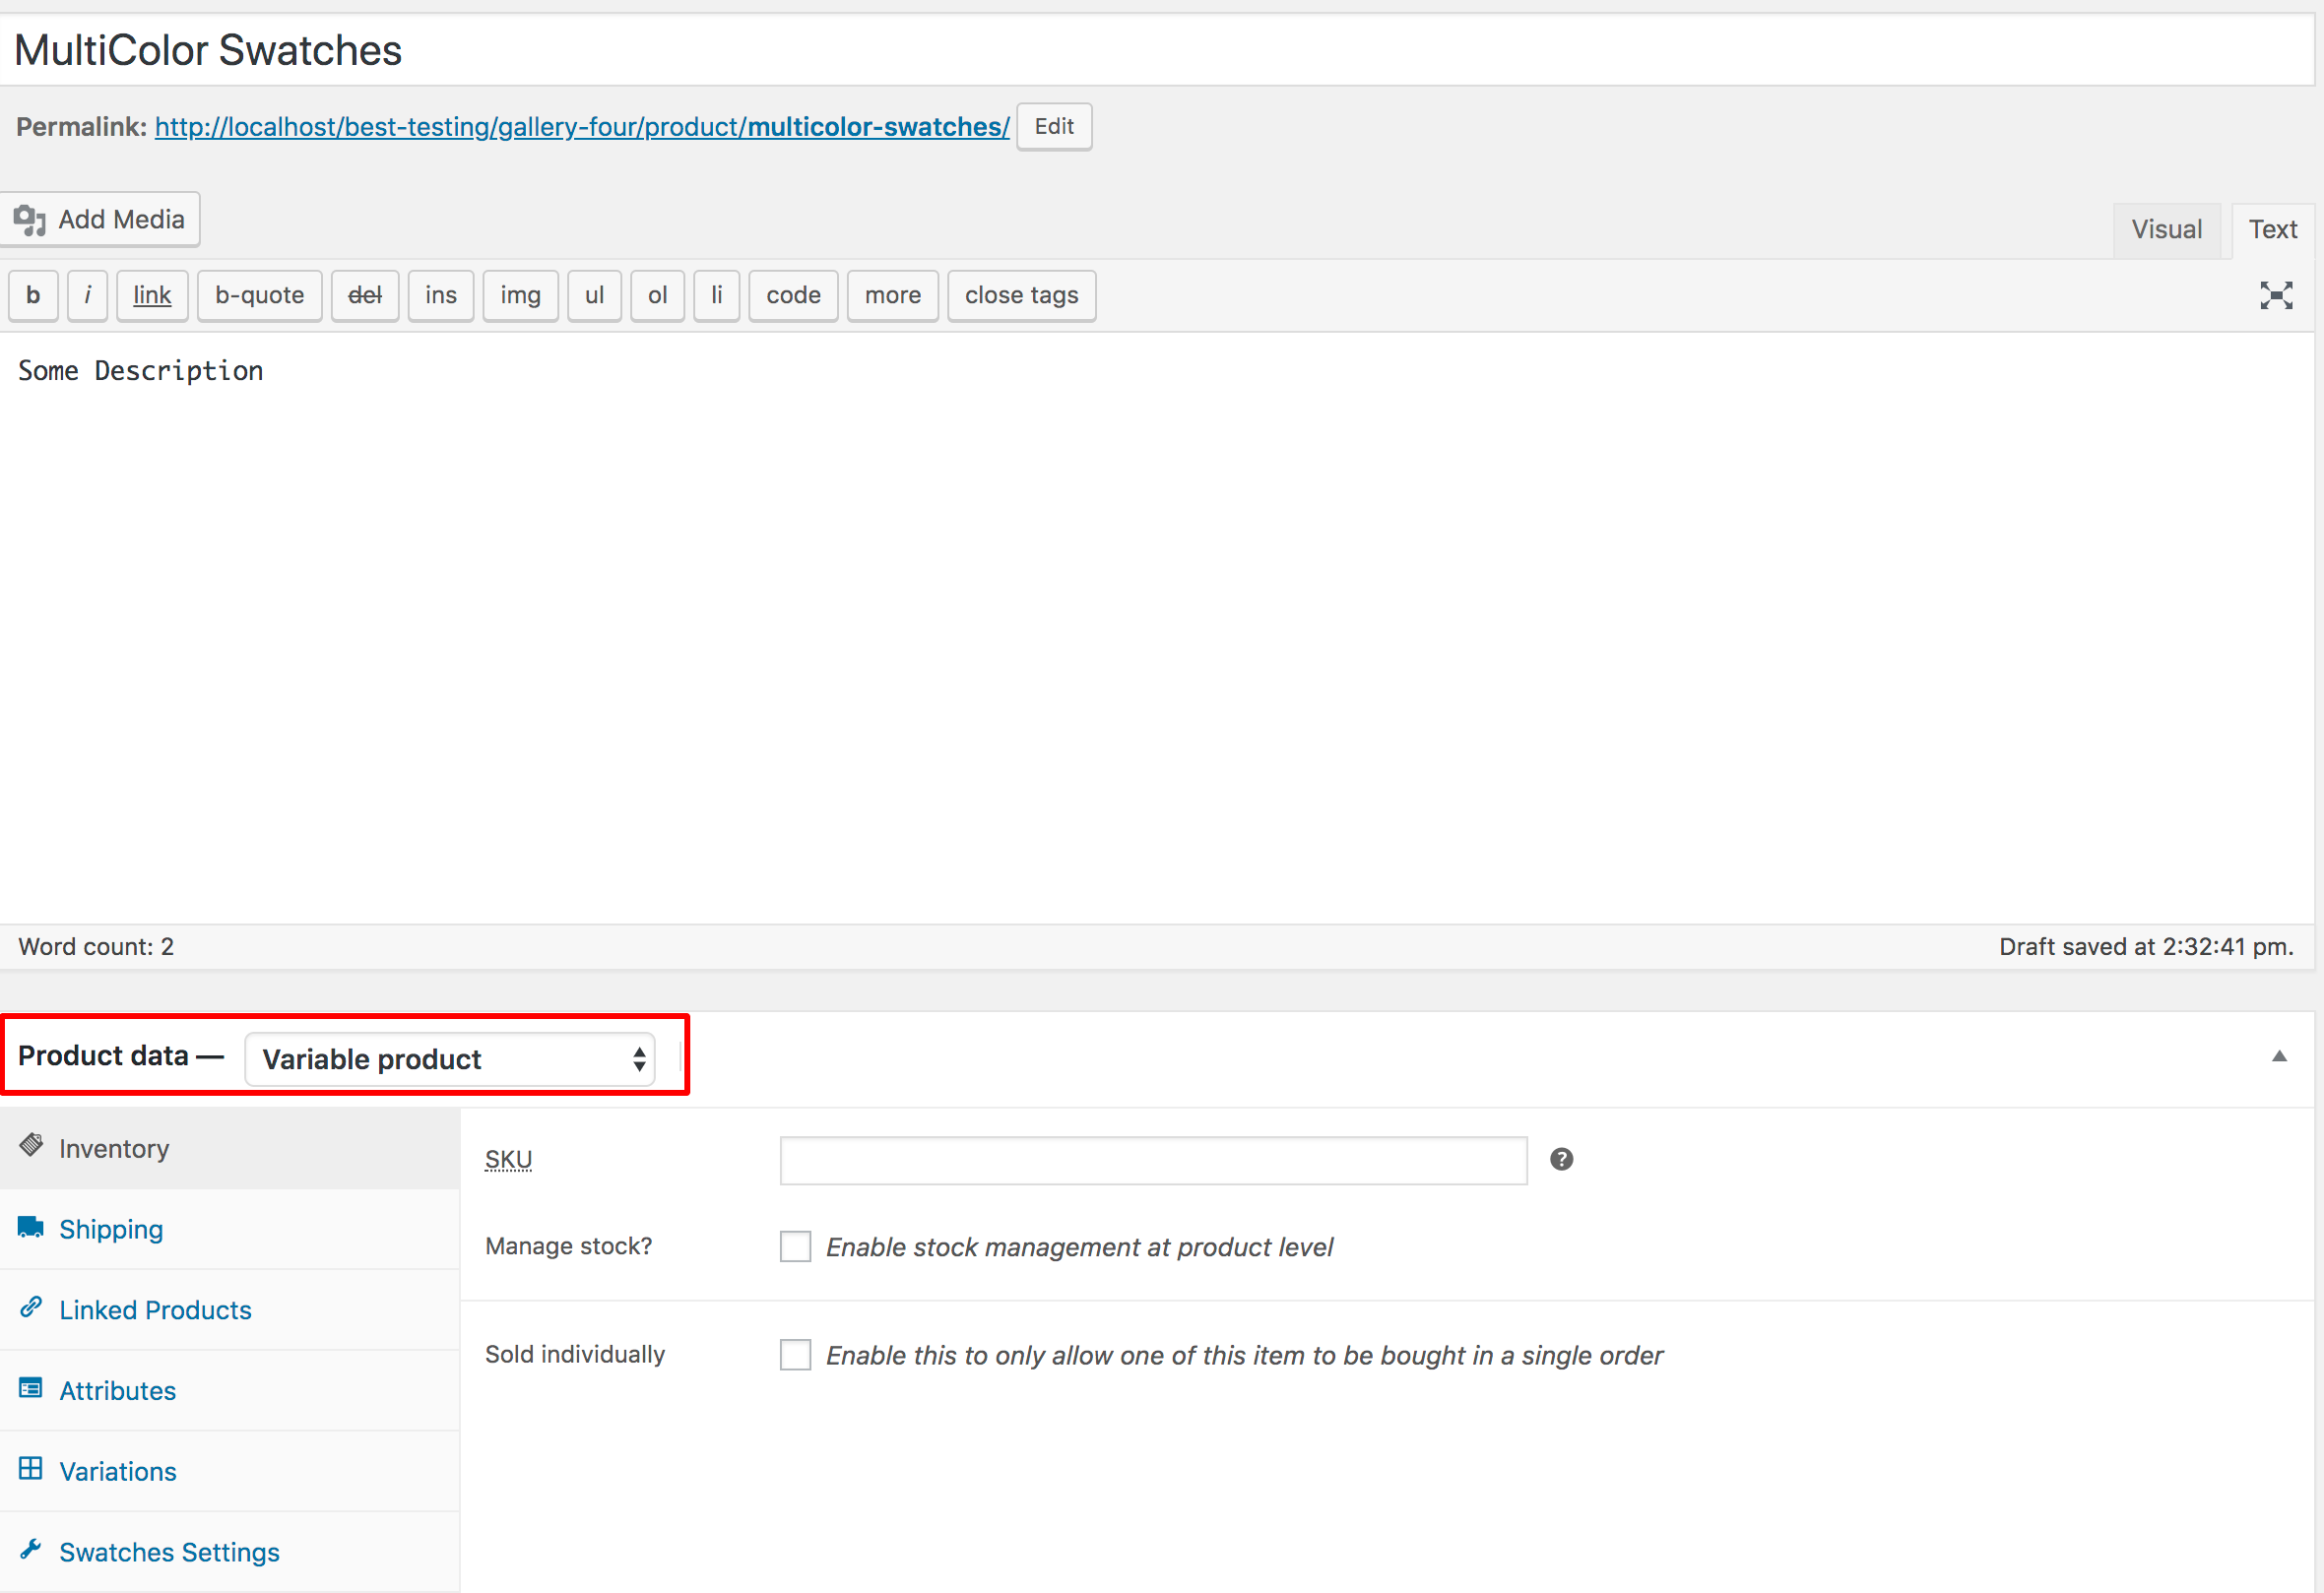
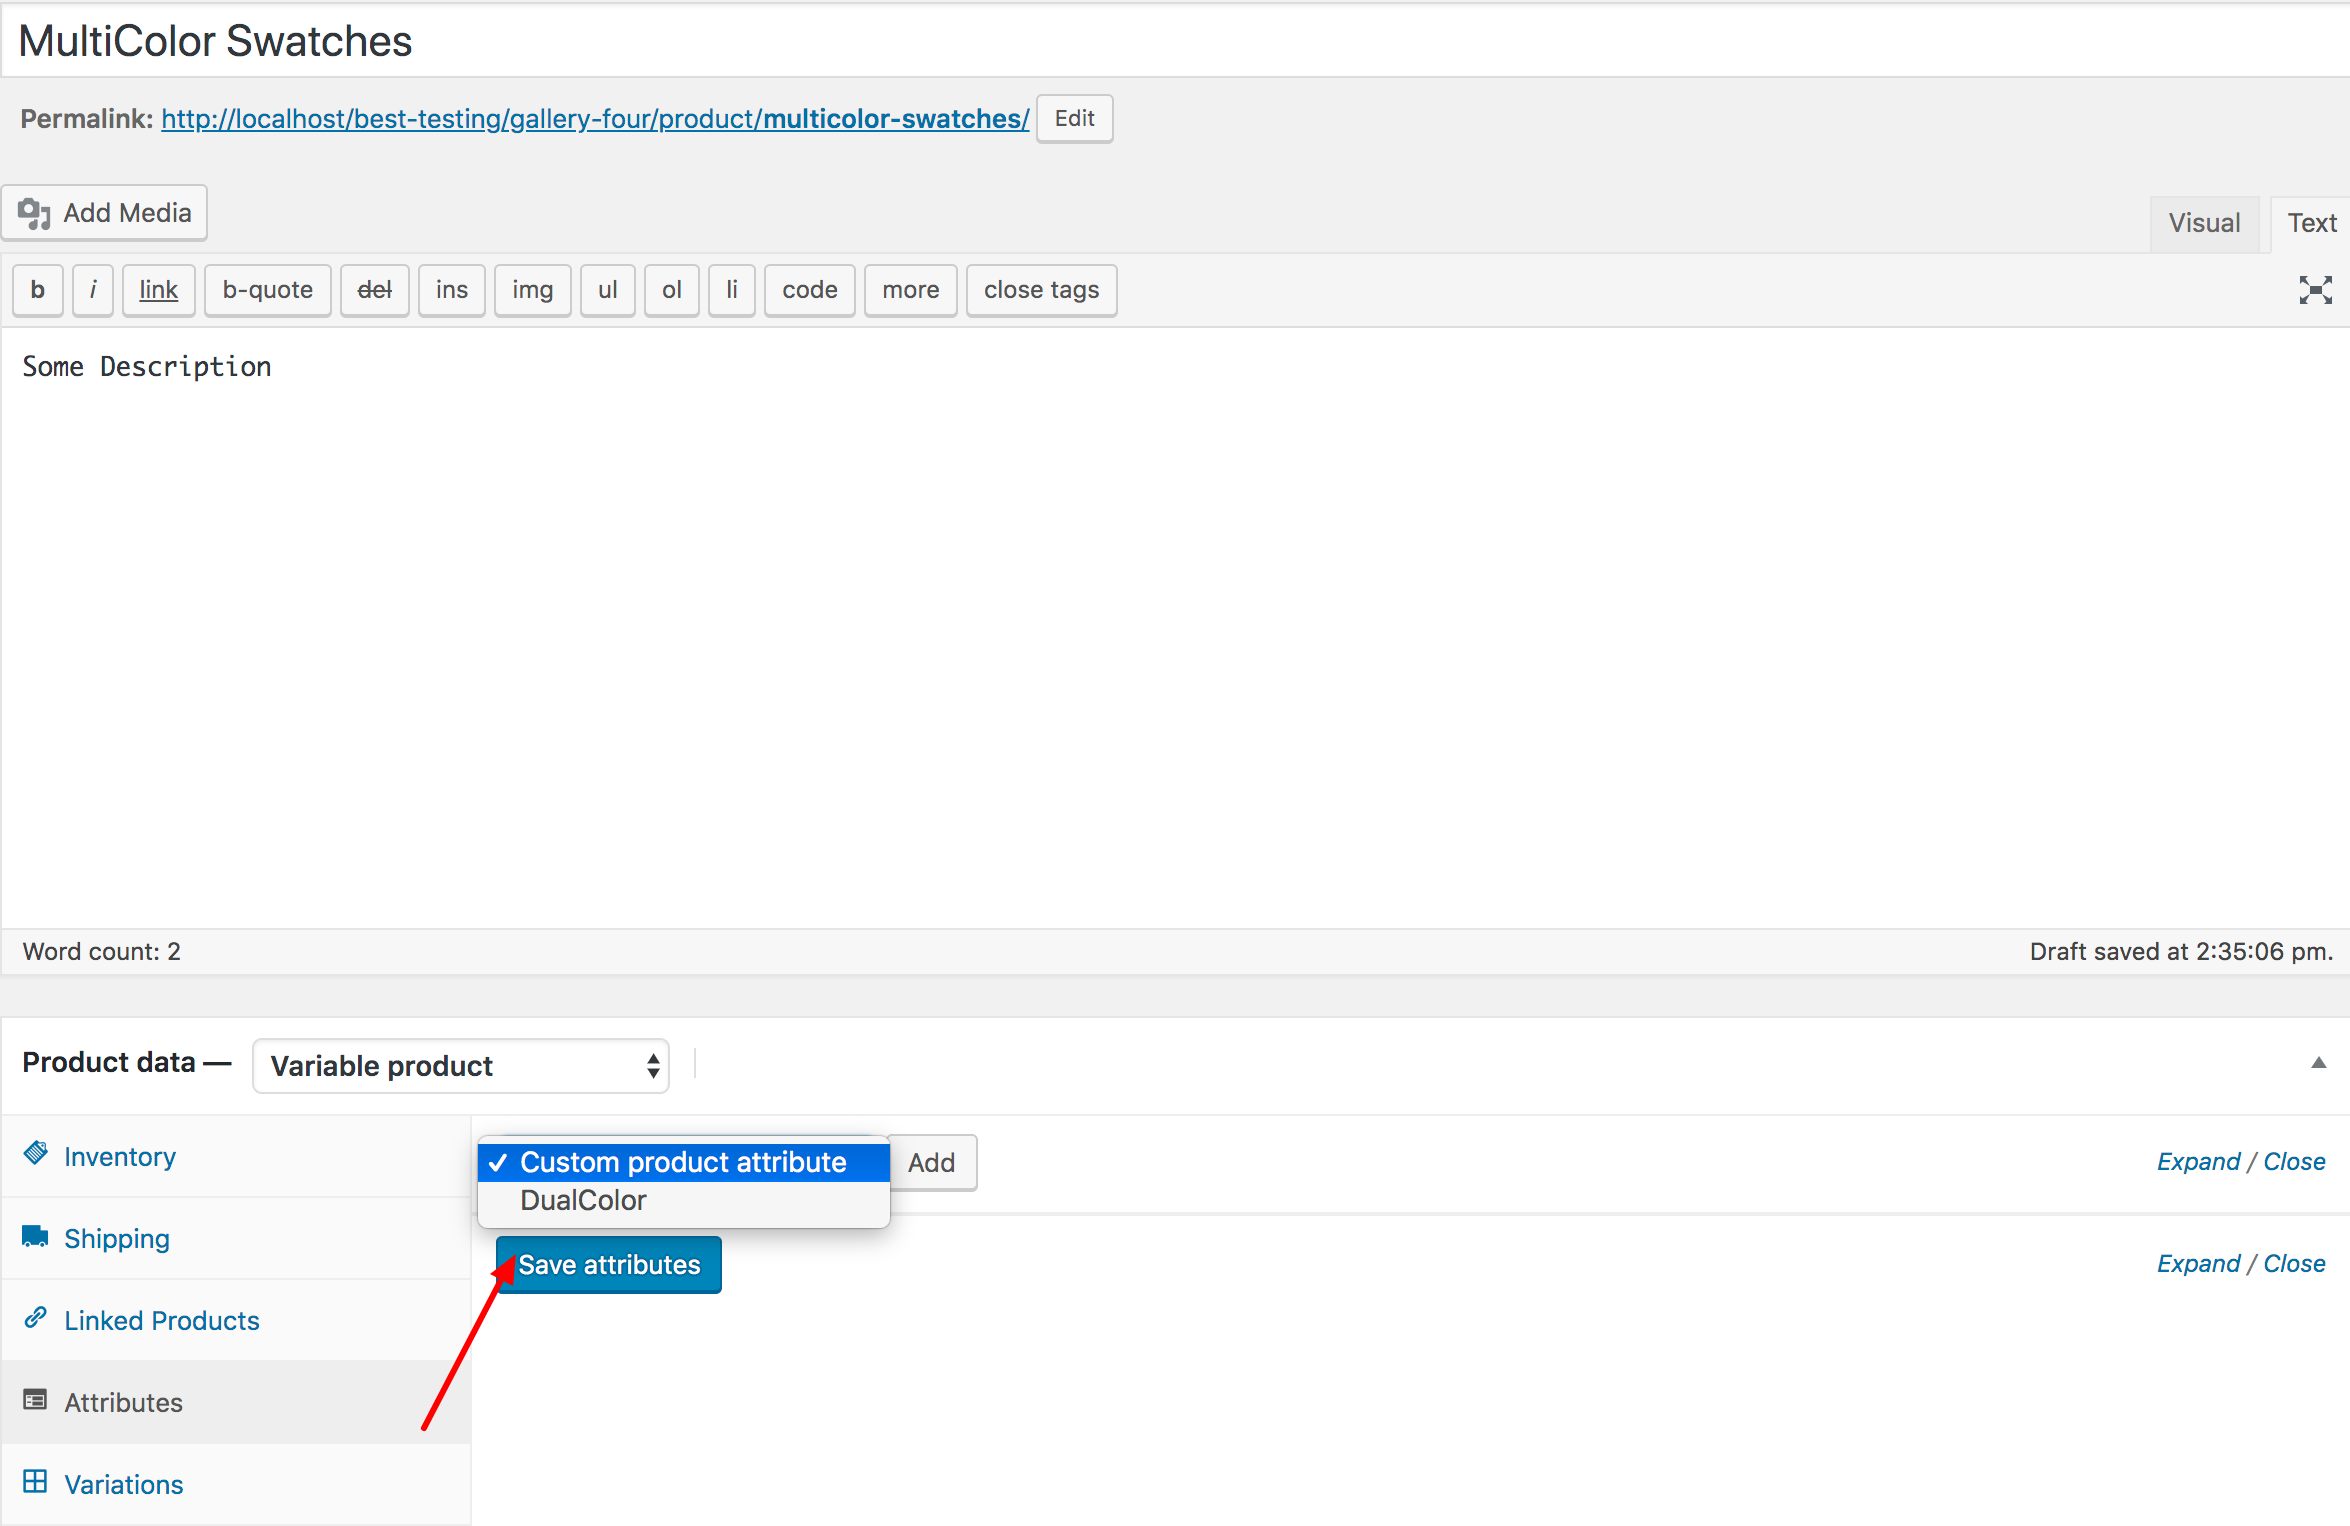
To create a variable product, head to the Products >> Add new. Give a name to your variable product and add some product description. Make sure you have variable product select from Product Data option.
Next, from the Attribute tab, press on Custom product attribute dropdown. This dropdown list will reveal with all available product attributes created globally.
Select your desired Attribute from this list. In my turn, it’s DualColor attribute. Select DualColor attribute, press Add button.
After Adding Dual Swatches, you can see the following screen. From here, you add all your attribute variations at once, pressing Select All button.
You can see in the following screenshot, I’ve my two variations: Green&Black and Red&Blue for DualColor attribute are there. Check Used for variations and press the Save attributes button
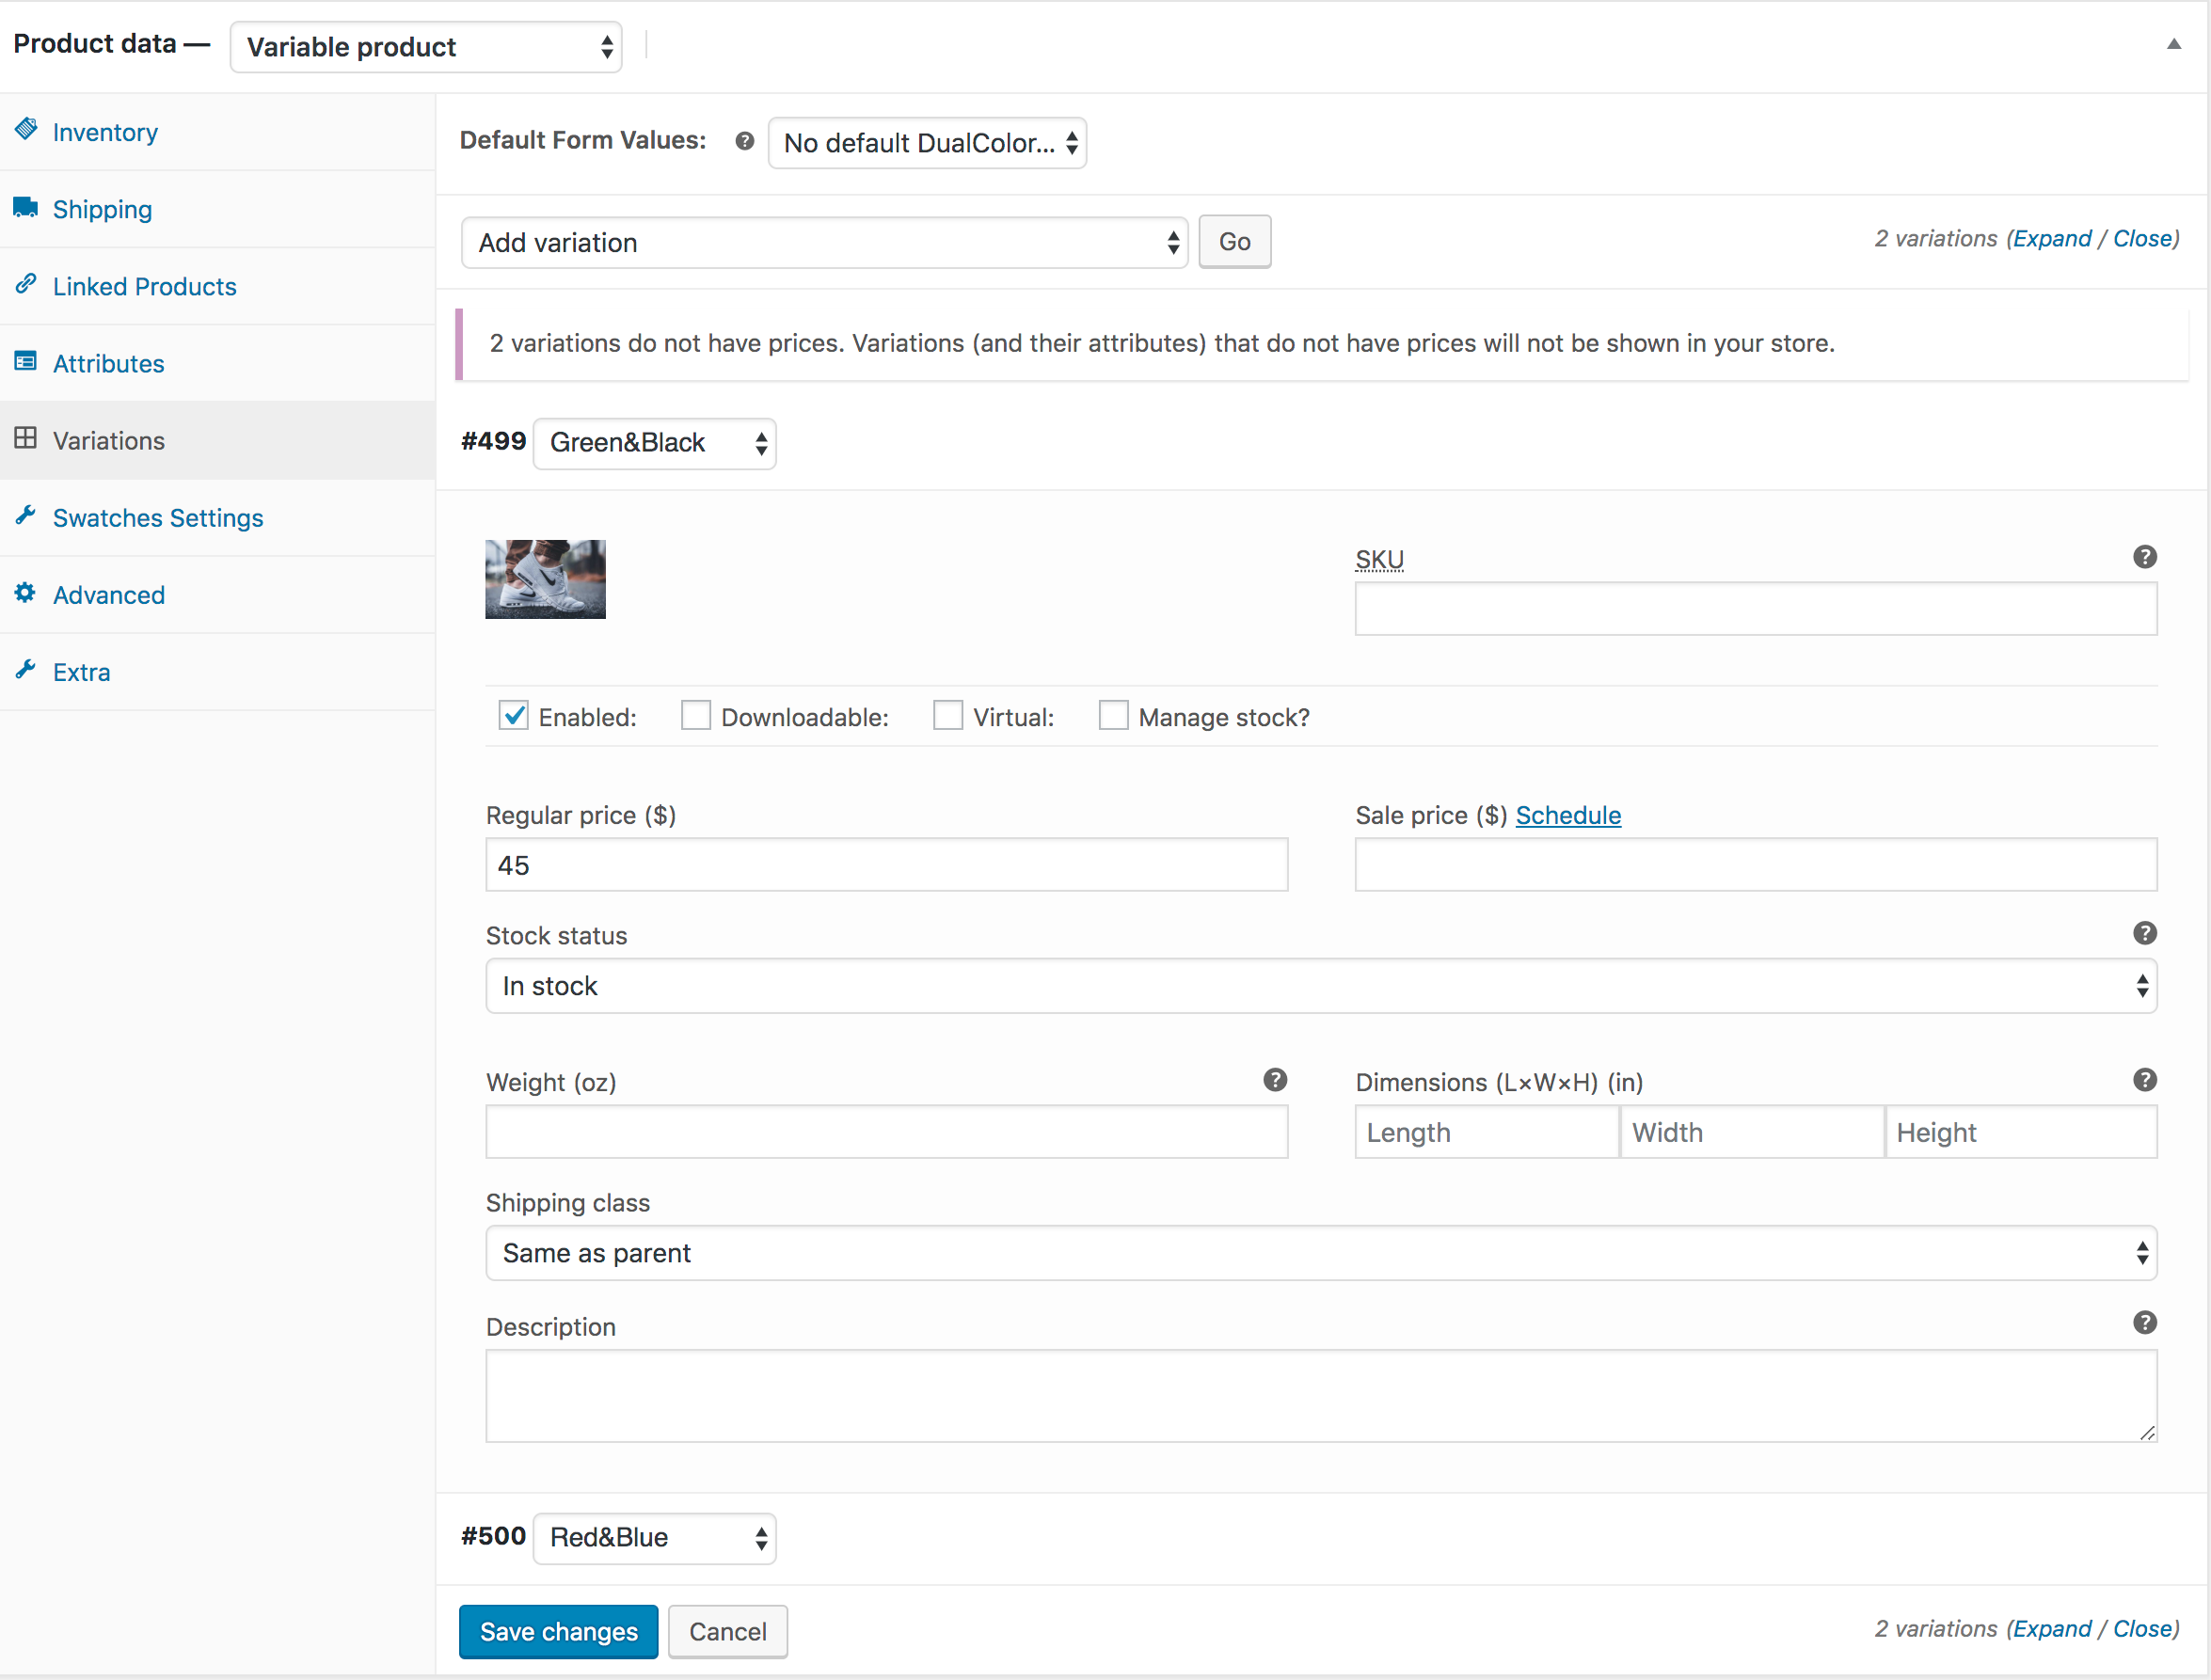
Get inside the next section called Variations. Click Add Variation dropdown. You can see Create variations from all attributes option comes up. Select the option and press the Go button.
After pressing the Go button, you can attribute variations are list one after another in accordion style. You can notice, my two attributes Green&Black and Read&Blue variation are there in the screenshot.
Now, these variable product variations will not appear in the product frontend without defining prices. For demonstration purpose, I’ll add price and feature image for Green&Black variation.
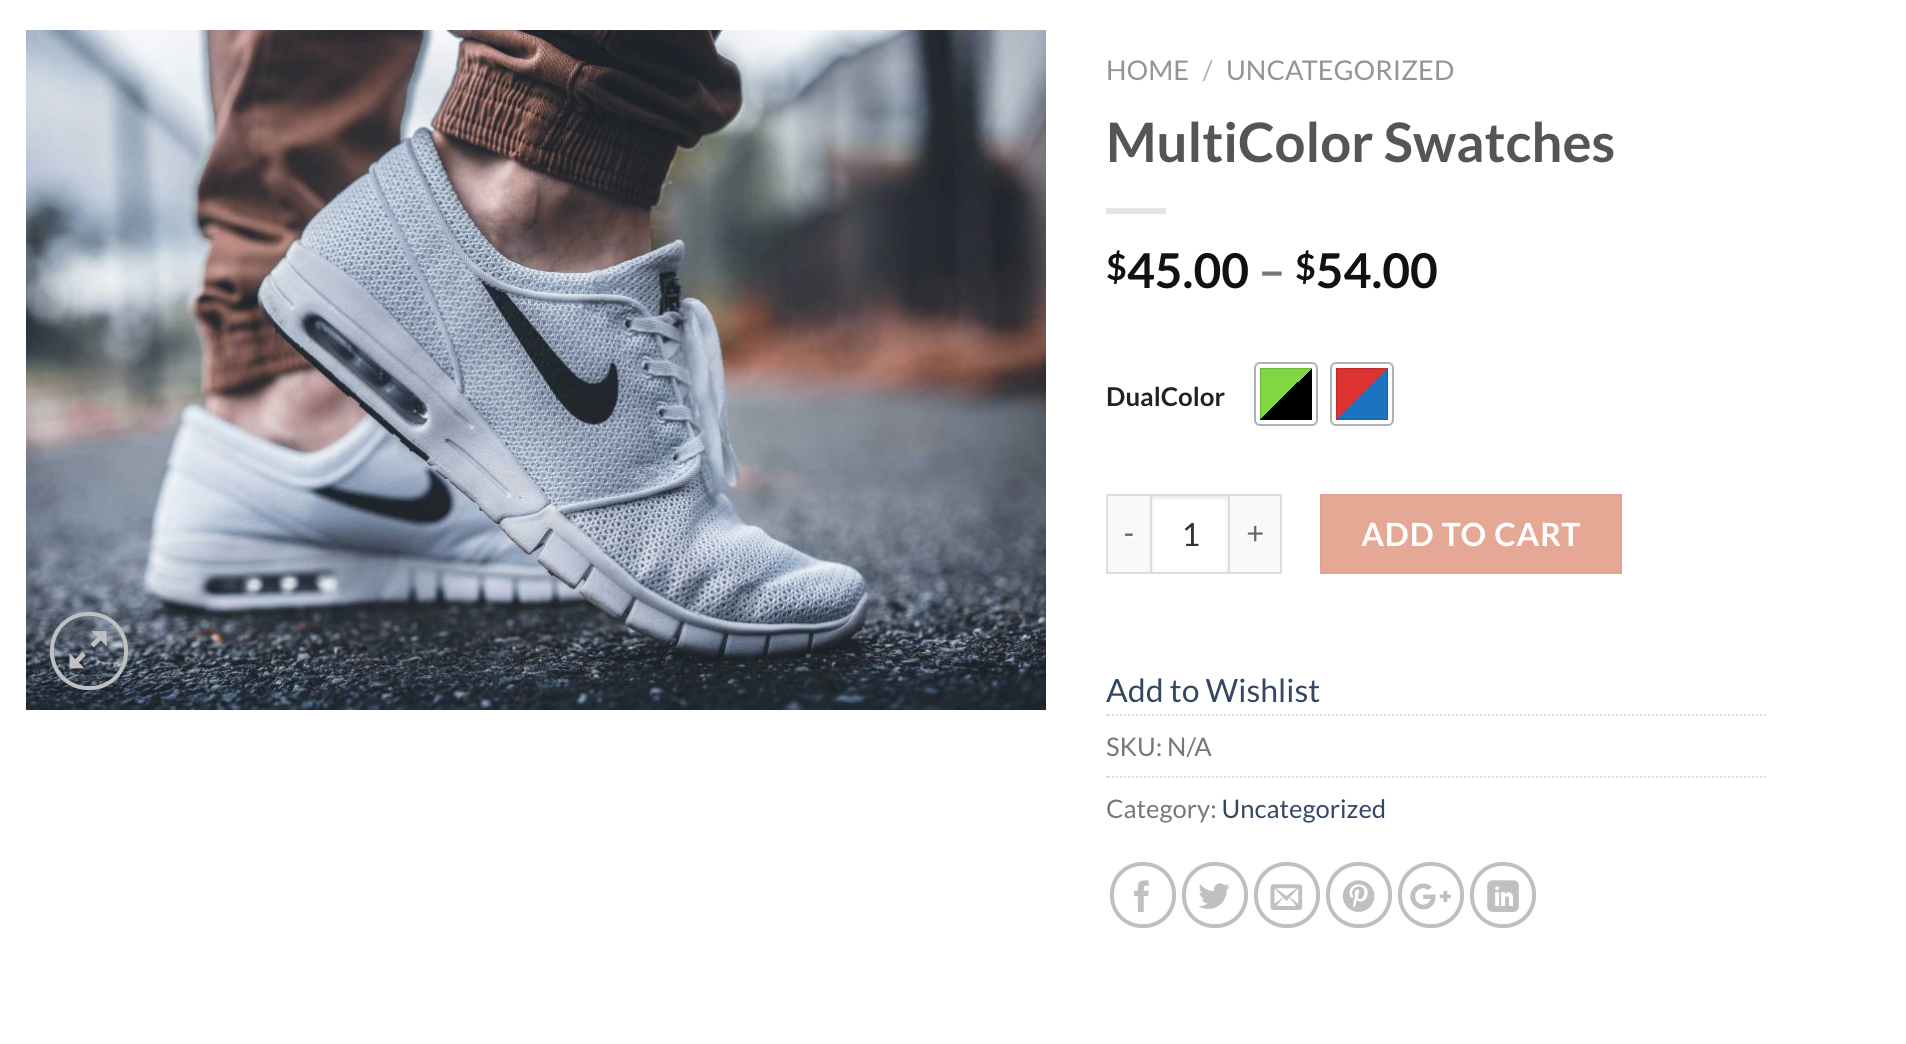
I’ve done the same for the Red&Blue variation. Click on the Save Changes button to update the changes. Now publish the product and get the product frontend. My product page is looking like the following screenshot.
